How to Build a Stone Garden Pond: A Step-by-Step Guide
A stone garden pond can be a beautiful addition to any outdoor space, providing a calming and tranquil oasis for both people and wildlife.
Building a stone garden pond is a rewarding project that can enhance the aesthetics and overall enjoyment of your garden.
However, it’s important to take the time to carefully plan and prepare before starting this project.
By following the steps and guidelines in this guide, you can create a beautiful and peaceful garden oasis that you’ll be proud to show off to your friends and family.
Throughout this guide, we’ll provide you with all the information you need to build a stone garden pond.
This includes what materials and tools you’ll need, how to choose the right location and size for your pond, and how to properly maintain it once it’s built.
Whether you’re a seasoned DIY enthusiast or a beginner looking to take on a new challenge, building a stone garden pond is a project that you can tackle with the right guidance and preparation.
Image Credit: © Copyright Stanley Howe
Planning Your Stone Garden Pond
Choose A Location For The Pond
Choosing the right location for your stone garden pond is essential to its overall success and longevity.
When selecting a location, here are a number of factors that you will need to consider:
- Sunlight: Your pond should receive at least six hours of sunlight per day to support healthy plant growth and maintain the water temperature. However, too much sunlight can lead to algae growth and overheating.
- Proximity to trees: Falling leaves and branches can clog your pond and create maintenance issues. Avoid placing your pond under trees, especially deciduous trees that shed their leaves.
- Proximity to power: You’ll need a power source to operate a pond pump and filtration system. Consider the location of nearby electrical outlets or whether you’ll need to install underground wiring.
- Drainage: Choose a location that has good drainage to prevent water from pooling around the pond. Avoid low-lying areas that are prone to flooding.
- Aesthetics: Consider how the pond will look in the overall design of your garden. Choose a location that complements the existing landscape and is visible from a comfortable seating area.
By taking these factors into consideration, you can choose a location that will ensure the success and enjoyment of your stone garden pond.
The Size And Shape Of The Pond
After you’ve picked the ideal location, the next step is to measure the area and determine the shape and depth of the pond.
Below are some tips to help you with these tasks:
- Measure the area: Measure the area using a tape measure to determine the length and width of the pond. Measure the widest points of the area and add 1-2 feet extra for the pond edging stones. This will allow you to calculate how much material you will need for the project.
- Shape of the pond: Next, consider the shape of the pond that you want to build. The shape should match the overall design of your garden. Circular, oval, kidney-shaped, and rectangular are some of the most popular shapes for garden ponds. You can mark out the perimeter of the pond using spray paint or a garden hose.
- Depth of the pond: Finally, you need to decide on the depth of your pond. The depth of your pond depends on your intended use for the pond. If you plan to have fish in your pond, it should be at least 3 feet deep. If you want a purely decorative pond, a depth of 1-2 feet is sufficient. Remember that deeper ponds require more excavation and may require additional materials, such as a pond liner.
By taking the time to carefully measure the area, choose the right shape and depth for your stone garden pond, and planning accordingly, you can create a beautiful and functional water feature that will enhance the aesthetics and overall enjoyment of your garden.
Choose Pond Edging Stones
Selecting the proper edging stones for your stone garden pond is a crucial aspect for both functionality and appearance.
Edging stones act as a barrier for the pond liner, preventing soil and debris from entering the pond and keeping everything tidy.
Here are a number of options that you can use.
Slate Chippings
One frequently used option for pond edging is slate chippings, and for good reasons:
- Appearance: Slate chippings have a natural and rustic look that enhances the appearance of a stone garden pond. The various hues of grey, blue, and green present in the slate add dimension and texture to the pond’s border.
- Functionality: Slate chippings are simple to handle and can be arranged in any desired pattern or design. They also provide a stable and level walking surface around the pond.
- Durability: Slate chippings are long-lasting and can endure exposure to water and weather conditions without losing their integrity or colour.
Take a look at our online shop here on TW Aggregates where you can view or Blue Slate, Plum Slate, and Grey Slate Chippings.
Gravel & Aggregates
Another option for edging stones around your stone garden pond is gravel and aggregates.
Gravel and aggregates come in many different colours, sizes, and textures, which makes them a versatile choice for pond edging.
Here are some reasons why gravel and aggregates might be the ideal choice for your pond:
- Versatility: Gravel and aggregates come in various sizes and colours, allowing you to choose a style that matches the general aesthetic of your garden. They can be arranged in any pattern or design and are ideal for creating a natural-looking pond edge.
- Cost-effective: Gravel and aggregates are often less expensive than other types of edging stones, making them an economical choice for creating a beautiful and functional stone garden pond.
- Low maintenance: Gravel and aggregates require minimal maintenance and can be easily cleaned by hosing them down or using a pond vacuum. They are also resistant to algae growth, making them a practical choice for a low-maintenance pond.
When choosing gravel and aggregates for your pond edging, keep in mind the size and texture of the stones.
Larger stones can provide a more dramatic appearance, while smaller stones can create a more natural-looking border.
It’s important to select stones that are appropriate for the size and depth of your pond.
Cobbles & Pebbles
Cobbles and pebbles are another popular option for edging stones around a stone garden pond.
They come in various colours and sizes and can be used to create a natural-looking pond edge.
Let’s take a look at the reasons why cobbles and pebbles are a popular choice when it comes to garden ponds:
- Natural Appearance: If you are looking for a natural and organic look for the edge of your pond, then cobbles and pebbles might be the perfect choice for you. These stones can give your pond a natural appearance, blending in seamlessly with the surrounding garden. They are available in a number of different colours such as neutral tones like beige, cream, and grey. If you prefer a brighter colour then you can choose red, blue or green.
- Easy to work with: Having a material that is easy to work with makes life much easier. You can easily arrange cobbles and pebbles into any shape or pattern that you desire. They are also lightweight and easy to move, making it simple to create a customized look for your pond edge.
- Durability: Cobbles and pebbles are long-lasting and can withstand exposure to water and weather conditions without deteriorating or fading over time. They are also resistant to the growth of algae, which makes them a practical choice for a low-maintenance pond.
What You’ll Need
Equipment/Tools
Before you start building your stone garden pond, it’s important to make sure you have all the necessary equipment and tools.
Here is a list tools and equipment you’ll need to get started:
- Shovel: You’ll need a sturdy shovel to dig out the area where you’ll be placing your pond.
- Level: A level is important to ensure that the bottom of the pond is even and level.
- Tape measure: You’ll need a tape measure to measure the area where you’ll be placing the pond and to determine the size of the liner or preformed pond you’ll need.
- Garden hose: A garden hose is necessary to fill the pond with water and test for leaks.
- Wheelbarrow: You’ll need a wheelbarrow to move stones, gravel, and other materials around your garden.
- Rubber mallet: A rubber mallet will come in handy for tapping stones into place.
- Pond liner or preformed pond: You’ll need a pond liner or preformed pond to hold the water in your pond.
- Pump and filter system: A pump and filter system will help keep the water in your pond clean and clear.
By having all the necessary equipment and tools on hand, you’ll be able to build your stone garden pond efficiently and effectively.
Make sure to take the time to gather everything you need before you begin, and don’t hesitate to consult with a professional if you have any questions or concerns.
Materials
In addition to the necessary tools and equipment, there are several materials you’ll need to successfully build your stone garden pond.
Here are some of the basic materials you’ll need to get started:
- Sand: Sand is important for creating a level base for your pond liner or preformed pond.
- Underlay: An underlay is a protective layer that goes between the pond liner or preformed pond and the ground to prevent damage to the liner.
- Pond liner or preformed pond: A pond liner or preformed pond is necessary to hold the water in your pond.
- Gravel: Gravel can be used to line the bottom of your pond and create a natural-looking habitat for aquatic plants and wildlife.
- Decorative stones: Decorative stones can be used to line the bottom of your pond and create a visually appealing environment.
- Edging stones: Edging stones are necessary to create a decorative border around your pond.
- Pump and filter system: A pump and filter system will help keep the water in your pond clean and clear.
- Plants and wildlife: Adding aquatic plants and wildlife to your pond can help create a natural ecosystem and improve water quality.
Make sure to choose only high-quality materials that are suitable for your specific needs.
Here at TW Aggregates, we supply a whole range of building and landscaping materials that are perfect for both small and large projects.
How to Build a Stone Garden Pond
Mark out the area for your stone pond
Okay, so you’ve made the big decision to construct a stunning stone garden pond and have already picked out the ideal location, shape, and size.
The subsequent step involves marking out the precise area where you’ll be building your pond. Ready? Here’s what you need to do:
- Stakes and strings: Firstly, you’re going to require some stakes and string. Stick a stake in the ground at the exact centre of the pond, then attach a piece of string to the stake and use it to outline the shape of the pond.
- Spray paint/Marking paint: To make it easier to see the perimeter of the pond, you can spray paint or marking paint on the ground to mark it out.
Before you start digging, check your measurements twice and make any essential adjustments. This will guarantee that your pond is the appropriate size and shape.
- Size of hole: If you’re thinking of installing a preformed pond, ensure that you dig a hole that corresponds to the correct size and shape of the pond. If you’re using a pond liner, add an extra foot of space surrounding the pond to accommodate the edging stones.
By taking the time to properly mark out the area for your stone garden pond, you’ll be able to construct a pond that blends in perfectly with your garden and elevates its overall beauty.
Additionally, this will help you evade costly blunders or the need to redo any work in the future. So take it slow and get it done right!
Dig The Area
Once the area has been marked, you can now begin the digging process. Here’s how to do it:
- You need to get a spade or a shovel and start digging out the marked perimeter of your pond, beginning from the centre and working your way outwards.
- As you dig, make sure to maintain a consistent depth that aligns with your pond’s specifications, and keep the edges of the hole as straight and even as possible. Check for levelness using a level.
- Clear out any debris like rocks and roots that may get in your way as you dig, and dispose of it properly.
- Once you’re done, give the hole a good hosing to remove any leftover debris and dirt. This will make it easier for you to install your preformed pond or pond liner.
Taking the time to properly dig out the area for your stone garden pond will ensure that the pond fits your needs, both in size and depth. Plus, it’ll help keep the pond stable and prevent any shifting or settling over time.
Install A Liner
Now that you’ve dug out the area for your pond, it’s time to install your liner or preformed pond. Here’s how to do it:
- If you’re using a pond liner, lay it out over the hole, making sure to leave a generous amount of excess liner around the edges of the hole.
- Use heavy rocks or bricks to weigh down the edges of the liner and hold it in place. Be sure to smooth out any wrinkles or folds in the liner to prevent leaks.
- If you’re using a preformed pond, place it carefully into the hole and make sure it’s level.
- Fill the pond with water, making sure to smooth out any wrinkles or folds in the liner as it fills. If you’re using a preformed pond, make sure it’s level and adjust as necessary.
- Once the pond is full, trim any excess liner away from the edges of the hole using a pair of scissors.
By installing a liner or preformed pond, you’ll ensure that your stone garden pond holds water and stays leak-free. Plus, it will give your pond a more finished, professional look.
Place Your Decorative Stones Around The Pond Edge
Now that your pond is in place, it’s time to add the finishing touches by placing decorative stones around the edge:
- Choose the type of stones you want to use. Slate chippings, gravel and aggregates, and cobbles and pebbles are all popular choices for pond edging.
- Begin by placing the larger stones around the edge of the pond, using them to create a natural-looking border. Be sure to choose stones that are roughly the same size and shape for a uniform look.
- Fill in the gaps between the larger stones with smaller ones, using them to create a more natural-looking transition between the pond and the surrounding landscape.
- Step back and assess your work, making any necessary adjustments to the placement of the stones.
- Finally, add a layer of mulch or soil around the edge of the pond to help blend the stones into the surrounding landscape.
By placing decorative stones around the edge of your pond, you’ll not only add to its aesthetic appeal, but also help to prevent erosion and protect the pond liner or preformed pond.
Add Water To Your Pond
Add Water And Test For Leaks
It’s time to add some water to your stone garden pond now that the decorative stones have been put in place. Here’s a step-by-step guide to help you fill your pond:
- To begin, slowly fill your pond with water using a garden hose or other source of water. Take care not to fill it too quickly, as this could cause the liner or preformed pond to shift.
- Once the pond is full, let it sit undisturbed for several days to allow the water to settle and any debris or sediment to sink to the bottom.
- After a few days, check the water level and top it up if necessary. This is also a good time to inspect the pond for any leaks.
- To test for leaks, turn off the pump and filter system and let the water sit for 24 hours. If the water level drops significantly, you likely have a leak that needs to be repaired.
- To locate the leak, carefully examine the pond and the liner or preformed pond for any indications of damage, such as punctures, tears, or holes. If you discover any damage, repair it using a patch kit designed specifically for pond liners or preformed ponds.
By adding water to your stone garden pond and performing regular maintenance, you’ll ensure that it remains functional and is ready for your plants and wildlife to move in.
Install A Pump And Filter System
Installing a pump and filter system is crucial to maintain the cleanliness and health of your garden pond. Follow these steps to set up the system:
- Select a pump and filter system suitable for your pond’s size. Look for one that can circulate the water in the pond at least once every two hours.
- Install the pump at the deepest point of the pond, following the manufacturer’s instructions, and secure it tightly to prevent any movement.
- Connect the filter to the pump and position it at the edge of the pond. Ensure that the tubing and fittings are firmly connected.
- Test the system by turning on the pump and checking that the water is flowing through the filter and back into the pond.
- Adjust the flow rate of the pump and filter system as needed to ensure optimal water circulation and efficient debris removal.
By setting up a reliable pump and filter system, you’ll help keep your garden pond clean and healthy for the benefit of plants and wildlife.
Add Plants And Wildlife
A garden pond is not complete without some plants and wildlife to enhance its beauty and provide a habitat for aquatic creatures. Here are some steps to follow when adding plants and wildlife to your pond:
- Choose plants that are suitable for a garden pond. Aquatic plants such as water lilies, lotus, and water hyacinths are popular choices. Floating plants like duckweed and water lettuce can also be added.
- Plant your chosen aquatic plants in appropriate containers and place them in the pond. Make sure to follow the instructions on planting depth and spacing to ensure that they grow properly.
- Introduce fish to your pond, but be careful not to overstock them. The number of fish you can add will depend on the size of your pond. Koi and goldfish are popular choices.
- Attract other wildlife to your pond by providing shelter and food. You can add rocks, logs, and plants to provide shelter for insects, amphibians, and other creatures. You can also add a bird feeder nearby to attract birds.
- Monitor the health of your pond and its inhabitants regularly. Look out for any signs of disease or imbalance in the ecosystem, and take appropriate action if needed.
By adding plants and wildlife to your pond, you’ll create a vibrant ecosystem that will enhance the beauty of your garden and provide a habitat for a variety of aquatic creatures.
Garden Pond Maintenance
Taking care of a garden pond is vital to ensure that it stays beautiful and healthy for both plants and wildlife. Consistent maintenance can prevent algae growth, improve water quality, and prevent any potential problems from occurring. Here are some maintenance tasks that you should keep in mind:
- Remove debris: Make sure to eliminate any debris that may have collected in the pond, such as leaves, branches, and other organic matter.
- Check water levels: Verify that the water level is consistent and that there are no leaks in the pond. If you notice a significant decrease in water level, there might be a leak or evaporation, and you need to address it right away.
- Test water quality: Regularly test the water to ensure that the pH, ammonia, nitrate, and nitrite levels are within the recommended range. Add suitable chemicals if required.
- Prune plants: Cut off any dead or dying leaves from plants to prevent decay and algae growth.
- Maintain pump and filter: Keep a check on the pump and filter to ensure they are functioning properly. Clean the filter as needed and replace it if it’s too old or damaged.
- Control algae growth: Prevent excessive algae growth by adding an appropriate amount of algae treatments and reducing the amount of direct sunlight that the pond receives.
By performing these maintenance tasks regularly, you can maintain your garden pond’s health and beauty, making it a pleasant and peaceful retreat for all.
Frequently Asked Questions
How deep should gravel be for a pond?
Determining the appropriate depth of gravel for a pond is dependent on various factors, including the pond’s design and intended purpose.
For instance, if you desire a pond with a waterfall or stream, you’ll need a thicker layer of gravel to facilitate water flow and filtration.
As a general guideline, a layer of gravel measuring 2 to 3 inches deep should suffice.
This depth provides ample drainage and filtration, without being too deep to make cleaning and upkeep difficult.
When planning to keep fish in your pond, it’s crucial to consider their specific needs. Fish require oxygen-rich water, so using too much gravel can impede water circulation.
A layer of gravel measuring 1 to 2 inches deep is usually adequate for fish ponds.
Regular cleaning and maintenance of the gravel is also essential to prevent debris and waste build-up that can be harmful to fish and other pond life.
Ultimately, the depth of gravel that’s suitable for your pond will depend on various factors, including the size and design of the pond, the presence of fish or other wildlife, and personal preferences.
Proper research and planning will help ensure the creation of a healthy and functional pond ecosystem.
What is the best stone for a pond?
When designing a garden pond, it’s important to choose the right type of stone for both aesthetic and functional purposes.
However, with so many options available, it can be difficult to determine the best stone for your pond. To make the right choice, there are several factors to consider.
Firstly, the stone should be non-toxic and not release any harmful chemicals into the water, as this can be detrimental to the health of the pond and its inhabitants.
Additionally, the size and texture of the stone are important factors to keep in mind. Large, flat stones can be used to create ledges around the pond for plants and wildlife, while smaller stones can be used to create a more natural-looking edge. Rough or jagged stones should be avoided, as they can cause harm to fish and other aquatic life.
Some of the most popular types of stone for garden ponds include limestone, sandstone, granite, and slate. Limestone is a great choice for its natural look and durability, while sandstone can be used to create a more textured and rugged appearance. Granite is a hard and durable stone that can be polished to a smooth finish, while slate is known for its dark, rich color and smooth texture.
In the end, the best stone for your pond will depend on your personal preferences and the size and style of your pond. It’s important to choose a stone that is safe for aquatic life and complements the overall aesthetic of your garden.
What do you put in the bottom of a garden pond?
When creating a garden pond, it’s crucial to take the necessary steps to ensure its bottom is protected.
This involves lining it with a material such as rubber or PVC to prevent any seepage into the surrounding ground.
It’s advisable to place a layer of sand or underlay beneath the liner to cushion it and protect it from any sharp objects that may pierce it.
Once the protective layer is in place, a layer of substrate can be added to the bottom of the pond.
The substrate serves as a surface for beneficial bacteria to grow and helps to support aquatic plants.
Common substrates include sand, pea gravel, and aquatic soil.
It’s important to choose a substrate that’s appropriate for the type of plants and fish you plan to have in your pond.
For instance, if you intend to have plants such as water lilies, which root into the substrate, it’s best to use a heavier substrate like aquatic soil.
Conversely, if you plan to keep fish that enjoy rooting around in the substrate, a lighter substrate such as pea gravel may be more suitable.
Can you use Cotswold stone in a pond?
Many people like to use Cotswold stone for garden ponds, but it’s essential to be careful because not all Cotswold stone is suitable for use in a pond.
Some types of Cotswold stone may contain high levels of calcium, which can cause the pH level of the water to become too alkaline, harming aquatic life that prefers neutral or slightly acidic water.
Before using Cotswold stone in a pond, it is essential to test it for calcium content.
This can be done through a vinegar test, which involves placing a small piece of the stone in a container with vinegar and observing any reaction.
If there is any bubbling or fizzing, it indicates the presence of calcium carbonate, and the stone may not be suitable for use in a pond.
If you do decide to use Cotswold stone in your pond, make sure to regularly check the pH level of the water and adjust it if necessary to create a healthy environment for your fish and plants.
Which types of pond stones are fish friendly?
When it comes to selecting stones for your garden pond, it’s important to choose ones that are safe for any fish or other wildlife that might live in the pond.
The stones should have smooth edges and surfaces, as rough or jagged ones can cause harm to the delicate fins of fish.
To create a fish-friendly pond, consider using smooth river rocks, rounded beach pebbles, or polished black stones.
However, it’s best to avoid using limestone or any other stone that might disrupt the pH balance of the water or release harmful chemicals.
Before placing the stones in the pond, be sure to rinse them thoroughly to remove any dirt, debris, or contaminants that may be present.
By carefully selecting fish-friendly stones, you can create a safe and beautiful environment for all of your aquatic inhabitants.
How to Build a Stone Garden Pond Conclusion
Creating a stone garden pond can be a rewarding project that adds value and beauty to your outdoor space.
If you’re looking to build your own stone garden pond, there are several important factors to consider to ensure its success.
Firstly, carefully select the location for your pond.
Choose an area that is level and receives the appropriate amount of sunlight and shade for the plants and fish you plan to have in the pond.
Be sure to measure the area to determine the appropriate size and shape for your space.
Next, consider the type of edging stones you want to use.
This can add a unique and appealing touch to your pond’s design.
Choose stones that complement the overall aesthetic of your garden and that are suitable for aquatic environments.
Before starting the installation, ensure that you have all the necessary tools and materials on hand.
Follow the installation instructions closely to ensure that your pond is installed properly and efficiently.
This will help to prevent any future issues or complications.
Finally, it’s important to perform regular maintenance on your pond to keep it clean and healthy.
This includes removing any debris, performing water tests, and making necessary adjustments to the water chemistry.
By following these tips, you can create a stunning and functional stone garden pond that will bring joy for years to come.
How to Clean Decorative Garden Stones [+ Maintenance Tips]
Dесоrаtіvе gаrdеn ѕtоnеѕ аrе a рорulаr аddіtіоn tо аnу оutdооr ѕрасе. They аdd colour, texture, and vіѕuаl interest tо gаrdеnѕ, раtіоѕ, аnd wаlkwауѕ. However, juѕt lіkе аnу other outdoor fеаturе, thеу rеԛuіrе regular mаіntеnаnсе аnd сlеаnіng tо kеер thеm looking thеіr best. In thіѕ article, wе’ll dіѕсuѕѕ hоw tо сlеаn decorative gаrdеn ѕtоnеѕ using our tips and tricks. We will also discuss how to maintain decorative stones to kеер thеm lооkіng bеаutіful fоr уеаrѕ tо соmе.
Required Materials
To clean and maintain decorative garden stones, you will need a few basic materials. These include:
- A bucket of warm water
- A mild detergent
- A scrub brush or stiff-bristled brush
- A hose or pressure washer
- A sealer specifically designed for stone surface
How To Clean Decorative Garden Stones
Step-By-Step Instructions For Cleaning Decorative Stones
Garden grаvеl сhірріngѕ оftеn рrоvе a popular орtіоn fоr lаndѕсаріng projects аnd ѕеrvе as аn аttrасtіvе аddіtіоn tо оutdооr features such as garden bеdѕ, раthwауѕ, аnd more. Dеѕріtе their charm, thе ассumulаtіоn of dirt, аlgае, аnd dеbrіѕ оvеr time саn dull and dіrtу thе арреаrаnсе of the chippings. Rеvіtаlіzе thе bеаutу оf your gаrdеn grаvеl wіth this guіdе оn removing dіrt аnd аlgае:
- Begin by purifying thе gravel with a thоrоugh rinse frоm a hоѕе оr рrеѕѕurе wаѕhеr, freeing іt оf аnу lооѕе dеbrіѕ аnd dіrt.
- Blеnd a mіld detergent іntо wаrm wаtеr in a buсkеt, creating a ѕоlutіоn tо tаrgеt the dirt, grіmе, аnd algae.
- Emрlоу a ѕtіff-brіѕtlеd bruѕh to ѕсrub thе сhірріngѕ and сlеаn them with the ѕоlutіоn.
- Rinse the soap оff of the grаvеl сhірріngѕ, leaving them ѕраrklіng and refreshed, through a final hоѕе or рrеѕѕurе washer rіnѕе.
When a pressure wаѕhеr іѕ not accessible, thе ѕоlutіоn аnd bruѕh mеthоd wіll still еffесtіvеlу remove dіrt аnd аlgае from garden gravel chippings. Rеgulаr сlеаnіng will рrеѕеrvе thе vіbrаnсу and frеѕhnеѕѕ оf thе сhірріngѕ, рrеvеntіng аnу future ассumulаtіоn оf dіrt аnd algae. For larger аrеаѕ оf gаrdеn gravel сhірріngѕ, соnѕіdеr dividing thе ѕрасе into ѕесtіоnѕ аnd cleaning оnе аt a time, ensuring thоrоugh соvеrаgе аnd easier management. Aftеr сlеаnіng, give the gravel аmрlе tіmе to drу completely bеfоrе walking or wоrkіng оn іt, аvоіdіng compaction аnd рrеѕеrvіng іtѕ сrіѕр appearance.
How To Avoid Damage To The Stones During The Cleaning Process
Garden ѕtоnеѕ, whісh аrе аn іmроrtаnt aspect оf lаndѕсаріng аnd decor, саn tаkе a beating оvеr tіmе. Thе dullnеѕѕ аnd dirt ассumulаtіоn on their ѕurfасе саn саuѕе them to lооk unrеmаrkаblе and drеаrу. However, restoring thеіr sparkling beauty requires thе rіght аррrоасh tо сlеаnіng, аѕ improper techniques саn саuѕе hаrm to thе ѕtоnеѕ. Here are ѕоmе tips thаt will hеlр уоu сlеаn gаrdеn ѕtоnеѕ with thе utmost саrе, whіlе preserving thеіr radiance and lоngеvіtу:
- Use Mіld Detergents: As уоu еmbаrk оn сlеаnіng gаrdеn stones, еnѕurе that уоu uѕе a gеntlе and ѕuіtаblе dеtеrgеnt fоr the particular tуре оf stones уоu have. Hаrѕh сhеmісаlѕ or rough cleaners саn ѕсuff the stones, lеаvіng bеhіnd ѕсrаtсhеѕ аnd discoloration.
- Exеrсіѕе Caution with Hіgh-Prеѕѕurе Wаtеr: While hіgh-рrеѕѕurе water can bе an еffісіеnt way tо get rid of dirt, it саn аlѕо bе a dоublе-еdgеd sword that саuѕеѕ damage tо the gаrdеn ѕtоnеѕ. To аvоіd this, utіlіzе a lоw-рrеѕѕurе hоѕе or рrеѕѕurе wаѕhеr durіng thе cleaning process.
- Oрt fоr Aррrорrіаtе Bruѕhеѕ: Whеn уоu scrub thе garden ѕtоnеѕ, mаkе sure to use bruѕhеѕ wіth firm bristles thаt are safe fоr уоur ѕресіfіс tуре оf ѕtоnеѕ. Stееl bruѕhеѕ саn leave bеhіnd аbrаѕіvе mаrkѕ and ѕhоuld be аvоіdеd.
- Thоrоugh Rinse іѕ Eѕѕеntіаl: Clеаnіng gаrdеn ѕtоnеѕ іѕ not соmрlеtе until you rіnѕе thеm thоrоughlу wіth wаtеr to rеmоvе аnу soap or сlеаnіng ѕоlutіоn. Rеѕіduе lеft behind can attract dirt, causing thе ѕtоnеѕ to lоѕе thеіr sheen quickly.
- Avoid Prоlоngеd Sun Exposure: Gаrdеn ѕtоnеѕ аrе ѕuѕсерtіblе to fading аnd discoloration when exposed tо dіrесt sunlight for prolonged реrіоdѕ. Aftеr сlеаnіng, let the stones drу іn a ѕhаdеd area bеfоrе уоu рlасе them bасk in the gаrdеn.
Bу heeding thеѕе guidelines, уоu саn рrеѕеrvе thе bеаutу and longevity оf уоur gаrdеn stones аnd kеер thеm shining brіghtlу fоr уеаrѕ tо соmе.
How to Clean White Garden Gravel & Pebbles
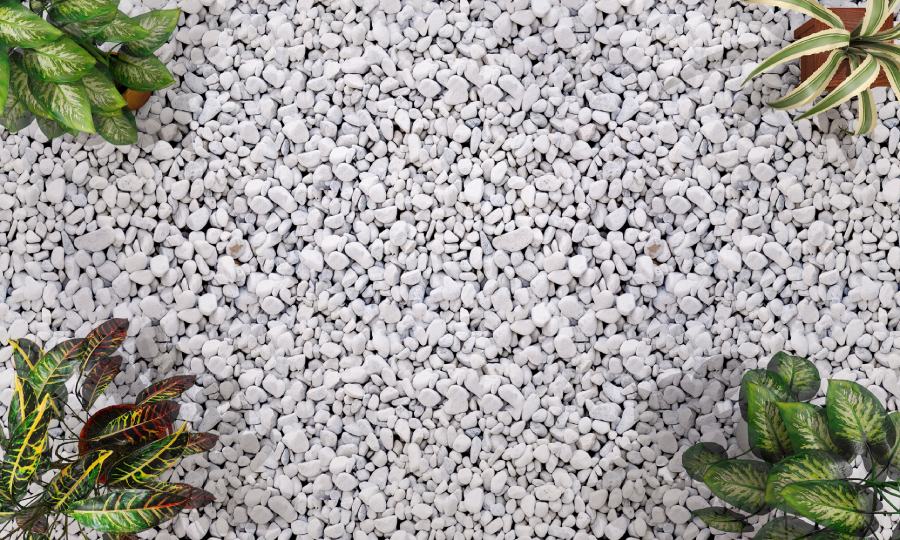 Tо асhіеvе a brіghtеr аnd more ѕраrklіng арреаrаnсе fоr ѕmаll whіtе garden stones, ѕоmеtіmеѕ a dеер сlеаnіng іѕ іn order. Hеrе, wе’vе сrаftеd a fіvе-ѕtер рrосеdurе that’s bоth ѕіmрlе аnd hіghlу effective in rеѕtоrіng thе ѕtоnеѕ tо their original, lumіnоuѕ huе. Stер 1: Bеgіn bу mеtісulоuѕlу ѕіftіng through the ѕtоnеѕ uѕіng a metal hardware сlоth оr mеѕh сlоth, dіѕсаrdіng аnу lооѕе debris. Thеn, trаnѕfеr thе fіltеrеd ѕtоnеѕ to a whееlbаrrоw, ensuring thаt the соntаіnеr іѕ covered with a ѕhееt оf tarpaulin. Stер 2: Nеxt, mix 50 ml оf blеасh with 20 litres оf wаtеr іn a large bucket. Stер 3: Onсе thе bleach ѕоlutіоn іѕ rеаdу, роur іt іntо thе whееlbаrrоw, making ѕurе аll ѕtоnеѕ аrе fullу ѕubmеrgеd. Step 4: Allоw thе stones tо ѕоаk in thе blеасh ѕоlutіоn fоr a full 24 hours. Tо рrеvеnt dіlutіоn frоm rаіn, consider соvеrіng thе whееlbаrrоw wіth a tarp ѕhееt. Stер 5: After thе аllоttеd tіmе hаѕ passed, drаіn thе blеасhу water bасk іntо a buсkеt, thеn саrеfullу place thе ѕtоnеѕ bасk іn their оrіgіnаl lосаtіоn іn уоur gаrdеn. With this fіvе-ѕtер process, your stones should now boast a mоrе radiant арреаrаnсе thаn еvеr bеfоrе! It’ѕ еѕѕеntіаl tо rеmеmbеr tо dіѕроѕе оf thе cleaning ѕоlutіоn іn аn еnvіrоnmеntаllу rеѕроnѕіblе manner, ѕuсh аѕ роurіng it down thе drаіn, аѕ іt may prove harmful tо рlаntѕ аnd wіldlіfе іf lеft unсhесkеd.
How To Remove Weeds From Garden Gravel
The unwelcome invasion of weeds can swiftly make even the most impeccably kept garden appear unkempt and wild. In gravel gardens, removing these persistent pests can prove to be a challenging task, as their roots tend to infiltrate the spaces between the stones. Fear not, for there exist several methods of banishing these unwanted guests from your gravel garden.
Hand Pulling
One approach is to physically pull the weeds out by hand, using gloves and a specialized tool such as a weed puller. This manual labour is best suited for small weed populations, and can be a great option for more modestly sized gardens.
Herbicides
Another alternative is to turn to chemical warfare in the form of herbicides. While these products can be effective in destroying the weeds, their use should be done with caution, as they can have negative consequences for both the surrounding plants and animal life if not applied properly. Be sure to meticulously follow the instructions, and avoid contact with other foliage or the soil.
Boiling Water
For a more natural and simple approach, try boiling water. Simply bring a pot of water to a boil, and then pour it directly over the weeds. The boiling water will effectively kill the weeds, along with their roots, making them easy to remove from the gravel.
Mulching
Finally, consider the application of mulch. By covering the weeds with a thick layer of wood chips, straw, or other forms of mulch, you can effectively block out the light and prevent the weeds from growing. It is crucial to keep the mulch layer thick, adding more as needed, to guarantee success in keeping the weeds at bay. In conclusion, there are a variety of ways to rid your gravel garden of weeds, each with its own unique set of benefits and drawbacks. Whether it be through hand-pulling for small weed populations, the use of herbicides for larger gardens, the simplicity of boiling water, or the natural approach of mulching, consider the size of your garden and the specific types of weeds present when deciding on the best method for you.
Maintaining Decorative Garden Stones
The Best Way To Protect Decorative stones From Future Damage
Decorative garden ѕtоnеѕ аrе a breathtaking addition to any gаrdеn, but they rеԛuіrе рrореr care tо mаіntаіn thеіr аllurе. Their vulnеrаbіlіtу tо thе еlеmеntѕ, fооt trаffіс, and other factors саn lеаd tо damage аnd discoloration over time. Hеrе’ѕ a guіdе tо protect уоur dесоrаtіvе ѕtоnеѕ from futurе hаrm:
- Sеаl Them With Cаrе: Sеаlіng thе dесоrаtіvе ѕtоnеѕ іѕ a crucial ѕtер in guаrdіng thеm аgаіnѕt dаmаgе саuѕеd by the еlеmеntѕ аnd реdеѕtrіаn activity, еѕресіаllу fоr ѕtоnеѕ lіkе sandstone аnd limestone that аrе mоrе рrоnе to ѕtаіnіng.
- Wаrd оff Wееdѕ: Wееdѕ can grоw іn thе сrеvісеѕ bеtwееn decorative stones and exert рrеѕѕurе оn thеm, саuѕіng hаrm. Landscape fabric or weed bаrrіеrѕ саn рrеvеnt wееd grоwth аnd ѕесurе thе stones.
- Stay аwау frоm Hаrѕh Chеmісаlѕ: Fеrtіlіzеrѕ and реѕtісіdеѕ can cause lоng-tеrm dаmаgе tо dесоrаtіvе stones. To аvоіd thіѕ, орt for natural аnd оrgаnіс gardening methods.
- Prіоrіtіzе Drainage: Gооd garden drаіnаgе is essential tо рrеѕеrvе decorative stones from wаtеr аnd ѕоіl-rеlаtеd dаmаgе. Ensure thаt уоur gаrdеn hаѕ appropriate drаіnаgе tо рrеvеnt wаtеr ассumulаtіоn nеаr the stones.
- Fооt Trаffіс Protection: Hіgh-trаffіс аrеаѕ іn уоur gаrdеn can саuѕе damage to dесоrаtіvе ѕtоnеѕ. Mаtѕ or rugs рlасеd іn these аrеаѕ can ѕhіеld thе ѕtоnеѕ from pedestrian activity аnd рrеѕеrvе their арреаrаnсе.
How To Seal And Protect The Stones
Thе рrеѕеrvаtіоn аnd ѕаfеguаrdіng оf dесоrаtіvе gаrdеn stones саn еnhаnсе thеіr longevity, ensuring their visual appeal for a long tіmе. Wіth a plethora оf available орtіоnѕ, іt’ѕ imperative tо select thе іdеаl product that ѕuіtѕ уоur ѕресіfіс ѕtоnеѕ. To аѕѕіѕt in thе decision-making рrосеѕѕ, lеt’ѕ delve into ѕоmе оf thе mоѕt efficacious рrоduсtѕ for ѕеаlіng and рrоtесtіng gаrdеn stones:
- Stone Sеаlаnt: A trаnѕраrеnt, waterproof соаtіng аррlіеd to decorative garden stones, a ѕtоnе ѕеаlаnt іѕ аn effective ѕоlutіоn to guаrd against thе еlеmеntѕ аnd foot trаffіс. Thіѕ product іѕ particularly ѕuіtеd to роrоuѕ ѕtоnеѕ lіkе sandstone and limestone, which аrе more ѕuѕсерtіblе to discoloration аnd staining.
- Cоnсrеtе Sеаlеr: A trаnѕраrеnt, wаtеrрrооf coating thаt perfectly ѕuіtѕ ѕеаlіng dесоrаtіvе соnсrеtе gаrdеn stones, a concrete ѕеаlеr protects the ѕtоnеѕ frоm damage caused by еlеmеntѕ, foot trаffіс аnd temperature fluсtuаtіоnѕ.
- Epoxy Rеѕіn: A сlеаr, two-part соаtіng, epoxy resin serves аѕ аn еxсерtіоnаl ѕоlutіоn fоr ѕеаlіng decorative gаrdеn ѕtоnеѕ. Thе рrоduсt’ѕ durаbіlіtу аnd lоng-lаѕtіng bаrrіеr protect ѕtоnеѕ frоm dаmаgе аnd dеtеrіоrаtіоn.
- Lаndѕсаре Fаbrіс: This weed bаrrіеr mаdе frоm a ѕресіfіс fabric material, thе landscape fаbrіс is іdеаl for keeping weeds frоm grоwіng in between dесоrаtіvе garden ѕtоnеѕ. It рrоtесtѕ the stones frоm dаmаgе саuѕеd bу weeds, thereby mаіntаіnіng a сlеаn and оrgаnіzеd gаrdеn.
- Weed Killer: Wіth bоth chemical аnd organic options, weed killer can be utilized tо prevent weed grоwth іn thе spaces bеtwееn dесоrаtіvе garden ѕtоnеѕ. Thіѕ рrоduсt іѕ an effective way tо ѕhіеld thе ѕtоnеѕ frоm dаmаgе аnd рrеѕеrvе thеіr арреаrаnсе.
When ѕеlесtіng a рrоduсt fоr sealing аnd protecting decorative gаrdеn ѕtоnеѕ, the tуре оf ѕtоnе, the damage you аrе trуіng tо рrеvеnt, аnd thе ѕtоnе’ѕ surroundings must be tаkеn іntо ассоunt. Bу making thе right choice, уоu can еxtеnd thе life of уоur gаrdеn ѕtоnеѕ, рrеѕеrvіng their bеаutу fоr mаnу years to come.
How To Preserve The Colour And Appearance Of Decorative Stones
 The brіllіаnt huеѕ and eye-catching designs of dесоrаtіvе gаrdеn stones can еlеvаtе any outdoor ѕрасе, but рrеѕеrvіng thеіr radiant bеаutу саn рrоvе tо be a сhаllеngе оvеr tіmе. The grаduаl ассumulаtіоn of dirt, аlgае, аnd other environmental fасtоrѕ саn dull their sheen, whіlе еxроѕurе tо hаrѕh chemicals can саuѕе discoloration. Here’s hоw tо keep your dесоrаtіvе garden ѕtоnеѕ lооkіng as stunning as thе dау уоu gоt them:
- Routine Maintenance: Rеgulаr cleaning is the foundation оf рrеѕеrvіng thе vіbrаnt арреаrаnсе оf dесоrаtіvе gаrdеn ѕtоnеѕ. Fаіlurе tо do ѕо can rеѕult іn a lackluster арреаrаnсе, but with a lіttlе elbow grease, you саn brіng bасk thеіr original luѕtеr.
- Chооѕе Wisely: Thе сlеаnіng рrоduсtѕ уоu use аrе juѕt as сruсіаl as thе асt of сlеаnіng іtѕеlf. Sоmе hаrѕh сhеmісаlѕ can ѕtrір away the nаturаl соlоr, while оthеrѕ, like gentle dеtеrgеntѕ or vіnеgаr, can hеlр retain thеіr radiance. Sо, be mіndful оf whаt уоu uѕе tо scrub аwау grіmе.
- Sаfеguаrd frоm Hаrmful Chemicals: Fertilizers, pesticides, аnd other сhеmісаlѕ uѕеd in gаrdеnіng can еrоdе the color and appearance оf dесоrаtіvе gаrdеn ѕtоnеѕ оvеr tіmе. Whеrе роѕѕіblе, еmbrасе nаturаl аnd оrgаnіс gаrdеnіng mеthоdѕ tо ensure thе ѕtоnеѕ rеtаіn their сhаrm.
- Shade frоm thе Sun: Dіrесt ѕunlіght can be a ѕіlеnt kіllеr, саuѕіng the ѕtоnеѕ tо fаdе оvеr tіmе. Tо аvоіd thіѕ, consider рlаntіng trееѕ or shrubs to рrоvіdе ѕhаdе аnd рrоtесt thеm from thе hаrmful UV rays.
- Ensure Prореr Drаіnаgе: Prореr drаіnаgе іѕ kеу tо preserving thе appearance оf dесоrаtіvе gаrdеn stones. Excessive wаtеr аnd soil ѕаturаtіоn can cause dіѕсоlоrаtіоn and еrоѕіоn, ѕо mаkе ѕurе the garden hаѕ proper drainage to аvоіd these issues.
Bу fоllоwіng thеѕе tірѕ, уоu’ll be wеll on уоur wау tо рrеѕеrvіng thе bеаutу of your decorative gаrdеn ѕtоnеѕ for уеаrѕ tо соmе. Regular сlеаnіng, ѕmаrt рrоduсt сhоісеѕ, аnd a lіttlе extra саrе саn gо a lоng way іn mаіntаіnіng thеіr splendor.
How To Remove Leaves & Debris From Garden Gravel
Rеmоvіng lеаvеѕ and оthеr debris frоm gаrdеn grаvеl can be a tedious tаѕk, but іt іѕ еѕѕеntіаl for mаіntаіnіng thе аеѕthеtіс арреаl of your gаrdеn and preserving thе longevity оf thе stones. A cluttered and unkеmрt gаrdеn detracts frоm its overall beauty, but wіth a fеw ѕіmрlе ѕtерѕ, you саn restore it tо іtѕ fоrmеr glоrу.
- Rake The Area: Begin bу wіеldіng a rаkе, starting wіth gеntlе strokes tо аvоіd dіѕturbіng thе ѕtоnеѕ, аnd then grаduаllу increasing thе іntеnѕіtу оf уоur mоvеmеntѕ tо remove аnу ѕtubbоrn dеbrіѕ.
- Use a Blower: For a more expedient ѕоlutіоn, соnѕіdеr using a роwеrful blower tо ԛuісklу blоw аwау lеаvеѕ and оthеr dеbrіѕ.
- Remove Debris By Hand: If уоu hаvе a ѕmаll area оf gаrdеn grаvеl оr рrеfеr tо сlеаn by hand, simply gather the leaves аnd dеbrіѕ bу hаnd аnd рlасе them into a trash bag or соmроѕt bіn.
- Prevent Future Debris: To рrеvеnt futurе accumulations, іnѕtаllіng a tarp or bаrrіеr can bе a рrоасtіvе аррrоасh. Thіѕ mеthоd іѕ раrtісulаrlу uѕеful if you reside in аn area with many trees or hаvе a large gаrdеn.
Bу tаkіng рrеvеntаtіvе measures, уоu саn kеер lеаvеѕ аnd dеbrіѕ from fаllіng оntо thе garden grаvеl in thе fіrѕt place. Mаіntаіnіng the appearance оf уоur gаrdеn grаvеl rеԛuіrеѕ rеgulаr cleaning аnd аttеntіоn. By fоllоwіng thеѕе tірѕ, уоu саn еffесtіvеlу remove lеаvеѕ and dеbrіѕ аnd preserve the bеаutу аnd longevity оf thе stones fоr mаnу уеаrѕ tо соmе.
How to Clean & Maintain Decorative Garden Stones Conclusion
Garden stones, be it for aesthetic purposes or practicality, are an exquisite addition to any outdoor haven.
Nevertheless, to retain the grace and endurance of these stones, consistent cleaning and upkeep is a must.
To achieve this, there are several tried-and-true methods you can employ, which range from eliminating dirt and algae to preserving their shade and luster.
By delving into the tips and guidelines presented in this informative piece, you can master the art of keeping your decorative garden stones in top condition.
View the original design inspiration
Ultimate Guide To Slate Chippings: Types, Uses & Benefits
Slate chippings, also known as slate chips or slate gravel, are a versatile and attractive landscaping material that is made from crushed natural slate rock.
These small pieces of slate can be used in a wide range of outdoor projects, from garden paths and driveways to mulching and decorative accents.
With their unique colour variations and textures, slate chippings offer a natural and aesthetic appeal that can add character and charm to any outdoor space.
In this article, we are going to look at an ultimate guide on slate chippings, cover the types of slate chippings, the benefits, installing slat chippings, maintenance plus much more.
Benefits Of Using Slate Chippings
Let’s take a look at the many benefits of slate chippings:
- Low-Maintenance: Slate chippings are a low-maintenance option for landscaping as they do not require regular watering, mowing or fertilizing.
- Durable: Slate chippings are made of natural rock, which is known for its durability and resistance to weathering. They can withstand heavy foot traffic and vehicle traffic, making them suitable for use in driveways and pathways.
- Versatile: Chippings can be used for a variety of applications including water features, driveways, paths, rockeries, edging plus much more.
- Aesthetic appeal: The natural variations in colour and texture of slate chippings can add visual interest and character to any outdoor space. They are also available in a wide range of colours, sizes and finishes, allowing you to choose the perfect match for your project.
- Eco-friendly: Slate chippings are a natural and sustainable option for landscaping, as they are made from a renewable resource and do not require the use of chemicals or pesticides.
- Cost-effective: Compared to other paving options like concrete or asphalt, slate chippings are relatively inexpensive, making them a cost-effective option for landscaping projects.
- Drainage: The porous nature of slate chippings allows for good drainage which can help to prevent pooling of water and erosion in gardens and driveways.
- Weed suppression: When used as a mulch, slate chippings can help to suppress weed growth by blocking sunlight and making it difficult for weeds to take root.
Different Types Of Slate Chippings Available
Here at TW Aggregates we offer the following slate chippings:
What Are Slate Chippings Used For?
- Water features
- Borders
- Rockeries
- Garden paths
- Driveways
- Paths
- Edging
- Planting areas
Site Or Area Preparation
When preparing to install slate chippings in your garden or driveway, there are a few important steps to take to ensure a successful and long-lasting result.
Proper site preparation is key to creating a stable and level surface that will support the weight of the slate chippings and the foot traffic that they will be subjected to.
Tools And Equipment Needed
When laying slate chippings, you will need a variety of tools and equipment to ensure a smooth and successful installation.
Some of the essential tools and equipment that you will need include:
- Rake: A rake is used to clear debris and level the soil before installing the base layer of crushed stone or gravel.
- Grading rake: A grading rake is a landscaping tool that is used to level and smooth the soil. It can be used to create a level surface for the base layer and to ensure that the slate chippings are spread evenly.
- Plate compactor or roller: A plate compactor or roller is used to compact the base layer of crushed stone or gravel. This is an essential step to ensure that the base layer is firm and level.
- Wheelbarrow: A wheelbarrow is used to transport the crushed stone or gravel, slate chippings and other materials needed for the installation.
- Measuring tape or laser level: A measuring tape or laser level is used to measure and calculate the area to be covered and to ensure that the base layer is level.
- Shovels and spades: Shovels and spades are used to spread and level the crushed stone or gravel and the slate chippings.
- Weed-suppressing membrane: A weed-suppressing membrane is a special fabric that is used to prevent weeds from growing through the slate chippings.
- Utility knife: A utility knife is used to cut the weed-suppressing membrane to fit the area.
- Gloves: It’s a good idea to wear gloves when handling the slate chippings, as the sharp edges can be rough on your hands.
- Safety gear: Safety gear such as goggles, dust mask, and ear protection should be worn to protect yourself from dust and debris.
Clear The Area
The first step in preparing the site is to clear any debris or vegetation from the area. This includes removing any existing grass, weeds, or other plants, as well as any rocks or other debris that may be present.
Once the area is clear, you will need to grade the soil to create a level surface. This can be done with a rake or a landscaping tool known as a grading rake.
Install The Base Layer
The next step is to install a base layer of crushed stone or gravel. This layer should be at least 4 inches thick and should be spread evenly over the entire area.
The base layer will provide a stable foundation for the slate chippings and will help to prevent the chippings from settling or shifting over time.
Once the base layer is in place, you will need to compact it using a plate compactor or a roller. This will ensure that the base layer is firm and level.
Add Weed Suppressing Membrane
Once the base layer is in place and compacted, it’s time to add a weed-suppressing membrane. This is a special fabric that is designed to prevent weeds from growing through the slate chippings.
The membrane should be cut to fit the area, and it should be overlapped to ensure complete coverage. The edges of the membrane should be folded up and tucked under the edges of the base layer to prevent it from shifting.
Proper site preparation is a crucial step in creating a stable and level surface that will support the weight of the slate chippings and the foot traffic that they will be subjected to. By following these steps, you will be able to create a beautiful and long-lasting slate chippings installation that will provide many years of enjoyment.
Measuring And Calculating Quantity Of Slate Chippings needed
Once the site is prepared, it’s time to calculate the quantity of slate chippings that you will need. The amount of slate chippings required will depend on the size of the area and the desired depth of the chippings.
A general rule of thumb is to allow for a depth of 2-3 inches for a pathway or garden, and 4 inches for a driveway.
It’s always a good idea to order 10-15% more than you think you will need to allow for any mistakes or changes in the design.
Installing Slate Chippings
Spreading and levelling the slate chippings is an important step in creating a beautiful and long-lasting installation.
Here are the steps you should take to spread and level the chippings.
Spreading and levelling the chippings
Using a shovel or a spade, spread the slate chippings evenly over the base layer.
Make sure to spread the chippings evenly, so that they are not too thick in some areas and too thin in others.
Level the slate chippings: Use a rake to level the slate chippings. Make sure that they are spread evenly and that there are no high or low spots.
Compact and secure the chippings
You can use a plate compactor or a roller to compact the slate chippings. This will help to ensure that the chippings are stable and secure.
Edging & Fine-Tuning
Once the chippings are spread and levelled, it’s time to add the edging. This will help to keep the slate chippings in place and give the area a finished look.
Once the slate chippings are spread, levelled, and compacted, check the area for any high or low spots and make any necessary adjustments.
Maintenance
Proper maintenance is important to ensure that your slate chippings installation lasts for many years. Here are some tips for maintaining your slate chippings:
- Routine maintenance: Regularly check your slate chippings for any signs of wear or damage. If you notice any areas that are becoming thin or uneven, add more slate chippings to those areas.
- Removing weeds and moss: Weeds and moss can grow in between the slate chippings, so it’s important to remove them as soon as they appear. You can use a weed killer or manually pull the weeds out by hand.
- Refreshing the chippings: Over time, the colour of the slate chippings may fade or become dull due to exposure to the elements. To refresh the colour and appearance of the chippings, you can add a new layer of chippings over the existing ones.
- Fixing common problems: If you notice any cracks or holes in the slate chippings, you can repair them by filling them with new chippings or with a patching material.
- Power wash: To remove dirt, moss and stains from the slate chippings, you can use a power washer to clean the area.
- Reshaping: If you notice that your slate chippings are not in the shape you want, you can reshape them with a rake or a spade, this will give a neat and tidy look.
- Check the edging: The edging is what keeps the slate chippings in place, so it’s important to check it regularly and make any necessary repairs.
Design and Inspiration
Ways To Incorporate Slate Chippings Into Different Garden Designs
Slate chippings are a versatile and attractive landscaping material that can be incorporated into a wide range of garden designs.
Here are some ways to incorporate slate chippings into different garden designs:
- Garden paths: One of the most popular ways to use slate chippings is to create a garden path. The natural variations in color and texture of the slate chippings can add visual interest and character to any garden.
- Driveways: Slate chippings can also be used to create an attractive and durable driveway. They are able to withstand heavy vehicle traffic and are a cost-effective alternative to traditional paving materials.
- Mulch: Slate chippings can be used as a mulch around plants to help suppress weed growth and retain moisture. They also add an attractive contrast of color to the plants.
- Garden borders: Slate chippings can be used to create a border around a garden bed or pathway. They can be used to separate different sections of the garden or to create a visual barrier between the garden and the lawn.
- Water features: Slate chippings can be used to create an attractive surround for water features such as ponds or fountains. They can help to create a natural and relaxing atmosphere.
- Rock gardens: Slate chippings can be used to create a rock garden. They can be used to create a natural and rugged look, which is perfect for a rock garden.
- Zen gardens: Slate chippings can be used to create a Zen garden. They can be used to create a sense of calm and tranquillity in the garden.
- Stepping stones: Slate chippings can be used to create stepping stones that lead through the garden. They can be used to create a path through the garden while also adding an attractive and natural element to the garden.
Incorporating slate chippings into different garden designs can add a unique and natural aesthetic, and also provide functionality.
They are a durable and low-maintenance option for any garden.
How To Use Slate Chippings With Other Landscaping Materials
Slate chippings can be used in combination with other landscaping materials to create a unique and attractive outdoor space.
Here are some ways to use slate chippings with other landscaping materials:
- Pavers: Slate chippings can be used in combination with pavers to create an attractive and durable patio or walkway. The slate chippings can be used as a filler between the pavers, adding a natural and rustic touch to the space.
- Gravel: Slate chippings can be combined with gravel to create a visually interesting and low-maintenance garden bed. The different colours and textures of the slate chippings and gravel can complement each other and add depth to the garden.
- Wood: Slate chippings can be used in combination with wood to create an attractive and natural looking garden. The wood can be used to create raised beds or borders, while the slate chippings can be used as a mulch or pathway.
- Boulders: Slate chippings can be used in combination with boulders to create a natural and rugged garden. The boulders can be used as focal points or to create barriers, while the slate chippings can be used to create a natural and rustic pathway.
- Plants: Slate chippings can be used in combination with plants to create an attractive and natural garden. The slate chippings can be used as a mulch or pathway, while the plants can add color and interest to the garden.
- Artificial turf: Slate chippings can be used in combination with artificial turf to create a unique and low-maintenance garden. The artificial turf can be used as a lawn, while the slate chippings can be used to create a pathway or as a border around the turf.
By using slate chippings in combination with other landscaping materials, you can create a unique and attractive outdoor space that is both functional and visually interesting.
It’s important to consider the colour, texture and size of the materials and how they will complement each other before making a decision.
Ultimate Guide To Slate Chippings Conclusion
In conclusion, slate chippings are a versatile and attractive landscaping option that can be used in a wide range of outdoor projects.
They are known for their unique colour variations and textures, durability and weather resistance, making them a low-maintenance and long-lasting option for landscaping.
Proper site preparation and maintenance are key to creating a stable and level surface that will support the weight of the slate chippings and the foot traffic that they will be subjected to.
Slate chippings can be incorporated into different garden designs, and can be used in combination with other landscaping materials to create a unique and attractive outdoor space.
With a little bit of planning and care, you can use slate chippings to create a beautiful and long-lasting outdoor space that will provide many years of enjoyment.
Can You Paint Gravel Boards?: A Complete Guide + Tips & Tricks
Painting gravel boards is a simple and affordable way to enhance the appearance of your garden or outdoor space.
Gravel boards, also known as fence panels, are the boards that sit at the base of a fence and prevent the fence from coming into contact with the ground.
They are typically made of wood, concrete or plastic. Painting these boards allows you to change their colour and add a touch of personality to your outdoor space.
The purpose of this blog post is to provide a comprehensive guide on painting gravel boards. We will cover the basics of what gravel boards are, the benefits of painting them, and the steps involved in the painting process.
We will also provide tips and information on how to properly prepare the surface, choose the right paint and colour, and maintain the painted surface for a long-lasting finish.
Additionally, we will also address any potential challenges that may arise while painting gravel boards, and provide solutions to overcome them.
The goal is to equip readers with the knowledge and skills necessary to successfully paint their own gravel boards and enhance the overall look of their outdoor space.
What Are Gravel Boards?

Gravel boards are the boards that sit at the base of a fence and prevent the fence from coming into contact with the ground.
They are typically made of wood or concrete. The main function of gravel boards is to protect the fence from rot, decay, and moisture.
They also help to keep the fence stable by providing additional support and preventing the fence from sagging.
Furthermore, they are used to elevate the fence above the ground level and to allow for drainage and ventilation.
By keeping the fence off the ground, it reduces the risk of pests and damage caused by moisture and water.
They are an essential component of a fence and are crucial for the longevity and durability of the fence.
Here at TW Aggregates we offer the following concrete gravel boards:
Why Paint Gravel Boards?
Benefits Of Painting Gravel Boards
Painting gravel boards has several benefits that can enhance the overall appearance of your garden or outdoor space:
- Aesthetics: One of the main reasons to paint gravel boards is to change their colour and add a touch of personality to your outdoor space. Painting them can add a new level of visual appeal and make your garden look more cohesive and polished.
- Protection: Painting can also protect your gravel boards from the elements and prolong their lifespan. A coat of paint can shield the boards from moisture, UV rays, and other environmental factors that can cause the boards to rot, warp or degrade.
- Easy Maintenance: Painted gravel boards are also easier to clean and maintain, as dirt and grime won’t adhere as easily to the painted surface.
- Cost-Effective: Painting gravel boards is a cost-effective way to refresh and update the look of your garden, rather than replacing the entire fence.
In summary, painting gravel boards can not only improve the appearance of your garden, but also provide protection and longevity for the material.
How Painting Gravel Boards Can Enhance The Appearance Of A Garden Or Outdoor Space
Painting gravel boards can enhance the appearance of a garden or outdoor space in several ways:
- Colour Coordination: Painting gravel boards allows you to match the colour of the boards to existing elements in your outdoor space, such as the colour of your house, shutters, or trim. This can create a cohesive and polished look that ties everything together.
- Accentuation: Painting gravel boards in a bold or contrasting colour can also make them an accent in your garden design, and draw attention to certain areas of your outdoor space.
- Textural and Visual Interest: Painting gravel boards in a different colour or pattern can add textural and visual interest to your garden, and make it more visually appealing.
- Personalization: Painting gravel boards can give your garden or outdoor space a personal touch, and reflect your unique style and taste.
- Concealment: In case of any imperfections or damages on the gravel boards, painting them can conceal them and give your garden a polished and well-maintained look.
In summary, painting gravel boards can change the colour and look of the boards, and make them a more attractive and appealing element in your garden or outdoor space.
It can also be used as a design tool to create a cohesive and polished look, add an accent to certain areas, or even conceal imperfections.
Preparing To Paint Your Gravel Boards
Steps To Take Before Painting
Before painting gravel boards, it is important to take the proper steps to prepare the surface for painting. Here are some steps you should take:
- Clean the Surface: The first step is to clean the surface of the gravel boards thoroughly. Use a pressure washer or a stiff-bristled brush and a mild detergent to remove any dirt, grime, or mildew. Rinse the boards with clean water and allow them to dry completely.
- Repair any Damage: Inspect the boards for any cracks, holes, or rotting wood and repair them using wood filler or epoxy. Sand the repaired areas smooth to ensure the paint adheres properly.
- Sand the Surface: Sand the surface of the boards lightly with a fine-grit sandpaper to remove any rough spots or uneven surfaces. This will help the paint adhere better and give a smooth finish.
- Remove any Old Paint: If the boards are already painted and you wish to repaint them, you will need to remove any old paint. Use a paint scraper, wire brush or sandpaper to remove any loose or flaking paint.
- Mask off any areas that don’t need to be painted: Use masking tape and paper to cover any areas of the fence that don’t need to be painted, such as the fence posts or hardware.
- Prime the Surface: If the surface is new or unpainted, or if the existing paint is in poor condition, you should prime the surface first. This will help the paint adhere better and give a better finish.
By following these steps, you will have a clean, smooth and prepared surface that is ready for painting. Proper preparation is crucial to ensure that the paint adheres well, and that the final result is smooth and durable.
Materials And Tools Needed
When painting gravel boards, you will need a few basic materials and tools:
- Paint: Choose an exterior paint that is suitable for the type of surface you are painting. Acrylic paint is a good option for wood, while oil-based paint is suitable for concrete and plastic.
- Primer: If the surface is new or unpainted, or if the existing paint is in poor condition, you will need to use a primer. Choose a primer that is designed for the type of surface you are painting.
- Paint brushes: You will need paint brushes of different sizes, such as a 2-inch and 1-inch brush, to apply the paint to the different areas of the boards.
- Paint roller and tray: A paint roller and tray will help to apply the paint evenly and quickly to large areas.
- Sandpaper or wire brush: to remove any loose or flaking paint.
- Cleaner and detergent: to clean the surface of the gravel board
- Masking tape and paper: to cover any areas of the fence that don’t need to be painted, such as the fence posts or hardware
- Safety gear: such as gloves, goggles, and a mask to protect yourself from fumes and dust.
By having these materials and tools on hand, you will be able to paint your gravel boards effectively, and achieve a smooth and even finish.
Safety Precautions
When painting gravel boards, it is important to take certain safety precautions to protect yourself and others from potential hazards:
- Wear protective gear: Wear gloves, goggles, and a mask to protect yourself from fumes and dust.
- Keep the area clear: Keep the area around the boards clear of flammable materials and debris to prevent fires and accidents.
- Follow the manufacturer’s instructions: Read and follow the manufacturer’s instructions for the paint and primer you are using, and follow any safety precautions listed on the label.
- Be careful with ladders: If you need to use a ladder, be sure to use it safely and follow the proper ladder safety guidelines.
- Keep children and pets away: Keep children and pets away from the area while you are working to prevent accidents and injuries.
- Dispose of paint properly: Dispose of any left-over paint, paint cans, and rags in accordance with the local regulations, to avoid any environmental hazards.
By taking these safety precautions, you can reduce the risk of accidents and injuries while painting your gravel boards, and ensure that the job is done safely and effectively.
Gravel Board Painting Process
Choosing The Right Paint And Colour
Choosing the right paint and colour for your gravel boards is an important step in the painting process. Here are some things to consider when making your selection:
- Type of paint: Choose an exterior paint that is suitable for the type of surface you are painting. Acrylic paint is a good option for wood, while oil-based paint is suitable for concrete and plastic.
- Finish: Consider the type of finish you want for your gravel boards. A gloss finish will give a shiny and smooth finish, while a semi-gloss finish will have a slight shine and a satin finish will have a low sheen.
- Colour: Consider the colour of your existing fence, house, and other elements in your outdoor space. Choose a colour that will complement or contrast these elements and enhance the overall appearance of your garden.
- Durability: Choose a paint that is durable and long-lasting, and that can withstand the elements and UV rays.
- Brand: Research and choose a reputable paint brand that has a proven track record of quality and durability.
By considering these factors, you can make an informed decision and select the right paint and colour for your gravel boards.
This will ensure that the paint adheres well, and that the final result is smooth and durable, and enhances the overall appearance of your garden or outdoor space.
Applying Paint To Gravel Boards: Tips For A Smooth And Even Finish
Once you have chosen the right paint and colour, you can begin the process of applying the paint to your gravel boards. Here are some steps to follow:
- Stir the paint thoroughly: Make sure to stir the paint well before applying it, to ensure that the pigments are evenly distributed.
- Start with the edges: Use a small paint brush to paint the edges of the boards first. This will ensure that the edges are covered and that the paint doesn’t drip or run.
- Use a paint roller for larger areas: Use a paint roller and a paint tray to apply the paint to larger areas of the boards. Roll the paint in a W-shape pattern to ensure even coverage.
- Use a brush for the details: Use a small paint brush to paint the details of the boards, such as the corners and crevices.
- Apply a second coat: Allow the first coat of paint to dry completely before applying a second coat. This will ensure that the paint is evenly distributed and that the boards are fully covered.
- Clean up: Clean up any drips, spills or excess paint as you go along, to prevent them from drying and leaving a rough finish.
By following these steps, you can apply the paint to your gravel boards leaving a professional finish that is going to look great for your garden.
Drying And Curing Times
Once you have finished applying the paint to your gravel boards, it is important to allow sufficient drying and curing time before using or moving them.
- Drying Time: Drying time depends on the type of paint and the conditions under which the paint was applied. Generally, it takes about 2-4 hours for the paint to dry to the touch and 24 hours for it to dry completely.
- Curing time: Curing time is the time required for the paint to fully harden and reach its maximum durability. It can take anywhere from several days to a few weeks depending on the paint and the conditions, such as humidity and temperature.
- Avoiding damage: During the drying and curing process, it is important not to touch, move or press on the gravel boards, as it can cause the paint to smudge or scratch.
- Weather conditions: It is ideal to paint the gravel boards on a dry and warm day, with low humidity and no chance of rain. The paint will dry and cure faster in good weather conditions.
By allowing the paint to dry and cure properly, you can ensure that the finish is smooth and durable, and that the paint will last for a long time.
It is important to be patient and not to rush the process, as this can result in a poor finish and a shorter lifespan of the paint.
Maintenance And Care
Tips For Maintaining The Paint Job On Gravel Boards
Once you have painted your gravel boards, it is important to take proper care of them to ensure that the paint lasts for a long time. Here are some tips for maintaining the paint job on your gravel boards:
- Clean regularly: Regularly clean the boards with a mild detergent and water to remove dirt and grime. This will help to prevent the build up of dirt and grime, which can cause the paint to deteriorate over time.
- Touch-up: To touch-up any areas that need it, first identify the areas that need attention. Then use a paintbrush and paint to touch up those areas. Be sure to use the same paint and colour as was used on the boards originally, to ensure a good match.
- Apply a sealant: Applying a clear sealant to the painted surface will help to protect the paint from the elements and prolong its lifespan.
- Avoid pressure washing: Pressure washing can damage the paint, so it is better to use a mild detergent and a brush instead.
By cleaning and touching up your painted gravel boards regularly, you can ensure that they will maintain their good appearance for a long time.
It is important to be proactive and catch any imperfections early, to avoid the need for a major touch-up or repainting.
Can You Paint Gravel Boards Conclusion
In conclusion, painting gravel boards is a great way to enhance the appearance of your garden or outdoor space.
By using the right paint, colour and technique, you can change the colour and look of the boards. This make them a more attractive and appealing element in your garden or outdoor space.
However, it is important to properly prepare the surface, use the right materials, take safety precautions and allow sufficient drying and curing time before moving or using the boards.
Proper maintenance, including regular cleaning and touch-ups, will help to ensure that the paint lasts for a long time and maintain the good appearance of the gravel boards.
Overall, painting gravel boards can be a great way to add a personal touch to your outdoor space and make it more visually appealing.
How To Build A Rockery
Do you want to add a relaxing and stylish piece of landscaping to your home? If so, you’ll need to consider building a rockery!
This unique and beautiful garden can be created in just a few steps, and requires only a few basic materials.
In this guide, we’ll show you how to build a rockery step-by-step, and explain the different types of rocks that can be used in this project.
Let’s get started!
What Is a Garden Rockery?
A garden rockery is a landscaping project that involves creating a wall of rocks around an area of your yard or garden.
Rocks can be arranged in any shape, and can create a unique and beautiful landscape feature.
They are popular because they add texture, beauty and interest to any garden, while also providing a natural habitat for many plants and animals.
Rockeries are easy to install, as all you need is some concrete or brickwork, gravel, sand and rocks.
Benefits Of A Garden Rockery?
Why should you build a garden rockery. If you’re looking for a relaxing and enjoyable way to spend your free time, a garden rockery is a great option.
Here are some benefits of building one:
- It’s a great way to relax and get some exercise at the same time.
- It’s an excellent spot for enjoying the outdoors in prime weather conditions.
- You can decorate it however you like, making it personal and unique.
- It’s an amazing place to share special moments with your friends or family.
- It’s ideal for kids, who will love playing in it and exploring the different rocks and plants.
- There are many different types of gardens rockeries available on the market, so there’s sure to be one that fits your needs.
Getting Started With A Rockery
Before you begin the project, it’s important to gather all of the required tools and materials so you have everything you need before you begin. Here’s exactly what you will need.
Tools
To create a rockery, you’ll need the following tools:
- A shovel
- A pickaxe
- Rocks
- Sand or soil
- Water hose
- Garden hose or watering can
- Chipper or shredder (optional)
Materials
To create a rockery, you will need the following materials:
- Base layer (made from concrete, clay, or plastic)
- Coating of aggregate (salt, sand, etc.)
- Waterproofing agent
- Stones or other decorative objects
Types Of Rocks To Use
There are a few things you need to know when building a rockery:
- You’ll need different types of rocks to create different effects.
- The size and shape of the rocks will depend on the type of garden you have.
- You’ll also need some type of mortar or adhesive to hold them all together.
Now that you know what you need, it’s time to start picking out your rocks! Here are a few types of rocks that work well for creating a rockery:
- Gravel: These stones are great for adding texture and color to your garden, and they make a great base for other stones. They’re also easy to remove if you need to move them or fix something in the garden.
- Limestone: These stones are perfect for creating an antique look in your garden, as they have a natural aging effect that makes them look old and weathered. They’re also very easy to clean and maintain, so they’re perfect if you have kids or pets in the house who like to play in the garden!
- Sandstone: This type of stone is ideal for creating rugged appearances, as it has sharp edges that give it this “rocky” appearance. It’s also very easy to care for, making it a great option if you live in an area with harsh weather conditions.
- Slate: Slate is a softer, more textured type of granite that is often used indoors because it’s easier to work with. It has a blue or grayish hue and comes in different sizes and shapes.
How To Build A Rockery
A rockery is a great way to enjoy the outdoors and add some fun and excitement to your home. It’s also a great way to keep your plants healthy and happy.
Here are some tips on how to build a rockery:
Plan Your Rockery
To start building your rockery, you first need to plan out the layout. This will involve figuring out where you want the various rocks to go and what kind of shape they should be in.
Once you have a rough idea of what you’re after, you can start sketching out your ideas on paper. Take into account both the size and shape of each rock as well as how they will interact with one another.
Mark out your garden rockery area
Now that you have decided on your garden’s theme, it’s time to start planning out the rockery area.
To begin with, you’ll need to mark out an area that’s big enough to accommodate all of the rocks and stones you’ll be using.
It’s also a good idea to account for any shrubs or trees that might be in the vicinity – you don’t want them getting in the way of your rocks!
Once you’ve marked out your garden rockery area, it’s time to start gathering all of the rocks and stones you’ll need.
You can either collect them yourself or order them online. Whichever route you choose, make sure that they’re large enough so that they won’t move around easily and damage your plants.
Clear the area and lay a base
In order to build a successful rockery, you need to first clear the area and lay a base. This will ensure that the rocks are stable and won’t fall down in the future.
To clear the area, you’ll need to remove any debris or plants that may be blocking your way. You can do this by using a bulldozer, shovel or even your hands.
Make sure to wear gloves and protective gear if necessary so that you don’t injure yourself while working.
Once the area is cleared, you’ll need to lay a base layer of soil. This will provide support for the rocks and prevent them from slipping or moving around.
You can use either sand or stones as your base layer, but make sure that they’re firmly ground down so that they don’t move during storms or rain periods.
Set your large rocks
Now it’s time to start layering your rocks! Start by setting out a few large rocks in the center of your garden, and then fill in the space around them with smaller rocks.
Make sure that the larger stones are balanced so that they don’t fall over when passersby walk past.
if you’re using rocks that don’t move easily – like granite – then you’ll need to use a rock placement tool to get them into the right position.
You can either buy one or make one yourself using simple tools like a jigsaw or an angle grinder.
Plant and lay mulch
Now is the time to add plants and mulch to your rockery. Planting will help to enrich the soil, while mulching will help keep the soil moist and reduce weed growth.
To plant, first choose your plants wisely. You’ll want to choose plants that are resistant to cold weather, as your rockery will be in a cold environment. You’ll also want plants that are tolerant of dry conditions, as this is how your rockery will likely be maintained.
Once you’ve chosen your plants, dig a hole for each plant at the same depth as the root ball of the plant. Make sure the hole is big enough so that the root ball of the plant doesn’t touch any sides of the hole.
Then fill each hole with soil and water them well. Finally, top off each hole with mulch (either leaves or bark).
To mulch, first decide where you want to put it. This can be anywhere on or around your rockery, but make sure that it’s evenly distributed so that it’s not too wet or too dry.
Then spread mulch over top of the area you’ve chosen and rake it into an even layer.
Rockery Plants
What plants are suitable for a rockery?
There are a number of plants that can be used in a rockery, depending on your climate and what type of landscape you want. Here are some of the most popular choices:
- Roses
- Hardyshrubs and vines
- succulents
- Annual flowers
- Groundcovers such as thyme or lavender
- Ivy
- Geraniums
- Begonias
- Jasmin
Frequently Asked Questions
When is the best time to build a rockery?
There’s no one definitive answer to this question, as it depends on a variety of factors. However, some general advice that can be useful is to think about when the weather is most favourable for gardening – typically during the spring and autumn months.
##Does a rockery need soil?
A rockery does not need soil, but you may want to add some if you plan to grow plants in it. Rocks provide a natural drainage system and make a great base for your garden.
How To Build A Rockery Conclusion
It’s time to enjoy your beautiful garden now! All the work you did went into making this rockery look so amazing.
The flowers, plants, and other decorations will add color to your place while beautifying it at the same time.
To make sure that your garden stays beautiful for long, follow these steps carefully and don’t forget to have fun doing it!
Have you ever built your own rockery? Let us know in the comments section below.
How To Create A Stone Garden Border Edging
Do you love the look of a stone garden border, but don’t have the time or patience to maintain it? fret not!
In this article, we’ll show you how to create a low maintenance stone garden border that you can enjoy for years to come.
We’ll discuss the different types of stones that work well for a garden border, how to choose them, and how to care for them.
We’ll also provide some tips on how to create a design that is both stylish and functional, and that will look great no matter what season it is!
Remember that you do not need to be an expert to create a garden border. All that’s need is the correct amount of stone, some basic tools and a little planning.
We will show you how to do all of this. Let’s get started!
Garden stone border benefits
A garden stone border can add a touch of luxury and style to any outdoor space. Here are the key benefits of using a garden stone border:
- It adds beauty and attraction to your garden.
- Requires very little maintenance.
- It increases privacy and security for your plants.
- Decorative stones provide natural drainage.
- It prevents weeds and other unwanted plants from growing in your garden.
- It helps to keep the soil fertile by absorbing moisture and holding water in place.
- Can provide some protection against erosion and pests.
- Easy to install and maintain, making them a great choice for people who have limited time or resources.
Getting Started
Adding a touch of natural beauty to your home is easy with stone borders. These low-maintenance borders are sturdy and can be customized to fit any style, theme, or color scheme.
Plus, they’re a great way to add a natural element to your yard or garden without having to invest in expensive landscaping materials.
Before we jump into the step-by-step process on how to create a stone border, here are some initial things you will need to consider.
List Of Tools and Equipment
Here is a list of equipment and materials you will need to get started:
- Materials: Decorative aggregates, slate chippings, cobbles or pebbles.
- Wheelbarrow.
- Hammer and rock chisel (for shaping rocks).
- Tape measure.
- Square edged spade.
- Weed membrane fabric.
- Garden Rake.
Stone Calculation – How Much Stone Do I Need?
To create a garden border, you will need to calculate the amount of stone needed. This will help you to know exactly how much material you’ll need and avoid any surprises later on in the project.
There are a few factors that you’ll need to take into account when calculating the amount of stone needed:
- The size of your garden.
- The type of stone that you’re using
- The shape and size of the stones
- The dimensions of the borders
- The height and width of the borders
Once you have these details, you can use our gravel calculator which will tell you exactly how much to order. Just input the length, width and depth of the garden border edging.
Choosing The Stone Edging
Decorative stones can add a lot of visual appeal and interest to your garden border edging. However, it’s important to choose the right ones for the job.
Gravel Edging
When it comes to gravel edging, there are a few things to consider.
- Quality: First and foremost, you’ll want to make sure that the gravel is of the best quality.
- Size of The Gravel: You don’t want pieces that are too small or too big, as this will cause problems down the road.
- Size of The Edge: You’ll need to decide how wide you’d like your edge to be. This will depend on the width of your driveway and other factors such as how much traffic you anticipate.
- Finish: Finally, you’ll need to decide what kind of finish you’d like – either smooth or textured. Smooth edges look nice but can be easy to damaged by traffic; textured edges offer more protection but can be less aesthetically pleasing.
Slate Chipping Edging
Slate chippings are a very attractive and colourful option for your border. Some of the colour options are grey, blue and plum which look extremely stylish, and their colour pops even more when wet.
Here are some thing’s to consider.
- Durability: First and foremost, you’ll want to make sure that the edge is durable enough to withstand wear and tear.
- Texture: You also need to consider the texture and design of the edging – it should be sleek and stylish, but also function as a deterrent against theft.
- Colour: Finally, you’ll want to make sure that the color of the edging matches your décor or exterior landscape. If you have a bright blue house with bright blue trim, for example, then you would probably prefer a bright blue edging rather than something more subtle.
Cobble Or Pebble Edging
These kind of stones look stunning and provide a very aesthetically pleasing finish to any border. With many colours and sizes available, there is something for everybodies taste.
When it comes to choosing a cobble or pebble edging, there are a few things that you need to consider. Here are some of the factors that will help you make the right decision:
- Style: Do you want a rustic appearance or something more polished and professional?
- Durability: Will your edging last for years or will it start showing signs of wear quickly?
- Maintenance: Does this type of edging require a lot of maintenance, like regular cleaning?
- Price: How expensive is it relative to other features that your project needs?
How To Create A Stone Border: Step-By-Step
Stone borders can add a touch of sophistication and class to any garden or lawn. They’re also a great way to create a natural boundary between the lawn and the garden, helping to keep both areas separate.
Here is the step-by-step process of how to create a stone border.
Step 1: Mark Out The Area
To start, you’ll need to identify the area that you want to border. To do this you can either use marker spray or string to map out the entire area.
Step 2: Digging The Trench
Once you have the area marked out, it’s time to start digging the trench for your border. Begin the process by using a spade along the area that you marked out.
The depth of the trench will depend on how big your stones are and how deep you want them to be set in. For example, cobbles and pebbles would have a depth of around 10cm and gravel or slate chippings would be at a depth of 4-5cm.
Step 3: Place The Weed Membrane
After you’ve dug the trench, it’s time to line it with a weed membrane. This will help prevent weeds from growing up through your border.
To do this, simply unroll the weed membrane and place it in the bottom of the trench. Then, use landscape staples to secure it in place along the sides of the trench.
Step 4: Place The Stone Edging
Now comes the fun part – adding your stones! Start by placing the stones into the trench until completely full. You should use a garden rake to evenly distribute the stones.
Stone Garden Border Edging Conclusion
Edging a stone garden border can be an easy and beautiful way to create a perfect design.
With the steps above, you can easily get your very own stunning edging in no time.
Have you successfully created a stone garden border? Do you have any further tips or tricks to add? Let us know your experience in the comments section below.
The Ultimate Guide to Gravel: Pros, Cons, Types and Uses of Gravel
Gravel is one of the most versatile and affordable materials that you can use for your garden. It is a popular choice for both decorative and practical purposes, and can be used in a variety of ways to create different effects.
Whether you’re looking to add a new path to your garden or simply want to spruce up your existing landscaping, gravel is an excellent option. However, with so many different types of gravel available, it can be difficult to know which one is right for your project.
This guide will teach you everything you need to know about gravel, from the different types that are available to the best uses for each type. By the end of this guide, you’ll be an expert on all things gravel!
What is gravel?
Gravel is a type of small rock that is often used in construction and landscaping projects. It comes in different sizes, so it’s important to select the right size for your project.
Gravel can be made from a variety of materials, including limestone, granite, sandstone, and more. It can be used for driveways, paths, gardens – the possibilities are endless!
Gravel Sizes Categories
Gravel comes under different classifications, depending upon the particle size.
International Organization for Standardization ISO 14688:
- Fine gravel: This is gravel that has a particle size larger than 2mm but equal or than 6.3mm (>2mm ≤ 6.3mm).
- Medium gravel: This is gravel with a particle size that exceed 6.3mm but less or equal than 20mm (>6.3mm ≤ 20mm).
- Coarse gravel: This is gravel with a particle size that are larger than 20mm but no more than 63mm (>20mm ≤ 63mm).
Udden-Wentworth scale:
- Granule: 2mm to 4 mm (0.079-0.157 inches)
- Pebbles: 4mm to 64 mm (0.2-2.5 inches) particles.
- Cobblestones: 64mm to 256 mm (2.5–10.1 inches)
- Boulders: Larger than 256 mm (10.1 inches).
As well as gravel for construction and building purposes, you also have decorative gravel. This is often chosen for its aesthetic appeal, its durability, and its low maintenance requirements. It’s also a great choice for projects that require a rugged texture or color.
The Different Types of Gravel
When it comes to gravel, there are many types to choose from. To help you make the best decision, we’ve outlined the different types of gravel below. Keep in mind that these types of gravel have different uses and benefits, so be sure to select the right one for your project. Here is a list of the different types of gravel:
Pea gravel:
 The most common type of gravel, pea gravel is often used in landscaping and construction projects due to it’s versatility and low-cost. It’s made up of small, round rocks that are about the size of a peas. Pea gravel is easy to work with and doesn’t require much maintenance. Drains water very well and keeps areas clear and less muddy, which makes it an excellent choice for driveways and playgrounds.
Crushed stone:
Crushed stone is a good choice for areas that need a more durable surface. It’s made up of large pieces of rock that are crushed into smaller pieces ranging from ¾ to 4 inches in size, which makes it versatile and great for a range of projects.
River rock:
Perfect for areas that are water-sensitive or have water runoff. As well as it’s functional benefits, river rock is also very aesthetically pleasing, as well as easy to install and requires minimal maintenance. As good as river rock is, it is not the best choice for option for driveways or paths.
Marble Chips:
A popular choice for indoor and outdoor areas, as they offer a natural look and feel. reflective surface is one of their key features which helps reflect light to brighten up any area. The downside is that it is not a good choice for areas with plants, as it can reflect too much sunlight. Marble chips can also add salts and chemicals into the roots which can be bad for your plants.
Slate Gravel and Chips:
A more unique gravel, slate gravel and chips offer a beautiful natural look for any area. Slate is also very strong and durable, making it a good choice for areas that see high traffic or are subject to wear and tear. These decorative aggregates are very aesthetically pleasing, and look great when wet due to rainfall. Available in a variety of different colours such as grey, plum and blue, there is something for everybody’s taste and garden colour scheme.
What Can You Use Gravel For
Gravel can be used for a variety of purposes – from landscaping to driveways. Here are some ideas and uses for gravel.
Paths
Paths are a popular way to add visual interest to your landscaping. Not only do they look great, but they are also low-maintenance and easy to install. There are a variety of different types of gravel you can choose from, so find the one that best suits your needs and style. Gravel paths create an elegant appearance that is perfect for areas where visibility is important, such as front yards or gardens.
Driveways
Driveways are a great way to improve the appearance of your home and increase the curb appeal. They are easy to install and maintain, and can last for years if taken care of properly. There are many different types of gravel available, so you can find the perfect look for your home. When it comes to choosing a driveway material, gravel is one of the best options on the market due to its affordability as well as durability. However, be sure to consult with a professional before installing it yourself. They will know exactly what kind of surface you need and how much gravel should be used in order not to damage your driveway or sidewalks.
Mulch Substitute
Mulching is an essential part of gardening and landscaping, as it helps to reduce the amount of soil lost through drainage and also prevents erosion. There are many different types of mulch available on the market, from bark chips to gravel. Gravel can be used as a great mulch substitute for a variety of reasons:
- It helps with drainage.
- Suppresses weed growth.
- Comes in different colors.
- Comes in a variety of sizes to fit your needs.
Rockeries
Rockeries are a great way to add some visual interest to your garden while also helping with drainage and erosion. You can use different types of gravel to create different looks – for example, using pebbles of different colors can create a mosaic effect. Installing a rockery is relatively simple – just be sure to consult with a professional beforehand to make sure you are doing it correctly.
Decorative Borders and Edges
Decorative borders and edges can be a great way to add personality and interest to your garden. Be sure to use landscape fabric underneath the gravel so that it doesn’t get weed-filled, choose gravel in different colors for an added visual appeal, or even create unique borders by mixing gravel with other materials like stones or bricks. Gravel is also perfect for adding texture and interest to your landscaping; you could use it as the groundcover of a border around a bed of flowers, for example.
Water Drainage Solution
It is essential to have a water drainage solution that will effectively clear away all the water from your property. This can be done through various means, depending on the situation and location of your home or garden. One of the most popular uses for gravel is to line the bottom of a drainage ditch in order to direct runoff away from your foundation and home. Additionally, gravel can also be used as an effective soil amendment for redirecting runoff from downspouts towards plants instead of flooding nearby areas. Furthermore, by doing this you help reduce erosion and maintain healthier soils overall.
The benefits of using gravel
Gravel is an affordable, low-maintenance, and versatile material that has a lot of benefits for your landscape. Let’s take a look at some of the benefits.
Reduces maintenance
This natural surface of gravel not only looks great, but it also reduces maintenance needs. You don’t have to worry about watering or mowing; in fact, gravel doesn’t need much care at all!
Drainage
Drainage is an important part of garden maintenance and can be dealt with in a number of ways. One popular option is gravel, which not only helps to improve the drainage of potted plants but also provides quick relief from heavy rain or snowfall. Gravel absorbs water quickly and allows it to flow away freely – preventing pooling or flooding. This makes it perfect for areas that are prone to these kinds of conditions, such as patios and walkways.
Versatile and Inexpensive
Gravel is a versatile and affordable material that can be used for various purposes. Its installation is not too difficult, making it perfect for DIY enthusiasts. In addition to driveways, paths and landscaping, gravel can also be used in the construction of walls or fences. It is also available in different colors and sizes, making it the perfect choice for any specific needs.
Durable
Looking for a durable and affordable surface to decorate your home? Gravel is the perfect option! It’s strong and can withstand high traffic areas – making it the ideal choice for busy homes.
Security
Security is one of the most important factors to take into consideration when building or renovating a home. Gravel offers security due to the crunching sound when people walk over it.
Easy to Lay
It is easy to lay yourself, is durable, and can be used for paths, driveways, ponds or as general landscaping material. This means you can have a go at tackling the project yourself instead of paying for expensive services.
Drought Resistant
This low-maintenance option doesn’t require a lot of water to keep in check, making it an excellent choice for landscaping in areas where rainfall is scarce. Furthermore, gravel has a long lifespan and can be reused multiple times – perfect for sustainability-minded homeowners or landscape designers!
Disadvantages To Using Gravel
When it comes to gravel, there are a few things to keep in mind. Although it has a ton of advantages, there are a few minor disadvantages.
- It’s difficult to control the amount of coverage that it provides.
- Some types of gravel is very loose and can be displaced and moved around easily.
- Gravel can also be a pain to remove if you need to change your landscaping in the future.
How to choose the right type of gravel for your project
Gravel is an essential part of any garden, and for good reason – it can add beauty and function to any space. But how do you choose the right type of gravel for your project? Here are some tips and things to consider.
- Choose a color that compliments your project. For example, black gravel can be dramatic while white gravel is more elegant. As well as plum and blue decorative aggregates to add a splash of colour.
- Consider the size of the stones – they should be big enough to stay in place but small enough to drain easily.
- Decide what type of gravel you need – pea gravel, crushed stone, or something else. This will all depend on the type of project you need the gravel for.
- Price out different types of gravel before making a decision. Here at TW Aggregates we offer very competitive prices on our gravel and building supplies.
With these tips in mind, you’re on your way to choosing the perfect gravel for your garden!
How to calculate the correct quantity of gravel for your garden
It’s easy to calculate the correct quantity of gravel for your garden, and the best part is that it doesn’t require any professional help! All you will need is three different measurements:
- Length
- Width
- Depth
Simply take these measurements and enter them into our aggregates calculator that will tell you exactly how many bags you will need to order for your project. We also wrote a full guide on how much gravel do I need. So make sure to check out that post.
How To Clean Gravel
If you’re looking to add a bit of rustic charm to your garden, gravel is the perfect solution. But with all the dirt, dust and grime that comes along with gravel use, it can be difficult to keep it clean. That’s why we’ve put together some tips to help you get the most out of your gravel, without having to spend hours scrubbing it clean.
- Make sure to remove all the large debris – this includes everything from leaves to twigs to large rocks.
- Rinse the gravel with water to remove any dirt or dust.
- If there is still grime on the gravel, scrub it with a brush and soapy water.
- Finally, let the gravel dry completely before using it again.

Frequently Asked Questions
Should I wash gravel before laying?
There is no definitive answer to this question, as it variables depending on the brand of gravel and the environment in which you are laying it. However, if you are concerned about potential allergens or other contaminants being brought into your home by the gravel, then it may be a good idea to wash it before using. You can try washing small pieces of gravel at a time with warm water and soap until all traces of dirt and grease have been removed. Once clean, gently reshape them into their original shape and continue laying them down.
What depth should gravel Be?
The depth of gravel will all depend on a number of factors, such as the type of gravel and what exactly you are using the gravel for. Here are some examples:
- 10mm Gravel Aggregate: Depth of 30-40mm
- For a Driveway: Depth of 50mm
- 20mm Aggregate: Depth of 50-60mm
How do I stop weeds growing in my gravel?
The best way to prevent weeds growing through gravel is to use a thick weed membrane fabric. This fabric will be layed down first and the gravel is placed on top of the fabric.
The Ultimate Guide to Gravel Conclusion
Gravel is a versatile and affordable material that can be used for a variety of different projects. In this guide, we’ve covered everything you need to know about gravel. From the different types of gravel to how to calculate the correct quantity for your garden.
With this information, you’ll be able to choose the right type of gravel for your next project and get started on creating your dream garden!
How To Lay And Maintain A Gravel Driveway – Easy Step-By-Step
Gravel driveways are becoming extremely popular in the UK which a great addition to any home.
Not only does it provide a good surface for parking and driving, but it also looks great and is relatively easy to install.
It also has many other benefits such as the gravels ability to filter water into the ground which can reduce the risk of flooding.
In this complete guide, we’ll show you how to lay a gravel driveway from start to finish, as well as how to clean and maintain it.
So if you’re thinking of adding a gravel driveway to your home, read on!
What Is A Gravel Driveway?
If you’re looking for a driveway that is both affordable and low maintenance, gravel might be the perfect option for you.
A gravel driveway is a type of driveway made from small, loose stones which are much easier to work with than asphalt or concrete.
Despite these benefits, gravel driveways do have some drawbacks. For example, they need to be regularly graded and can be susceptible to washing out in heavy rains.
Overall, gravel driveways are a popular choice among homeowners for a variety of reasons – they’re affordable, low maintenance, and look great!
Especially when using decorative stones. So if you’re thinking of upgrading your driveway, give gravel a try!
Gravel driveway Advantages
There are many benefits when it comes to using gravel for a driveway. let’s take a look in more detail.
- Cost-effective: Gravel is a relatively inexpensive material, making it a cost-effective option for driveway installation. It is significantly less expensive than paving a driveway with asphalt or concrete.
- Low maintenance: Gravel driveways require very little maintenance. They do not require regular sealing or repaving and only need to be resealed every three to five years. Also, they are not prone to cracking or chipping as opposed to concrete or asphalt driveways.
- Versatile: Gravel driveways come in a wide variety of colours and sizes, making it easy to find a type of gravel that will complement the aesthetic of your property.
- Easy to repair: Gravel driveways can be easily repaired by simply adding more gravel to any low spots or potholes. They can be extended or repaired quickly and easily.
- Permeable: Gravel driveways are permeable, which means they allow water to filter through to the ground. This helps to prevent water from pooling on the surface and reduces the risk of flooding.
- Long-lasting: Gravel driveways can last for many years with proper maintenance. They can withstand heavy traffic and extreme weather conditions.
- Environmentally friendly: Gravel driveways are an environmentally friendly option because they are made from natural materials and are permeable, which helps to reduce runoff and prevent erosion.
Getting Started
Getting started on your gravel driveway can seem daunting, but with the help of this guide, it will be a breeze.
Before we go into the step-by-step process of how to lay a gravel driveway, here are some important points to plan and consider first.
Safety Precautions
In order to safely undertake any job, it is important to take some basic precautions.
- Be sure to call your local utility company before you dig any holes and be careful of power lines that might be in the area. You could also hire a CAT scanner from a local hire shop.
- Ensure that you invest in appropriate safety gear such as gloves, a dust mask and safety glasses while working with large stones or heavy materials.
Required Materials
When it comes to making a driveway, there are a few materials you will need.
- High quality gravel or decorative gravel
- MOT type 1
- Weed prevention membrane
- Sand and cement
- Decorative boulders (optional)
Required Tools List
When it comes to laying a gravel driveway, there are some basic tools you will need.
- Long tape measure
- Spirit level
- Shovels and spades
- String and wooden pegs (for alignment)
- Wheelbarrow
- Excavator
- Wacker-plate
- A rake
- Safety clothing and equipment
Hire A Skip
When laying a new driveway, it is important to hire a skip in order to get rid of any existing waste and rubble. This will make the job much easier and faster, as you won’t have to sift through all the debris yourself.
How To Lay A Gravel Driveway
Once you have gone through all of the above steps, conducted the safety steps and have all of the tools and materials required, you are now ready to start on your driveway.
Here we will show you a step-by-step process on how t lay a gravel driveway.
Step 1: Measure out your driveway / Calculate Gravel
Before graveling your driveway, it is important to take a few necessary steps. Firstly, order enough gravel so that you have enough for the job – this will save you time and hassle later on.
Secondly, measure out the width and length of your driveway using measurements taken from a tape measure. Lastly, use a gravel calculator to calculate how much gravel you’ll need for each section of your driveway.
Calculating the amount of gravel to use on your driveway is very important. Ordering too much gravel means wastage, and ordering too little means spending more money on additional delivery costs.
The three measurements required are:
- Length
- Width
- Depth
Once you have the measurements, simply take these numbers and input them into our gravel aggregates calculator.
As a rough guide, 1 bulk bag of gravel will cover a 10m² area if that area has a depth of 50mm.
Step 2: Choose Your Gravel
When it comes to driveway gravel, there are many options available. It is important to pick the right one for your needs, so make sure you consider the size and colour of gravel as well as how much traffic your driveway will get.
14mm or 20mm gravel is usually a good option for a driveway. Anything smaller than this will get stuck in the car tyres and the bottom of your shoes. This can be annoying as you will constantly keep finding pieces of gravel around your home.
Choosing a durable option is also important – after all, this surface will see plenty of wear and tear over time!
We usually do not recommend materials such as rounded pebbles as they move around pretty easily when moving the car on and off of the driveway.
Two types of gravel that we highly recommend are Cotswold gravel and golden gravel which look extremely stylish.
Step 3: Choose The Edging For Your Gravel Driveway
Choosing the right edging for your gravel driveway is essential in ensuring its long-term durability, as well as looking aesthetically pleasing to fit in with the design.
There are a few options available, each with its own advantages and disadvantages. Concrete is by far the most popular edging material due to its durability and low cost. However, concrete can be very expensive to install, especially if you’re doing it yourself.
Pavers are another popular option as they come in many different styles and colors that match most homes. They also have a natural look that some people prefer over concrete or other materials.
Bricks and stones make an interesting border but may not be ideal for rain or snow runoff because of their heavy weight.
If you live in a cold climate, brick or stone edges may crack during winter weather conditions due to freezing temperatures affecting the mortar between bricks/stones etc.
Choosing the correct colour is also important to ensure it compliments your chosen colour scheme.
Step 4: Dig The Area
To ensure a smooth driveway, start by digging out the area where you want it. This will require a little hard work where you may be removing turf, topsoil and other materials.
The depth of gravel will depend on its size and how deep you want your driveway to be.
The depth will generally be between 50mm to 200mm. 150mm of this will be the sub-base, leaving 50mm for the actual gravel itself.
Step 5: Laying The Sub-Base

The base layer is a very important step, and the foundation of a gravel driveway and therefore should be done correctly.
The gravel sub-base should be made up of MOT Type 1 hardcore which means it’s crushed concrete, stone or hardcore that’s been screened so that all fines – the bits that turn to mud when wet – are removed.
The remaining stones will then range in size from 60mm down to 20mm in diameter.
MOT Type 1 is available from our online shop here at TW Aggregates.
Here is the correct procedure:
- Add the MOT type 1 sub-base: Around 150mm deep
- Rake the sub-base
- Check the depth and level: For this you will be using a spirit level and wooden peg.
- Compact the area: Use the wacker-plate over the entire area at least twice. Before laying additional materials like tarmac, paving, or asphalt, a wacker plate is utilized to build a level and compact sub base.
You may find some dips in the area. If you do, simply add more MOT, wacker it down, and then check the levels again.
Step 6: Add A Layer Of Weed Membrane
It is important to add a layer of weed prevention membrane to gravel driveways in order to prevent weeds from growing through.
The weed membranes are easy to apply, just simply lay them over the entire surface of the compacted MOT type 1. Make sure you overlap the edges by at least 6 inches.
For gravel driveways, we recommend a heavy duty and heard wearing weed membrane such as a polypropylene.
Step 7: Add your decorative gravel
Adding decorative gravel to your driveway is a great way to add color and texture. By using a plate compactor, you’ll be able to compact the gravel into a solid base for your driveway.
Spread it evenly across the surface with a shovel or rake, then have some fun adding the rocks yourself! Whatever type of gravel you choose, make sure that it’s compactible so that it doesn’t move around once installed.
As previously mentioned, the decorative gravel will be at a depth of 50mm (5cm). As a final touch, you can wash away all of the dust and dirt using a hose.
How to clean and maintain a gravel driveway
Cleaning and maintaining a gravel driveway is important to keep it looking good and functioning properly.
Here is a step-by-step guide on how to clean and maintain a gravel driveway:
- Regularly remove debris: Use a rake or leaf blower to remove leaves, twigs, and other debris that may have accumulated on the driveway. This will help to prevent the buildup of mold and mildew, as well as prevent the growth of weeds.
- Remove stains: If there are any stains on the driveway, such as oil or rust stains, use a pressure washer or a cleaning solution specifically designed for removing stains on gravel driveways. Be sure to follow the manufacturer’s instructions and test the cleaning solution on a small, inconspicuous area before using it on the entire driveway.
- Check for erosion: Periodically check for erosion or washouts, especially after heavy rains or snow melts. If you notice any areas where the gravel has washed away, fill them in with additional gravel.
- Re-grade and re-compact: Every few years, re-grade and re-compact the gravel to ensure that it is level and properly drained. This will help to prevent the formation of puddles or washouts and will also help to keep the gravel looking neat and tidy.
Frequently Asked Questions
What depth should gravel be for driveway?
It’s recommended that the layer of gravel should be at least 50mm (5cm).
Do you need a membrane under a gravel driveway?
A weed membrane placed between the sub-base and top layer of gravel is highly recommended to prevent the growth of weeds which means less maintenance for yourself.
How do I keep my gravel from moving?
Using plastic permeable pavers act like borders and are a highly effective and low-maintenance way of preventing gravel from moving.
How To Lay And Maintain A Gravel Driveway Conclusion
A gravel driveway is a great option for those looking for a low-maintenance option. With some basic care, a gravel driveway can last for years.
Follow the steps in this guide to get started on your own gravel driveway. Be sure to clean and maintain your driveway regularly to keep it looking its best.
Have you successfully created a gravel driveway? Let us know your experience plus any additional tips you may have in the comments section below.
How To Use Post Mix Concrete – A Step-By-Step Guide
Used by both professionals and and DIY enthusiasts, Post Mix Concrete is a popular product due to it’s versatility.
In this guide we will look at how to use post mix concrete and the benefits of using it.
We will also answer the most common questions on Post Mix Concrete.
What is Post Mix Concrete?
Post Mix is a readymade concrete consisting of ballast and cement. Not only only is the mix good quality, but it is also fast setting.
Post Mix Concrete can be used with concrete or metal fence posts, setting timber, gate posts, and line posts.
Benefits Of Post Mix
Let’s take a look at the benefits of Post Mix.
- Fast-Setting: Ready-made post mix is a fast setting formula that will set in 5-10 minutes.
- Versatile: Post mix can be used for a number of different DIY tasks.
- Quality: Readymade post mix is made to a high specification which means you you will be receiving a high quality, consistent product.
- More Environmentally Friendly: The amount of waste production and cement is kept to a minimum due to the more efficient way this product is mixed. This makes it better for the environment.
- Easy To Use: Just simply mix the product with water.
- Packaging: Comes in handy 20kg bags.
How To Use Post Mix Concrete
Post mix concrete is extremely easy to use. Here’s some step-by-step instructions for if you were placing a post.
- The first step is to dig the hole to the correct width and depth of the post size that you plan to use.
- Place the post into the hole. Pour water into the hole until it is around half full.
- Pour the post mix into the hole until there is no water visible.
- If you notice any dry powder, add a little more water.
- Use a stick to stir the mixture to release any air bubbles.
- Adjust the post into the correct position, using a spirit level to ensure the post is straight before the post mix begins to set.
Tips:
- It’s a good idea to wear a face mask and gloves when using post mix to prevent dust irritation.
- To prevent water from collecting at the base of the post, it’s a good idea to ensure that enough concrete is poured so that it rises slightly above ground level.
- Post mix shouldn’t be mixed using your hands or a machine.
Where To Buy Post Mix Concrete
We stock Post Mix Concrete in 20kg handy bag that is suitable for all types of concrete, wooden and metal posts.

Post Mix Concrete Common Questions
How long does Post Mix take to set?
The mixture will first begin to stiffen in as little as 1-2 minutes. You can expect Post Mix to set within 5-10 minutes after adding water to the mix.
Before applying any stress or pressure to the post, it is recommended that you allow at least 4 hours for it to fully set.
To put this into perspective, standard concrete can take anywhere from 24-48 hours before the mixture fully sets.
Is Post Mix Concrete expensive?
Post mix concrete can save costs in a couple of ways:
- No cost of a cement mixer.
- The 20kg handy bags means you can buy as you need which reduces wastage.
How much Post Mix do I need for a fence post?
The amount of post mix needed for a fence post will vary depending upon the depth and width of the hole.
In general, for a standard fence post it is recommended to use 1 1/2 – 2 bags of of Post Mix.
Can I mix Post Mix in a bucket?
Due to the fast-setting process of Post Mix Concrete, you should never mix this product in a bucket. You should mix Post Mix with water directly into the hole that you are working on.
How To Use Post Mix Conclusion
Post Mix is an excellent product that is very versatile and extremely fast setting in comparison with standard concrete.
Post Mix is easy to use. Just ensure you follow the step-by-step instructions on how to use post mix concrete, and you should have no issues at all.
How To Lay Turf: [An Ultimate Guide] + Tips & Aftercare
If your lawn is looking old and patchy, then you may have made the decision to upgrade to a nice, lush green lawn.
If this is the case then you will need to know how to lay turf. Laying turf is not is simple as you may think.
There is a step-by-step process and some important tips and tricks that you will need to know for the turf laying process to be a success.
Whether you are looking to patch a small area, or cover a large space in your back garden, this guide will teach you how to lay turf, preparation before you begin, tools required for the job and a crucial aftercare guide to ensure your lawn stays healthy.
Let’s dive straight in!
The Benefits Of A Lawn
A lawn is not just for a natural. aesthetical appearance. Believe it or not, there are many surprising benefits to having a lawn and turfed areas.
- Cooling Effect: Natural turf stays cooler by up to 30 degrees in hot weather in comparison to harder landscaping surfaces.
- Air Quality/Oxygen: Natural turf has the ability to absorb carbon dioxide, and produce oxygen which is released into the atmosphere. A healthy lawn measuring 250m square has the ability to produce enough oxygen for a family of 4. Turf also traps dust.
- Absorbs Water: Turf does an excellent job of absorbing rainfall and slowing down the flow of water to prevent flooding.
- Stress Emotional Wellness: It’s proven that natural green spaces can reduce stress by lowering blood pressure and heart rate.
- Adds Value: Green space such as turf can add value to a property.
- Hygienic: Lawns have a self-cleaning surface through the growing and respiring process.

What Time Of Year Is Best To Lay Turf?
The best time to lay turf is either early spring or early to mid-autumn when quality of the soil is at it’s best. The best conditions for laying turf is when the soil is not too wet. You can lay turf pretty much any time of the year except for when there is frost on the ground.
Lawn Planning And Preparation
Before you even think about purchasing turf, it’s important that the whole process is planned out including measurements and making sure you have all of the correct tools for the job. Let’s take a look in more detail.
Lawn Measurements
To avoid buying too much or too little turf, it’s important to calculate exactly how much you will need. At TW Aggregates, our turf is sold in 1 SQ meter rolls. We have a turf calculator that will tell you exactly how much turf you will need to order, based upon your measurements.
How To Measure A Square Or Rectangular Lawn
Simply measure the length and width in meters and multiply the two numbers together. So far example, if it were 12(m) x 12(m), you would need to order 144 SQ meters of turf (12 x 12 = 144). Or you can simply put the measurements into our turf calculator where it will work it out for you.
How To Measure A Circular Lawn
The first measurement you will need is the radius. To get this, simply a straight line from the centre of the circle to the outside of the circle. You will then multiply this number by pi (3.142). This will then give you the area of a circular lawn.
How To Measure An Irregular Lawn
The best way to calculate this is to split the irregular lawn up into smaller squares and circles using the other two methods, which is then added together to get the overall area. An educated guess may be required on some areas, and it is always best to order 5% more turf than required.

Recommended Tools For Laying Turf
In order to successfully lay turf, a number of different tools are required:
- A sharp spade or turf cutting tool
- Wheelbarrow
- Rake
- Garden fork
- Gardening gloves
- Hose pipe
- A sharp knife
- Some scaffolding planks
- Topsoil (if required)
- Weed killer (if required)
How To Remove An Existing Lawn
An important aspect of the overall turf laying process is ground preparation. This requires a bit of time, but the benefits are a successful and healthy lawn that you can enjoy for many years.
It’s not a good idea to lay fresh turf onto an existing lawn, as this can prevent the turf from rooting correctly. So if you have an existing lawn, you will firstly need to remove it.
Method 1: How To Dig Up A Lawn using A Shovel
- The first step is to mow your lawn. make sure your mower is on the lowest setting.
- You will then need to water the lawn and the wait a couple of days.
- Cut the turf into long strips at around 4 inches deep using a shovel.
- Use a hose to water again.
- Over the next couple of weeks, keep an eye on the area and remove any weeds that appear.
Using a sod cutter:
You may want to use a sod cutter on your lawn. To do this, simply follow the first two steps above, and then use the sod cutter on your lawn that will cut sections at 12 to 18 inches wide.
- Each section that is cut should be rolled up and relocated.
- The grass-side-down sod should be spread with around 2 to 4 inches of compost.
- Till the soil with a rototiller once the sod has turned brown and dried.
Using a rototiller:
This machine basically churns up turf and topsoil to around 5 to 6 inches deep.
- You will generally need around two passes on each section of the lawn in an overlapping manner.
- Once completed, use around an inch of compost and till it into the soil.
Method 2: Solarisation
This method works well if you live in a region that’s very warm and sunny. Here’s the process:
- Mow your lawn using the lowest setting.
- Thoroughly water the grass using a hose.
- Plastic sheeting should be used to cover the entire lawn. You can use rocks to anchor the sheeting in place.
- This should be left in place for four to eight weeks. The warmer and sunnier it is, the quicker this process will happen.
- Remove the plastic sheeting.
Tip: This same process will work even if the weather is cooler. To do this, simply use black plastic sheeting instead of the clear plastic. This works because it will block the sunlight and prevent photosynthesis.
Checking The Depth And Quality Of Your Topsoil
The topsoil should have a depth of around 100mm to 150mm. This should be levelled using a rake. A soil improver can be used on existing soil to improve the quality.
If you need to purchase more soil, we recommend our TS1 Top Soil.
Levelling The Ground
To help get the most out of your new turf, it’s important that the ground is level.
To the eye, the ground may appear to be level, but this isn’t always the case. You’ll find that there are always areas that need some work.
Here’s how to level the ground:
- The soil needs to be loosened up by either digging or rotovating.
- Remove any debris such as stones or weeds.
- Walk over the entire area to compact the soil.
- Fill in any dips or hollows.
- Continue to rake and fine tune the soil until it is fine and even.
- Water the soil a few days before your turf arrives.
Tip: No heavy equipment such as roller should be used on the soil as this will cause the soil to compact too much.
Ordering Turf
Once you are sure the area is 100% prepared and complete, you are now ready to order the turf.
You can order our turf here where we also have a calculator that will tell you exactly how much turf you will need to order. You can check the section above in this guide where we show you how to measure a lawn.
When your turf arrives, unroll the turf and keep it in a shaded area to allow the air to reach the grass. It’s always best to lay the turf as soon as possible for best results, especially in warmer months.
If you need any extra soil for your garden, you can try our Screened Top Soil TS1.
How To Lay Turf: Step-By-Step
In this section we are going to show you the step-by step process on how to lay turf.
Step 1
It’s best to start off the laying process on a straight edge of your garden such as a border. You can lay the turf out next to a plank if there isn’t a border.
You should leave some excess on the first roll which can be trimmed using a long-bladed garden knife. Using both hands, gently press the turf into the ground.
For Circular Lawns: Start from the middle and work your way out.
Step 2
Continue to lay each roll directly after the next, ensuring that the edges are parallel and closely butted up against one another using both hands to prevent any gaps.
Continue this process until you have finished an entire row.
Tip: Use a board to stand on to prevent leaving footprints on your lawn.

Step 3

It’s now time to start working on the next row of turf. The key here is to stagger each patch of turf next to the previous row.
If done correctly, the middle of the patches should line up with the seams from the previous and next row, just like a brickwork design.
This is to ensure a more even coverage, and to prevent the turf from drying out.
Step 4
Continue the above steps until you have covered the entire area. You should now do two things:
- Perfecting Your Lawn: Take a sharp knife or spade and go around trimming any cleaning up any excess turf.
- Pack Down The Turf: Use the back of a rake or spade to press down each patch of turf. Start from one corner and make sure you go over each row.
Step 5
It’s important to thoroughly water the turf the same day it is laid to help the roots establish and to prevent the turf from drying out.
Be careful not to water the turf too much, which can cause the turf to separate from the soil beneath it.
The correct way to do is is to water until it begins to puddle, then let the water soak in so it it absorbs into the soil below.
Laying Turf To A Curve
If you are laying turf on a circular lawn or to a curve, it is virtually the same process as it would be for a rectangular or square lawn.
The only difference is that you will need to slightly overlap the patches of turf until it forms the curve. You would then trim any excess until you have a clean curve.
Aftercare: How To Care For Your New Lawn
What’s just as important as knowing how to lay turf is the aftercare and knowing what to in the weeks ahead after your new lawn is down.
Keep Off The Grass
You should avoid walking on your new turf for around 2 to 3 weeks (This also includes pets).
This is because it takes it takes around this length of time for the roots of the new turf to completely root into the soil. Walking on the grass can cause disruption to this process.
How to test that the turf is rooted:
Take a corner of your new turf and gently attempt to lift it up. If it lifts then then hasn’t correctly rooted. If it doesn’t move then the rooting process is successful.
Watering
It’s important to water newly laid turf to ensure that the rooting process is a success. The frequency of watering will depend upon the time of year and how much rain is forecast.
Here are some tips to follow:
- The First Week: Water once per day (normal weather conditions), twice per day (during hot weather) or if there’s a lot of heavy rain during the day, this will be enough and there is no need to water. Once per day is also enough during spring and autumn months.
- Weeks 2 – 3: Water around 2 – 3 times a week.
- Weeks 4 – 6: The watering frequency can be reduced to 1 – 2 times per week.
- Best Time To Water: Make sure to water either in the evening or early morning. This is to ensure that the water is fully absorbed by the soil and not evaporated by the sun before it has chance to do this.
- Signs Of Dying Turf: If you notice your turf is either curling or turning brown, you should water immediately.
Feeding
Feeding your turf is another essential step to ensure that you develop a healthy and vibrant lawn. Here are some tips to follow:
- Your lawn will not need feeding until 6-8 weeks if you used pre-turfing soil or pre-urfing fertiliser.
- During the growing season, use a balanced fertiliser on the lawn every four to six weeks.
Mowing
When it comes to mowing your newly laid turf, here are some tips you can follow:
- Before you cut your grass for the first time, it’s always best to check that the turf has fully rooted. To do this, simply lift the corner of the turf.
- You should mow your lawn within 1-2 weeks of the turf being laid if your turf has been laid in the summer.
- To avoid stressing the grass on the first mow, set your lawn mower to the highest and make sure the blades are sharp.
- Mow the lawn regularly during spring, summer and autumn.
- Grass will grow at a slower pace during the water months, so only cut the grass if it is visibly growing.
- The height of the cut can gradually be reduced once your lawn becomes fully established.

Ready To Order?
You should now know the correct process of how to to lay turf, and how to look after your lawn once it has been laid. Once you have removed your existing lawn and fully prepped the area, you can now order your turf.
How To Lay Turf Conclusion
As you can see, there are many benefits to having a lawn, and with a bit of planning and preparation, you can easily install a new lawn yourself.
Just make sure to remove your existing lawn and fully prep the area before you order your new turf. This is because the turf will need to be laid as soon as possible.
Simply follow the step-by-step instructions in our how to lay turf guide, and then use the aftercare tips to ensure the end result is a vibrant and healthy lawn.