Types Of Garden Stones: Choosing The Perfect Aggregate
Explore the world of landscaping and discover the myriad ‘Types of Garden Stones’ that can breathe life and character into your outdoor haven.
In this insightful guide, we’ll take you on a journey through the enchanting realm of garden stones, unveiling their diverse forms, unique features, and how to harness their beauty to transform your garden into a captivating oasis.
From classic choices like gravel and chippings to the grandeur of large garden stones, you’ll uncover the secrets of selecting the perfect stones to suit your style and elevate your landscaping game.
Join us as we delve into the art of garden stone selection, learning about their individual strengths, applications, and the magic they bring to your green sanctuary.
Types Of Garden Stones
Gravel

Gravel, a beloved favourite, offers a vast palette of colours, sizes, and textures that can cater to the most diverse landscape designs.
From the sleek and modern Polar White to the inviting warmth of Golden Gravel, and even the earthy charm of chestnut Pea or the sophistication of Flamengo, gravel has a spectrum that suits any garden vision.
In the world of natural materials, gravel brings its unique character, varying notably in size. For expansive landscaping or driveways, the chunkier 14-20mm gravel reigns supreme, offering a robust foundation.
On the flip side, for pathways where comfort underfoot matters, the smaller and rounded Gravel 10mm is the ideal choice.
When it comes to driveways, 20mm Gravel takes the lead, thanks to its angular shape that naturally interlocks, making it not only beautiful but also practical for driving.
Now, let’s delve into the delightful advantages of gravel. Its versatility knows no bounds, fitting seamlessly into a wide array of landscaping projects. Lay it with minimal preparation, and you’ll revel in its easy maintenance. The natural knack of gravel for weed suppression is a boon for any gardener, freeing you from the relentless battle against unwanted green invaders.
But the beauty of gravel doesn’t stop there. It adds a captivating final touch to water features and wildlife ponds. Picture this: mixing and matching various gravel colours and shades to create a chic, pond-edge masterpiece. It’s all about elevating your garden aesthetic effortlessly.
So, whether you’re crafting a serene sanctuary or a vibrant outdoor haven, gravel is your trusted companion, offering not just functionality but also a touch of elegance to your landscape canvas.
Pros:
- Versatile: Gravel is incredibly versatile and can be used for pathways, driveways, or as a ground cover around plants.
- Excellent Drainage: Its permeable nature allows rainwater to seep through, reducing runoff and preventing puddles.
- Low Maintenance: Gravel is easy to maintain, requiring periodic raking and replenishment to keep it looking fresh.
- Cost-Effective: It’s often an affordable choice compared to other garden stones.
Cons:
- Movement: Gravel can shift and migrate over time, requiring occasional levelling.
- Weed Growth: Weeds may sprout through the gravel, necessitating weed control measures.
- Difficulty for Mobility Aids: It’s not the best choice for paths where wheelchairs or strollers need easy access.
Slate Chippings
Slate chippings emerge as the versatile, eco-friendly solution to elevate your garden’s aesthetics. They’re the go-to choice for enhancing various garden areas, from rockeries to ponds, borders to driveways.
What’s remarkable about 20mm Slate Chippings is their flatness, providing a comfortable and attractive surface for pathways that invite leisurely strolls.
When you opt for slate chippings, you’re not just adding beauty to your garden but also making an eco-conscious choice. These chippings are classified as recycled material, originating as by-products of roofing slate manufacturing.
This means you’re contributing to a more environmentally friendly garden space compared to using other garden stones.
Slate comes in an enticing range of natural colours, including the rich hues of plum, calming greens, deep blues, and the elegant graphite grey. The versatility of slate extends to its sizing options, offering you flexibility in design.
One of the standout advantages of incorporating slate chippings into your garden is their exceptional weed control capabilities.
By choosing slate, you’re not just creating a beautiful garden; you’re also ensuring that unwanted weeds stay at bay, giving your garden a neat and tidy appearance all year round.
Pros:
- Decorative: Chippings come in various colours and sizes, making them a decorative choice for garden borders and pathways.
- Low Maintenance: Similar to gravel, chippings are relatively low-maintenance and require periodic raking.
- Natural Appearance: They can give your garden a natural, rustic appearance.
- Weed Control: When properly installed, chippings can help suppress weed growth.
Cons:
- Sharp Edges: Some chippings can have sharp edges, which may not be suitable for play areas or high-traffic zones.
- Occasional Replacement: Over time, chippings may break down and require replenishing to maintain their appearance.
- Limited Load-Bearing Capacity: Chippings are not ideal for heavy-duty applications like driveways.
Check out our range of decorative aggregates, including slate chippings here.
Cobbles & Pebbles
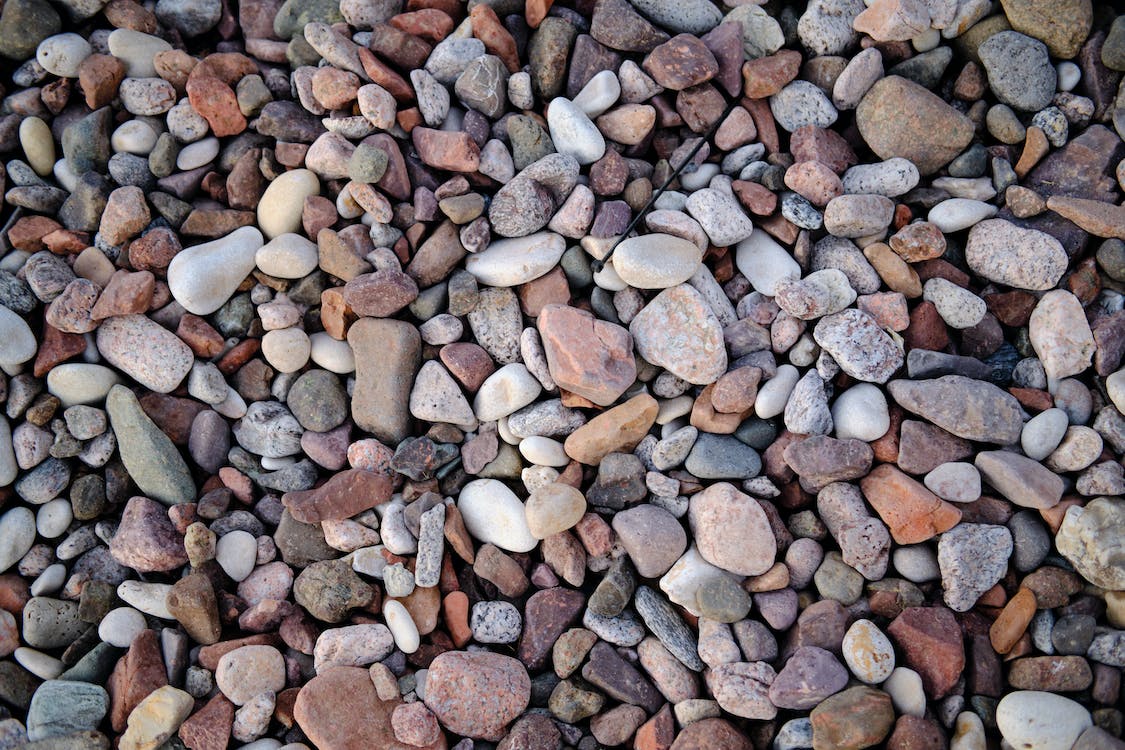
Cobbles and pebbles, these larger stones, distinguish themselves with a smooth, rounded finish, adding an element of elegance to any garden.
Picture them as the stylish, eye-catching additions that transform your outdoor space into a visual delight.
Their versatility knows no bounds, whether you’re creating a captivating rockery formation, infusing designer aesthetics into borders, accentuating the charm of ponds, aquatics, or elevating the allure of planting beds.
But where cobbles and pebbles truly shine is in stone garden water features. Their smooth texture, akin to polished gems, sparkles and glistens magnificently when kissed by water.
When it comes to sizing, pebbles typically range from 20-60mm, while cobbles step up the game with sizes ranging from 40-100mm.
The allure of these stones lies in their natural shapes, forged by the ceaseless caress of flowing water, resulting in their distinctive rounded forms.
If your garden dreams involve ornate decorative borders or the soothing presence of an attractive water feature or pond, look no further.
Cobbles and pebbles are the perfect ingredients to bring your vision to life, infusing elegance and a touch of nature into every corner of your outdoor haven.
Pros:
- Aesthetic Appeal: Cobbles and pebbles offer a visually appealing addition to your garden. Their smooth, rounded finish lends a touch of elegance and natural beauty to your outdoor space.
- Versatility: These stones are incredibly versatile. They can be used to create captivating rockeries, define borders, enhance the aesthetics of ponds and water features, or add texture to planting beds.
- Glistening Water Features: Cobbles and pebbles are particularly popular for water features due to their smooth texture. When wet, they glisten beautifully, creating an enchanting and soothing effect.
- Natural Colour Tones: Certain types, like Scottish Cobbles and Pebbles, reveal their natural colour tones when in contact with water, enhancing their beauty and appeal.
- Diverse Sizing: Pebbles typically range from 20-60mm, while cobbles come in larger sizes, ranging from 40-100mm. This diversity in sizing allows for various design possibilities.
- Natural Origins: The rounded shapes of cobbles and pebbles are a result of natural processes, where they’ve been smoothed by flowing water, adding an authentic touch to your garden.
Cons:
- Heavyweight: Cobbles and pebbles can be quite heavy, which may require additional effort during installation and make them less suitable for certain applications.
- Cost: Depending on the type and quantity, these stones can be relatively expensive compared to other landscaping materials, which might impact your landscaping budget.
- Limited Load-Bearing Capacity: While they’re excellent for decorative purposes, cobbles and pebbles are not ideal for high-traffic areas or as a foundation for heavy structures like driveways.
- Maintenance: Over time, they may shift or require levelling, especially in areas with heavy rain or foot traffic, necessitating periodic maintenance.
- Weed Growth: The gaps between cobbles and pebbles can sometimes allow weed growth, which might require weed control measures to maintain a tidy appearance.
Large Garden Stones & Feature Stones
Embrace the grandeur of your garden! A truly stunning garden is incomplete without a captivating focal point, and large garden stones are your key to achieving this splendid effect.
When we say large garden stones, we’re talking about a diverse range, from majestic boulders that command attention to artfully shaped rockery stones, mesmerizing feature stones, and even chic slate planters.
Imagine this: Your garden boasts shaded areas where the struggle to grow plants is real. Here’s where a rockery or a statement stone feature swoops in to transform that empty canvas into a masterpiece.
Boulders and rockery stones, available in an array of shapes and sizes, from jagged and angular to softly rounded, offer endless possibilities for adding character to your garden.
Part of the delightful journey of designing with large stones is the art of placement. You can opt for a single grand specimen stone that stands as a majestic soloist, drawing all eyes to its beauty.
Alternatively, you can gather a cluster of feature stones, crafting an ensemble that tells a story of texture and charm.
For an extra splash of vibrancy and texture, consider spreading decorative gravel or infusing vibrant plantings between these stately stones.
It’s all about infusing life, colour, and intrigue into your garden’s landscape.
Pros:
- Striking Focal Points: Large garden stones and feature stones can serve as stunning focal points in your garden, adding visual interest and depth.
- Customization: They allow for creative and customized landscaping designs.
- Durability: Properly placed large stones can last for generations, requiring minimal maintenance.
Cons:
- Heavy Installation: The placement of large stones typically requires heavy machinery and professional installation.
- Cost: Acquiring and installing large stones can be costly, especially for unique or rare specimens.
- Limited Usability: Large stones are best used for specific aesthetic or structural purposes rather than widespread coverage.
Choosing the Right Garden Stones
Selecting the perfect garden stones for your landscaping project requires thoughtful consideration.
The choice of stones should align with your overall design, budget, and long-term maintenance preferences.
Considerations for Selecting the Perfect Stones
Before you dive into choosing garden stones, it’s essential to evaluate your specific needs and preferences. Consider the following factors:
- Intended Use: Determine the primary purpose of the stones – for walkways, patios, borders, or decorative accents.
- Climate: Think about your local climate conditions, as some stones may be more suitable for certain environments.
- Budget: Establish a budget for your landscaping project, and explore stone options that fit within your financial constraints.
- Aesthetic Appeal: Consider the look and feel you want to achieve in your garden, whether it’s rustic, modern, or something in between.
- Maintenance: Assess how much time and effort you’re willing to invest in stone maintenance, as some materials require more care than others.
- Sustainability: If environmental considerations are a priority, research eco-friendly stone options that minimize your ecological footprint.
By carefully weighing these factors, you can narrow down your choices and make an informed decision regarding the selection of garden stones that best suit your needs and preferences.
Installation and Maintenance
Proper installation and maintenance are crucial to ensure the longevity and beauty of your garden stones. In this section, we’ll explore essential guidelines for both aspects of stone care.
Proper Installation Techniques
Installing garden stones correctly is vital to their performance and durability. Here are some key steps to consider:
- Foundation Preparation: Ensure that the base beneath the stones is well-compacted and properly graded to prevent settling and uneven surfaces.
- Edge Restraints: Use edge restraints, such as metal or plastic borders, to keep the stones in place and prevent shifting over time.
- Spacing and Alignment: Pay attention to spacing and alignment to create visually pleasing patterns and allow for proper drainage.
- Proper Bedding Material: Choose the appropriate bedding material, such as sand or gravel, to provide stability and support for the stones.
Maintaining the Beauty of Garden Stones
Maintaining the appearance of your garden stones is relatively straightforward with regular care and attention. Here are some tips for keeping them in top condition:
- Regular Cleaning: Sweep or hose down the stones regularly to remove dirt, debris, and organic matter. For stubborn stains, use a mild detergent or stone-specific cleaner.
- Weed Control: To prevent weeds from growing between the stones, consider using landscape fabric or applying an appropriate weed inhibitor.
- Sealing: Some stone types benefit from sealing to protect against staining and moisture penetration. Consult with a professional to determine if sealing is necessary for your specific stones.
- Repairing Damages: Address any cracked or damaged stones promptly to prevent further deterioration. Replacing a damaged stone can help maintain the integrity of your landscape.
Taking the time to install garden stones correctly and providing routine maintenance ensures that your outdoor space remains beautiful and functional for years to come.
Functional Uses of Garden Stones
Garden stones serve various functional purposes in landscaping, enhancing both the practicality and aesthetics of your outdoor space. In this section, we’ll explore some common uses of garden stones.
Creating Walkways and Pathways
Garden stones are often used to create charming walkways and pathways throughout your landscape.
Whether you prefer a formal brick pathway or a more natural stone-stepping path, these features add structure and guide visitors through your garden.
Pathways can be designed to highlight specific garden areas, lead to focal points, or simply provide a pleasant journey through your green oasis.
Garden stones are available in various sizes and shapes, allowing you to create patterns and designs that match your garden’s style.
Stunning Garden Borders and Edging
Garden borders and edging play a crucial role in defining different garden areas, keeping plants in check, and preventing soil erosion.
Garden stones are an excellent choice for creating borders and edging due to their durability and aesthetic appeal.
You can use larger stones to create raised flower beds or retaining walls, while smaller stones or pebbles can define the edges of your garden beds.
These borders not only add structure but also serve as a visual transition between different garden elements, enhancing the overall aesthetics of your landscape.
Stone Accents in Water Features
Water features such as fountains, ponds, and waterfalls are brought to life with the addition of garden stones. These stones create a natural look and help integrate the water feature seamlessly into your garden design.
By strategically placing garden stones in and around your water feature, you can mimic the appearance of a natural streambed or riverbank.
This not only enhances the visual appeal but also provides a habitat for beneficial aquatic plants and wildlife.
Incorporating garden stones into your landscape design not only adds functionality but also contributes to the overall beauty and ambiance of your outdoor space. Next, we’ll explore how decorative stones can infuse personality into your garden.
Adding Personality with Decorative Stones
Decorative stones are a versatile and creative way to personalize your garden and make it uniquely yours.
In this section, we’ll delve into the various ways you can use decorative stones to add character and charm to your outdoor space.
Using Pebbles and River Rocks
Pebbles and river rocks are small, smooth stones that come in a range of colours and sizes. They can be used in various creative ways, such as:
- Mulch Alternative: Replace traditional mulch with river rocks or pebbles to create a low-maintenance and visually appealing ground cover.
- Zen Garden Accents: Arrange pebbles in intricate patterns or use them to create a calming Zen garden.
- Water Feature Enhancements: Place river rocks around the base of fountains or in the bed of a pond to enhance the natural appearance of water features.
- Accentuating Planters: Use pebbles and river rocks to fill the space around potted plants or succulents, adding a polished look to your garden.
- Stepping Stones: Create whimsical pathways or stepping stone arrangements using flat river rocks that invite exploration in your garden.
The versatility of pebbles and river rocks allows you to experiment with different designs and styles, making your garden truly unique.
Decorative Stone Arrangements
Decorative stones can be artistically arranged to create eye-catching focal points or intriguing designs within your garden. Consider these creative ideas:
- Rock Gardens: Craft a captivating rock garden with a variety of stones, showcasing different shapes, sizes, and textures. Combine them with drought-tolerant plants for a low-maintenance and visually striking garden.
- Mosaic Art: Break larger stones into smaller pieces and use them to create intricate mosaic designs on garden walls, planters, or garden furniture.
- Stone Sculptures: Commission or create your own stone sculptures to serve as captivating focal points within your garden. These can range from abstract sculptures to animal figures, adding personality to your outdoor space.
Decorative stone arrangements allow you to express your creativity and infuse your garden with a sense of artistry and wonder.
Incorporating Sculptures and Focal Points
Garden stones can complement other artistic elements, such as sculptures and garden ornaments.
When strategically placed, stones can draw attention to these focal points and enhance their visual impact.
Consider placing stones around a sculpture’s base or creating a stone pedestal to elevate the artwork. This not only highlights the sculpture but also grounds it within the natural landscape.
Garden stones can also be used to frame and accentuate other ornamental elements, such as birdbaths, trellises, or outdoor seating areas.
By incorporating decorative stones and artful arrangements, you can infuse personality and charm into your garden, making it a reflection of your unique style and preferences.
Environmental Considerations
As stewards of the environment, it’s essential to consider the ecological impact of your landscaping choices. In this section, we’ll explore environmentally friendly options when it comes to garden stones.
Eco-Friendly Stone Choices
If you’re passionate about sustainability, there are eco-friendly stone choices that align with your values. These options include:
- Reclaimed Stones: Opt for reclaimed or salvaged stones from demolition sites or historical buildings. Repurposing these stones not only reduces waste but also adds character and history to your garden.
- Local Stone Sourcing: Choose stones that are sourced locally to reduce the environmental footprint associated with long-distance transportation. Local stones are often readily available and can support regional economies.
- Recycled Materials: Consider using recycled stone products, such as crushed concrete or recycled glass aggregate, as sustainable alternatives for pathways and landscaping features.
By selecting eco-friendly stone options, you can minimize the environmental impact of your landscaping project while still enjoying the beauty and functionality of garden stones.
Permeable Pavers for Sustainable Landscaping
Permeable pavers are an environmentally responsible choice for hardscaping elements like driveways and patios.
These pavers allow rainwater to seep through the gaps between stones, reducing runoff and helping recharge groundwater.
The environmental benefits of permeable pavers include:
- Storm water Management: Permeable pavers help mitigate flooding and erosion by allowing rainwater to infiltrate the ground slowly.
- Water Quality Improvement: They filter out pollutants from rainwater, enhancing water quality as it returns to the soil.
- Sustainable Landscaping: Permeable pavers promote sustainable landscaping practices by supporting healthy soil and vegetation.
Incorporating permeable pavers into your garden design is a proactive step towards sustainable and environmentally conscious landscaping.
Garden Stone Safety
Safety should be a top priority when using garden stones in your outdoor space, especially if your garden is frequented by children and pets.
In this section, we’ll explore safety measures to consider.
Non-Slip Solutions for Pathways
Slippery pathways can pose a safety hazard, particularly during wet or icy conditions. To prevent slips and falls, consider the following non-slip solutions:
- Textured Surfaces: Choose garden stones with textured surfaces or those specifically designed for slip resistance. These stones provide better traction underfoot.
- Anti-Slip Coatings: Apply anti-slip coatings or treatments to existing stone surfaces to enhance their grip.
Prioritizing non-slip solutions ensures that your garden remains safe for everyone, even in adverse weather conditions.
Child and Pet-Friendly Stone Options
When designing your garden, it’s crucial to select stones that are safe for children and pets. Some considerations include:
- Smooth Edges: Opt for garden stones with smooth edges to prevent injuries from sharp corners or edges.
- Non-Toxic Materials: Ensure that the stones you choose are non-toxic and safe for accidental contact or ingestion by children and pets.
- Securely Installed Stones: Properly install garden stones to prevent tripping hazards or loose stones that could pose a risk.
Creating a safe environment within your garden allows everyone, including children and pets, to enjoy the outdoor space without worry.
Fire-Safe Stones for Outdoor Cooking Areas
If your garden includes an outdoor kitchen or cooking area, it’s essential to select fire-safe stones.
These stones can withstand high temperatures without cracking or deteriorating, ensuring your outdoor cooking experience remains safe and enjoyable.
Popular fire-safe stone options include natural stones like granite and certain types of concrete pavers designed for use in outdoor kitchens.
Be sure to consult with a professional when designing outdoor cooking areas to ensure compliance with safety standards.
Prioritizing safety in your garden design ensures that your outdoor space remains a haven of enjoyment for everyone, free from potential hazards.
The Psychology of Garden Stones
The choice of garden stones goes beyond aesthetics; it can also impact the emotional atmosphere of your outdoor space.
In this section, we’ll delve into the psychology of garden stones and how they can influence the mood and ambiance of your garden.
Emotional Impact of Stone Selection
The type, colour, and arrangement of garden stones can evoke specific emotions and feelings within your garden. For example:
- Tranquillity: Soft, muted colours and gentle curves in stone pathways can create a sense of calm and relaxation.
- Elegance: Rich, dark stones and symmetrical patterns can evoke a feeling of sophistication and luxury.
- Playfulness: Brightly coloured pebbles and irregular arrangements can add a playful and whimsical touch to your garden.
By understanding the emotional impact of stone selection, you can intentionally design your garden to elicit the desired feelings and moods, enhancing your overall outdoor experience.
Creating a Tranquil Oasis with Stones
For many, a garden serves as a sanctuary, a place to escape the stresses of daily life. Garden stones play a pivotal role in creating a tranquil oasis within your outdoor space. Consider the following design elements:
- Water and Stones: The combination of water features, such as ponds or fountains, with carefully placed stones can create a soothing and serene atmosphere.
- Zen Gardens: Embrace the principles of Zen gardening by using simple arrangements of stones, gravel, and minimalistic plantings to cultivate a sense of inner peace.
- Seating Areas: Design cosy seating areas amidst your garden, using stone benches or natural stone as seating. This invites contemplation and relaxation.
The harmonious integration of garden stones into your landscape design can provide a haven of tranquillity, allowing you to escape the hustle and bustle of everyday life and find solace in your garden.
Stones as a Reflection of Your Personality
Your choice of garden stones can be a reflection of your personality and style.
Just as art and décor in your home reveal your tastes, the stones in your garden can convey your unique identity.
For instance:
- Bold and Creative: If you’re adventurous and creative, consider incorporating unusual stone shapes and colors into your garden design, making it a bold expression of your personality.
- Classic and Timeless: If you prefer timeless elegance, opt for traditional stone choices like granite or brick pavers, creating a garden that exudes classic charm.
- Minimalistic and Zen: A penchant for simplicity and inner calm might lead you to create a Zen-inspired garden with carefully selected stones and minimalistic elements.
Expressing your personality through your garden allows you to connect with your outdoor space on a deeper level, making it a place of personal significance and comfort.
Inspiring Garden Stone Ideas
To spark your creativity and inspire your garden stone projects, let’s explore a few enchanting garden design ideas that incorporate various types of stones.
Japanese Zen Gardens with Stone Features
Create a serene and meditative retreat with a Japanese Zen garden. Use smooth river rocks, carefully raked gravel, and strategically placed stones to symbolize elements like islands and mountains.
Add a central stone lantern or a bamboo water feature to complete the Zen ambiance.
A Japanese Zen garden is a perfect sanctuary for mindfulness and contemplation, offering a space for inner peace and tranquillity.
Mediterranean-Inspired Stone Courtyards
Embrace the allure of the Mediterranean by designing a stone courtyard reminiscent of Southern Europe.
Use rustic limestone or tumbled travertine to create an old-world charm. Plant aromatic herbs like lavender and rosemary in between the stones, infusing the air with delightful scents.
A Mediterranean-inspired stone courtyard provides a cosy and inviting space for al fresco dining and leisurely gatherings.
English Cottage Gardens with Cobblestone Paths
Capture the romantic essence of an English cottage garden with cobblestone pathways and borders. Cobblestones, with their irregular shapes and aged appearance, lend a timeless and charming character to your garden.
Plant a profusion of colourful flowers to complement the rustic stone surfaces.
An English cottage garden exudes warmth and nostalgia, offering a welcoming retreat filled with the beauty of nature.
Budget-Friendly Garden Stone Projects
Landscaping on a budget doesn’t mean compromising on style and quality. In this section, we’ll explore budget-friendly garden stone projects that allow you to transform your outdoor space without breaking the bank.
DIY Stone Projects for Small Budgets
If you have a limited budget, consider these do-it-yourself (DIY) stone projects:
- DIY Stone Pathways: Create charming garden pathways by collecting free or low-cost stones from local sources, such as construction sites or friends’ yards. Arrange them in an appealing pattern to guide visitors through your garden.
- Stone Mulch: Replace traditional mulch with small, local stones or pebbles. Not only is this cost-effective, but it also reduces the need for frequent mulch replacement.
- Stone Borders: Use rocks or stones found in your area to create natural garden borders. These can define garden beds and enhance your landscape without the expense of purchased materials.
These DIY projects are not only budget-friendly but also allow you to infuse your garden with a personalized touch.
Repurposing Old Stones for New Beauty
Repurposing old or salvaged stones is an eco-friendly and budget-conscious way to enhance your garden:
- Reclaimed Stones: Scout for reclaimed stones from demolition sites or local salvage yards. These stones often come at a fraction of the cost of new ones and add character to your garden.
- Reused Pavers: If you have old pavers or bricks lying around, consider repurposing them for a new project. Cleaning and arranging them creatively can breathe new life into your garden.
Repurposing old stones not only saves you money but also contributes to sustainable landscaping practices.
Saving Money Without Compromising Quality
To save money without sacrificing quality, consider the following tips:
- Comparison Shopping: Compare prices from different suppliers to find the best deals on garden stones.
- Buy in Bulk: Purchasing stones in bulk can often lead to cost savings. Consider teaming up with neighbors or friends for bulk purchases.
- Mix and Match: You can achieve a unique and budget-friendly look by combining different types of stones creatively. Mix natural stones with man-made pavers to create visually appealing contrasts.
With a little creativity and strategic planning, you can create a beautiful garden that suits your budget and reflects your style.
Working with a Professional
While DIY projects are satisfying, some garden designs may require the expertise of a professional landscaper or stone mason.
In this section, we’ll explore when to consult an expert and how they can help turn your vision into reality.
When to Consult a Landscaping Expert
Consider consulting a landscaping expert when:
- Your Project Is Complex: If your garden design involves intricate stonework, multi-level terraces, or extensive hardscaping, a professional can ensure structural integrity and aesthetic appeal.
- You Need Permits: Some landscaping projects require permits or compliance with local building codes. A professional can guide you through the permitting process.
- Large-Scale Projects: For substantial projects that involve heavy machinery, extensive excavation, or drainage solutions, a professional ensures safety and efficiency.
- Time Constraints: If you have limited time for your landscaping project, hiring professionals can expedite the process and deliver faster results.
Collaborating with Stone Masons and Designers
Stone masons and landscape designers are valuable partners in creating a stunning garden. Here’s how they can assist you:
- Expertise: Stone masons are skilled in working with stone materials, ensuring precise installation and a polished finish.
- Design Vision: Landscape designers can translate your ideas into a cohesive and aesthetically pleasing garden plan.
- Project Management: Professionals can manage the logistics of your project, including sourcing materials, coordinating labor, and adhering to timelines.
Collaborating with experts can streamline the landscaping process and guarantee a successful outcome that aligns with your vision.
Frequently Asked Questions (FAQs)
FAQ 1: Can I mix different types of garden stones in my landscaping project?
Absolutely! Mixing different types of garden stones can add visual interest and depth to your landscaping. Just be sure to consider factors like colour, texture, and durability to create a harmonious blend. Experimenting with various stones can lead to stunning and unique results.
FAQ 2: How do I prevent weeds from growing between the stones?
To prevent weeds, consider using landscape fabric or a weed barrier beneath the stones. This will hinder weed growth while allowing water to drain. Additionally, applying an appropriate weed inhibitor or regularly maintaining the spaces between the stones can help keep weeds at bay.
FAQ 3: Are natural garden stones more expensive than man-made options?
The cost of garden stones can vary widely based on factors such as the type of stone, its source, and your location. In general, natural stones like granite and limestone may be more expensive than man-made options like concrete pavers. However, the durability and timeless beauty of natural stones can make them a worthwhile investment.
FAQ 4: What should I consider when choosing the colour of garden stones?
When selecting stone colours, think about the overall aesthetics of your garden. Lighter-coloured stones can create a bright and open feel, while darker stones add depth and warmth.
Consider how the stone colour complements the surrounding plants and structures to achieve a harmonious look.
FAQ 5: Can I use garden stones in a small urban garden?
Absolutely! Garden stones are versatile and can be adapted to fit any size garden, including small urban spaces.
In fact, they can visually expand the space by creating defined pathways, borders, or seating areas. Choose stones that suit the scale of your garden to maximize its functionality and charm.
Types Of Garden Stones Conclusion
In conclusion, our exploration of ‘Types of Garden Stones’ has unveiled a rich tapestry of choices to adorn your outdoor paradise.
From the versatility of gravel and chippings to the grandeur of large garden stones, we’ve journeyed through the realm of landscaping possibilities.
You’ve discovered the distinctive qualities of each stone, their ideal applications, and how they can weave magic into your garden’s design.
As you embark on your landscaping journey, armed with this newfound knowledge, remember that the choice of garden stones is not just about aesthetics but also about crafting an environment that suits your unique vision.
So, whether you’re seeking practicality, elegance, or a touch of grandeur, these ‘Types of Garden Stones’ offer you the palette to paint your outdoor masterpiece.
Now, it’s time to roll up your sleeves and bring your garden dreams to life.
Select your stones with purpose, design with creativity, and watch as your green sanctuary flourishes with the charm of these garden stones, each telling its own story of beauty and allure.
47 Low Maintenance Plants That Thrive in The Sun
Looking to transform your outdoor space into a sunlit haven? If you’re on the hunt for plants that thrive in the sun, you’ve landed in the right spot.
Welcome to a comprehensive guide where we unveil 47 exceptional low-maintenance plant varieties that not only endure, but truly flourish under the radiant embrace of the sun.
Imagine a garden teeming with life, vibrant hues, and dynamic textures – all while requiring minimal upkeep. That’s the magic these sun-loving wonders bring to the table.
Whether you’re a seasoned gardener seeking to simplify your landscape or a newbie ready to embark on your green journey, these plants have your back, demanding less attention and offering more natural magnificence.
Say farewell to the woes of constant pruning and intricate care routines. With this curated selection of sun-thriving champions, you’ll unlock the secret to a stunning garden that practically tends to itself.
So, gather your gardening gear and prepare to delve into a world where the sun’s energy meets nature’s resilience.
Plants That Thrive in The Sun
1. Abelia
- Botanical Name: Abelia
- Sun Exposure: Full to Partial Sun
- Soil Type: Well-draining
- Soil pH: Neutral to slightly acidic
Abelias are versatile shrubs known for their attractive foliage and delicate, tubular flowers. They thrive in a variety of settings and make excellent additions to borders, hedges, or as standalone specimens.
The plant’s abundant flowers attract pollinators, adding a lively touch to your garden.
2. Angelonia
- Botanical Name: Angelonia
- Sun Exposure: Full Sun
- Soil Type: Well-draining
- Soil pH: Neutral
Angelonia, also called “Summer Snapdragons,” brings vibrant spikes of colour to your garden during warm months.
These heat-tolerant plants are excellent for beds, borders, and containers, and they attract butterflies while being resistant to deer and rabbits.
3. Azalea
- Botanical Name: Rhododendron
- Sun Exposure: Part Shade to Shade
- Soil Type: Well-draining, Moist
- Soil pH: Acidic (4.5-6.0)
Azaleas are renowned for their stunning clusters of flowers in a range of hues.
These acid-loving shrubs thrive in woodland gardens, and their spring blooms bring an enchanting charm to shaded areas.
4. Bearded Iris
- Botanical Name: Iris germanica
- Sun Exposure: Full Sun
- Soil Type: Well-draining
- Soil pH: Neutral to slightly alkaline
Bearded irises showcase striking, sword-like leaves and exquisite, intricate flowers.
Their bold colours and intricate patterns make them ideal for adding dramatic flair to borders, and they thrive in sunny locations with well-draining soil.
5. Black-eyed Susan
- Botanical Name: Rudbeckia
- Sun Exposure: Full Sun
- Soil Type: Well-draining
- Soil pH: Neutral to slightly acidic
Black-eyed Susans are beloved for their golden-yellow petals and dark centres.
These tough, native plants attract pollinators and thrive in a variety of conditions, making them a great choice for wildflower meadows and cottage gardens.
6. Bugleweed
- Botanical Name: Ajuga reptans
- Sun Exposure: Full Sun to Part Shade
- Soil Type: Well-draining, Moist
- Soil pH: Neutral to slightly acidic
Bugleweed is a low-growing ground cover that offers striking foliage and small, spike-like flowers.
It’s an excellent choice for edging, rock gardens, or filling in shady spots where other plants struggle.
7. Butterfly Milkweed
- Botanical Name: Asclepias tuberosa
- Sun Exposure: Full Sun
- Soil Type: Well-draining
- Soil pH: Neutral to slightly acidic
Butterfly Milkweed is a native perennial that attracts pollinators, especially monarch butterflies.
Its vibrant orange flowers and sturdy growth make it a favourite for sunny borders, wildflower gardens, and butterfly habitats.
8. Calibrachoa
- Botanical Name: Calibrachoa
- Sun Exposure: Full Sun
- Soil Type: Well-draining
- Soil pH: Neutral to slightly acidic
Calibrachoa, often known as “Million Bells,” is prized for its profusion of small, bell-shaped flowers in a variety of vibrant colours.
This trailing plant is perfect for hanging baskets, containers, and window boxes, adding cascades of beauty to your outdoor spaces.
9. Chrysanthemum
- Botanical Name: Chrysanthemum
- Sun Exposure: Full Sun to Part Shade
- Soil Type: Well-draining
- Soil pH: Neutral to slightly acidic
Chrysanthemums, or “mums,” are fall-blooming favourites, offering a rich tapestry of colours.
They can be grown as perennials or treated as annuals, bringing a splash of colour to autumn gardens, containers, and floral arrangements.
10. Coneflower
- Botanical Name: Echinacea
- Sun Exposure: Full Sun
- Soil Type: Well-draining, Sandy
- Soil pH: Neutral
Coneflowers are native wildflowers cherished for their distinctive daisy-like blooms with prominent, cone-shaped centres.
They’re not only pollinator magnets but also add a touch of rustic charm to native gardens and meadows.
11. Cosmos
- Botanical Name: Cosmos bipinnatus
- Sun Exposure: Full Sun
- Soil Type: Well-draining
- Soil pH: Neutral to slightly acidic
Cosmos dazzles with delicate, feathery foliage and cheerful, daisy-like flowers.
These fast-growing annuals bring a carefree, cottage-garden feel to your landscape, attracting bees, butterflies, and other beneficial insects.
12. Coreopsis
- Botanical Name: Coreopsis
- Sun Exposure: Full Sun
- Soil Type: Well-draining
- Soil pH: Neutral to slightly acidic
Coreopsis, or “tickseed,” boasts sunny yellow, orange, or red flowers that dance on slender stems.
These native perennials are perfect for borders, rock gardens, or naturalistic plantings, adding a splash of colour throughout the growing season.
13. Creeping Phlox
- Botanical Name: Phlox subulata
- Sun Exposure: Full Sun
- Soil Type: Well-draining
- Soil pH: Neutral to slightly acidic
Creeping Phlox forms a vibrant carpet of colour with its masses of tiny, star-shaped flowers.
It’s a stunning ground cover for slopes, rock gardens, and borders, adding dimension and texture to your outdoor spaces.
14. Daffodil
- Botanical Name: Narcissus
- Sun Exposure: Full Sun to Part Shade
- Soil Type: Well-draining
- Soil pH: Neutral to slightly acidic
Daffodils herald spring with their cheerful blooms in shades of yellow, white, and orange.
These bulbs are perfect for naturalizing in grassy areas, borders, or containers, bringing early-season colour and charm.
15. Daylily
- Botanical Name: Hemerocallis
- Sun Exposure: Full Sun to Part Shade
- Soil Type: Well-draining
- Soil pH: Neutral to slightly acidic
Daylilies are known for their stunning, trumpet-shaped flowers that come in an array of colors and patterns.
These hardy perennials are a breeze to grow and make eye-catching additions to borders, beds, and even water gardens.
16. Delphinium
- Botanical Name: Delphinium
- Sun Exposure: Full Sun
- Soil Type: Well-draining
- Soil pH: Neutral to slightly alkaline
Delphiniums stand tall with their majestic, spiky blooms in shades of blue, purple, pink, and white.
These cottage-garden classics bring vertical drama to your landscape, creating a captivating focal point.
17. Dianthus
- Botanical Name: Dianthus
- Sun Exposure: Full Sun
- Soil Type: Well-draining
- Soil pH: Neutral to slightly alkaline
Dianthus, or “pinks,” are beloved for their fringed petals and spicy fragrance.
These compact perennials are perfect for borders, rock gardens, and containers, adding a touch of charm and elegance.
18. Euphorbia
- Botanical Name: Euphorbia
- Sun Exposure: Full Sun to Part Shade
- Soil Type: Well-draining
- Soil pH: Neutral
Euphorbias are a diverse group of plants known for their unique forms and striking foliage.
From compact ground covers to architectural specimens, they add texture and interest to a variety of garden styles.
19. Fan Flower
- Botanical Name: Scaevola
- Sun Exposure: Full Sun to Part Shade
- Soil Type: Well-draining
- Soil pH: Neutral
Fan flowers are trailing annuals with fan-shaped blooms that create a cascade of colour.
They’re ideal for hanging baskets, containers, and window boxes, bringing a touch of whimsy to your garden.
20. Feather Reed Grass
- Botanical Name: Calamagrostis
- Sun Exposure: Full Sun to Part Shade
- Soil Type: Well-draining
- Soil pH: Neutral to slightly acidic
Feather Reed Grass offers elegant, vertical growth and feathery plumes that sway gracefully in the breeze.
These ornamental grasses make striking focal points in borders, and they’re equally captivating when used in mass plantings.
21. Flowering Quince
- Botanical Name: Chaenomeles
- Sun Exposure: Full Sun to Part Shade
- Soil Type: Well-draining
- Soil pH: Neutral
Flowering quince delights with its early spring blossoms in shades of red, orange, or pink.
These deciduous shrubs are fantastic for hedges, borders, or training against a wall, providing a burst of colour before the arrival of warmer days.
22. Foxglove
- Botanical Name: Digitalis
- Sun Exposure: Part Shade to Full Shade
- Soil Type: Well-draining, Moist
- Soil pH: Acidic to Neutral
Foxgloves present tall spires of tubular flowers that attract pollinators like bees and hummingbirds.
They’re a charming addition to shade gardens and woodland settings, creating a sense of enchantment with their ethereal presence.
23. Geranium
- Botanical Name: Geranium
- Sun Exposure: Full Sun to Part Shade
- Soil Type: Well-draining
- Soil pH: Neutral to slightly acidic
Geraniums, often referred to as “cranesbills,” offer a wide variety of colours and forms.
These versatile perennials are perfect for borders, rock gardens, and containers, adding a splash of colour and texture.
24. Hibiscus
- Botanical Name: Hibiscus
- Sun Exposure: Full Sun to Part Shade
- Soil Type: Moist, Well-draining
- Soil pH: Neutral to slightly acidic
Hibiscus dazzles with its large, showy flowers that come in an array of colours.
These tropical-looking plants are perfect for creating a bold focal point in your garden, attracting attention and pollinators alike.
25. Impatiens
- Botanical Name: Impatiens
- Sun Exposure: Part Shade to Full Shade
- Soil Type: Well-draining, Moist
- Soil pH: Neutral to slightly acidic
Impatiens, or “busy Lizzies,” are renowned for their vibrant, jewel-toned flowers that brighten shady spots.
These annuals are perfect for containers, borders, and hanging baskets, adding a pop of colour to dim corners.
26. Inkberry
- Botanical Name: Ilex glabra
- Sun Exposure: Full Sun to Part Shade
- Soil Type: Moist, Well-draining
- Soil pH: Neutral to slightly acidic
Inkberry is a versatile evergreen shrub known for its glossy, dark green leaves. It’s an excellent choice for hedges, foundation plantings, or as a backdrop for other flowering shrubs.
27. Lambs’ Ear
- Botanical Name: Stachys byzantina
- Sun Exposure: Full Sun
- Soil Type: Well-draining
- Soil pH: Neutral
Lambs’ Ear is cherished for its soft, silvery leaves that resemble a lamb’s ear. This low-growing perennial is perfect for edging, rock gardens, or as a ground cover, adding texture and contrast.
28. Lantana
- Botanical Name: Lantana
- Sun Exposure: Full Sun
- Soil Type: Well-draining
- Soil pH: Neutral to slightly acidic
Lantana dazzles with clusters of multicolored flowers that attract butterflies and hummingbirds. These heat-tolerant plants are ideal for containers, borders, and mass plantings, adding a tropical touch to your landscape.
29. Marigold
- Botanical Name: Tagetes
- Sun Exposure: Full Sun
- Soil Type: Well-draining
- Soil pH: Neutral
Marigolds are popular annuals known for their cheerful, daisy-like blooms in shades of yellow, orange, and red. They’re excellent companions for vegetable gardens, helping deter pests and adding a burst of color.
30. Monkey Grass
- Botanical Name: Liriope
- Sun Exposure: Full Sun to Part Shade
- Soil Type: Well-draining
- Soil pH: Neutral to slightly acidic
Monkey Grass, also known as liriope, offers tufts of grass-like foliage and charming spikes of flowers. This low-maintenance ground cover is perfect for borders, pathways, or mass plantings, adding texture and structure.
31. Pansy
- Botanical Name: Viola x wittrockiana
- Sun Exposure: Full Sun to Part Shade
- Soil Type: Well-draining, Moist
- Soil pH: Neutral to slightly acidic
Pansies are renowned for their charming, “smiling” faces and vibrant blooms that flourish in cooler seasons. These annuals are perfect for adding a burst of color to containers, borders, and even window boxes.
32. Panicle Hydrangea
- Botanical Name: Hydrangea paniculata
- Sun Exposure: Full Sun to Part Shade
- Soil Type: Moist, Well-draining
- Soil pH: Neutral to slightly acidic
Panicle hydrangeas captivate with their cone-shaped flower clusters that transform from white to pink as they age. These hardy shrubs are excellent for borders, hedges, or as standalone specimens, bringing summer elegance to your garden.
33. Peony
- Botanical Name: Paeonia
- Sun Exposure: Full Sun to Part Shade
- Soil Type: Well-draining, Moist
- Soil pH: Neutral
Peonies are perennial favorites adored for their lush, fragrant blooms in shades of pink, white, and red. These showstoppers are ideal for adding a touch of elegance and romance to borders, cutting gardens, and focal points.
34. Peppermint
- Botanical Name: Mentha x piperita
- Sun Exposure: Full Sun to Part Shade
- Soil Type: Moist, Well-draining
- Soil pH: Neutral to slightly acidic
Peppermint is a versatile herb prized for its aromatic leaves, making it a perfect addition to herb gardens, containers, or as a natural pest repellent. It’s easy to grow and offers a refreshing culinary and medicinal boost.
35. Pink Muhly grass
- Botanical Name: Muhlenbergia capillaris
- Sun Exposure: Full Sun
- Soil Type: Well-draining
- Soil pH: Neutral to slightly acidic
Pink Muhlygrass captivates with its fluffy, pinkish flower plumes that sway gracefully in the breeze. This ornamental grass is perfect for mass plantings, borders, or as a striking focal point in your landscape.
36. Poppy
- Botanical Name: Papaver
- Sun Exposure: Full Sun
- Soil Type: Well-draining
- Soil pH: Neutral to slightly acidic
Poppies are renowned for their large, delicate flowers in shades of red, orange, pink, or white. These annuals or perennials are ideal for adding a touch of whimsy and charm to cottage gardens, meadows, and borders.
37. Rosemary
- Botanical Name: Rosmarinus officinalis
- Sun Exposure: Full Sun
- Soil Type: Well-draining
- Soil pH: Neutral to slightly alkaline
Rosemary is a fragrant herb with needle-like leaves and delicate blue flowers. It’s perfect for culinary use, adding a Mediterranean touch to your garden, and attracting pollinators like bees.
38. Rose of Sharon
- Botanical Name: Hibiscus syriacus
- Sun Exposure: Full Sun to Part Shade
- Soil Type: Moist, Well-draining
- Soil pH: Neutral to slightly acidic
Rose of Sharon is a deciduous shrub with large, showy flowers in shades of white, pink, purple, or blue. These flowering shrubs are perfect for creating a summer focal point or screen in your landscape.
39. Russian Sage
- Botanical Name: Perovskia atriplicifolia
- Sun Exposure: Full Sun
- Soil Type: Well-draining
- Soil pH: Neutral to slightly alkaline
Russian Sage boasts silvery foliage and airy spikes of lavender-blue flowers. This drought-tolerant perennial is perfect for adding a touch of elegance and texture to borders, rock gardens, or even xeriscapes.
40. Salvia
- Botanical Name: Salvi
- Sun Exposure: Full Sun
- Soil Type: Well-draining
- Soil pH: Neutral
Salvias, or “sages,” come in various colors and forms, and they’re beloved for their spiky, nectar-rich flowers that attract pollinators. These versatile perennials are excellent for borders, containers, and wildlife gardens.
41. Sedum (Stonecrop)
- Botanical Name: Sedum
- Sun Exposure: Full Sun
- Soil Type: Well-draining
- Soil pH: Neutral to slightly acidic
Sedums, or “stonecrops,” offer fleshy leaves and star-shaped flowers, making them perfect for rock gardens, containers, and even green roofs. These drought-tolerant plants add texture and interest to your landscape.
42. Snapdragon
- Botanical Name: Antirrhinum
- Sun Exposure: Full Sun to Part Shade
- Soil Type: Well-draining, Moist
- Soil pH: Neutral to slightly acidic
Snapdragons enchant with their colorful, tubular flowers that resemble dragon jaws. These cool-season annuals or perennials are excellent for adding vertical interest to beds, borders, and containers.
43. Spirea
- Botanical Name: Spiraea
- Sun Exposure: Full Sun to Part Shade
- Soil Type: Well-draining
- Soil pH: Neutral to slightly acidic
Spireas are versatile shrubs known for their cascading clusters of flowers. These hardy plants are perfect for hedges, borders, or foundation plantings, adding texture and visual appeal to your landscape.
44. Sunflower
- Botanical Name: Helianthus
- Sun Exposure: Full Sun
- Soil Type: Well-draining, Moist
- Soil pH: Neutral to slightly acidic
Sunflowers bring smiles with their iconic, cheerful blooms that follow the sun’s path. These annuals or perennials are excellent for attracting pollinators, creating cut flower arrangements, and adding a touch of radiance.
45. Viola
- Botanical Name: Viola
- Sun Exposure: Full Sun to Part Shade
- Soil Type: Well-draining, Moist
- Soil pH: Acidic (4.8-5.8)
Violas grow in various colors, including white, yellow, pink, red, orange, and even black. Newer selections are cold weather tolerant, making them ideal for planting in the fall of the Lower, Middle, Coastal, and Tropical South.
Violets also grow well in rock gardens or as woodland plants.
46. Yarrow
- Botanical Name: Achillea
- Sun Exposure: Full Sun
- Soil Type: Well-draining, Poor
- Soil pH: Neutral to slightly alkaline
Yarrow offers flat clusters of flowers in shades of white, pink, red, or yellow. These drought-tolerant perennials are excellent for adding colour to wildflower meadows, borders, and cottage gardens.
47. Zinnia
- Botanical Name: Zinnia
- Sun Exposure: Full Sun
- Soil Type: Well-draining, Moist
- Soil pH: Neutral
Zinnias are cherished for their bold, dahlia-like blooms in an array of vibrant colors. These annuals are perfect for adding pops of color to borders, cutting gardens, and containers, attracting butterflies and providing vibrant summer displays.
Plants That Thrive in The Sun Conclusion
And there you have it, fellow gardening enthusiasts! We’ve traversed the lush landscapes of 47 low-maintenance plants that thrive in the the sun.
From the cheerful faces of pansies to the regal presence of peonies, and the whimsical charm of zinnias, these sun-soaked wonders have undoubtedly ignited your imagination and stirred a renewed passion for cultivating vibrant outdoor havens.
With these carefully curated selections, you can achieve a remarkable tapestry of colours, shapes, and fragrances while maintaining the joy of gardening without constant upkeep.
So, whether you’re an urban dweller seeking to transform a modest balcony or a dedicated green thumb with grand visions for your estate, the key lies in selecting the right plants that harmonize with your vision and lifestyle.
So, fellow garden dreamer, it’s time to roll up your sleeves, dig into the soil, and let your sun-loving plants flourish under your care. Happy gardening!
How To Lay Slate Chippings
Today, we’re delving into the captivating realm of “How to Lay Slate Chippings,” where nature’s rugged elegance meets your creative vision.
Imagine pathways and garden beds adorned with the timeless charm of slate, each chipping a brushstroke that adds depth and character to your outdoor canvas.
Slate chippings, versatile and visually striking, hold the key to transforming ordinary spaces into extraordinary havens.
This guide will navigate you through the steps of selecting the right size chippings, orchestrating their arrangement, and bringing a touch of elegance to your landscape.
As we delve into the details, keep in mind that laying slate chippings is a blend of art and technique.
Whether you’re curating a pathway, revamping your driveway, or enhancing garden beds, this guide equips you with the know-how to infuse your surroundings with beauty and functionality.
Let’s jump straight in!
How To Lay Slate Chippings Summary
Step 1: Choose Chippings Select the perfect colour and size of slate chippings to set the stage for your project.
Step 2: Calculate Quantity Use our gravel calculator for precise measurements, ensuring an efficient installation.
Step 3: Mark Your Area Outline the designated space, providing a clear guide for the transformation ahead.
Step 4: Excavate & Prepare Dig out the area, adding stability with Type 1 MOT and a weed prevention membrane.
Step 5: Lay Chippings Carefully place slate chippings at 4-5cm depth, evenly spreading them for a stunning result.
The upcoming sections of this extensive guide will delve deeply into each aspect, leaving no stone unturned.
Essential Tools
When it comes to laying slate chippings, a well-equipped arsenal is your gateway to an enchanting garden landscape.
Here’s a curated selection of tools that shall accompany you on this journey:
- Gardening Gloves: Your trusty companions, shielding your hands from the earth’s embrace, allowing you to work with comfort and precision. Choose gloves that fit like a second skin, providing dexterity without compromising protection.
- Wheelbarrow: A garden’s faithful steed, transporting your slate chippings with ease across your outdoor canvas. Seek a sturdy wheelbarrow that can handle the weight and volume of your chosen chippings.
- Rake: The maestro of levelling, a rake ensures an even distribution of chippings, creating a seamless tapestry of textures. Opt for one with sturdy tines to effortlessly sculpt your design.
- Shovel: A versatile workhorse, the shovel aids in excavating, lifting, and moving earth. Whether you’re clearing the canvas or spreading chippings, a dependable shovel is a must-have.
- Landscape Fabric: A guardian against unruly weeds, landscape fabric acts as your silent sentinel, preserving the integrity of your design. Lay it down like a protective embrace, ensuring no unwanted intruders tarnish your masterpiece.
- Landscape Fabric Pins: The anchors that secure your guardian in place, preventing it from being swayed by the winds of time. These pins ensure your landscape fabric stands strong against the forces of nature.
- Chipping Fork: For those intricate touch-ups and precision adjustments, a chipping fork is your artist’s brush. It allows you to finesse your arrangement, coaxing every chipping into its perfect place.
- Measuring Tape: A tool of accuracy and meticulousness, a measuring tape ensures your calculations are precise, helping you determine the optimal amount of chippings for your masterpiece.
- Kneeling Pad: A cushion for your knees, providing respite as you kneel upon the earth to finesse every detail. Ensure comfort and longevity during your creative process.
- Bucket or Scoop: A vessel for measured elegance, a bucket or scoop aids in transporting chippings precisely, allowing you to fill gaps and niches with the grace of an artist’s stroke.
- Safety Glasses: The guardians of your vision, protecting your eyes from potential debris as you sculpt and arrange. Safety is paramount, after all.
- Broom or Brush: The final touches to your masterpiece, a broom or brush sweeps away any loose debris, presenting a polished and inviting landscape to all who behold.
How To Lay Slate Chippings: Step-By-Step
Step 1: Choosing Slate Chippings
Before diving into your slate garden project, it’s vital to determine the colour and size of slate chippings that will best suit your garden environment. Slate chippings come in various sizes.
Here at TW Aggregates we have 20mm and 40 variations in our decorative aggregates such as grey slate, blue slate, plum slate, and golden gravel.
If your goal is to create an appealing slate path in your garden, the 20mm slate chippings are an excellent choice.
Their flatter texture ensures a more comfortable walking surface compared to larger chippings.
On the other hand, if you’re looking to cover the ground or enhance areas around ponds, the larger 40mm slate chippings offer a chunkier texture that adds an attractive, open-textured finish.
In essence, your selection of slate chipping size depends on your project’s purpose and your desired visual impact. By picking the right size, you’re laying the groundwork for a stunning garden transformation.
Step 2: Calculate How Much Slate You Need
Now that you’re delving deeper into the realm of slate chippings, it’s time to tackle a fundamental task – calculating the exact quantity required for your project.
No more puzzling over quantities! We’ve streamlined the process with a handy slate calculator designed to provide you with accurate bag estimates.
Take the uncertainty out of the equation by inputting the width and depth of your desired coverage area, and watch our calculator work its magic.
Optimal Depth for Slate Chippings
Determining the ideal depth for your slate chippings is pivotal for a polished end result.
For most garden projects, aiming for a depth of around 4-5cm is recommended for 20mm slate chippings.
If you’re working with 40mm slate chippings, a depth of 5-6cm ensures an attractive appearance.
When it comes to the larger 50-150mm Slate Paddlestones, a slightly deeper layer of approximately 6cm is advised.
Don’t be fooled by their size; these Paddlestones settle gracefully. However, it’s worth noting that due to their dimensions, they might not be the best choice for creating paths and driveways, where more compact chippings would perform better.
Step 3: Mark out the area for excavation
Tailoring your approach to the specific usage is a fundamental key.
In scenarios where foot traffic comes into play – think slate pathways – a strategic excavation and the establishment of a foundational layer using crushed Type 1 MOT becomes a wise move.
This extra step bolsters stability and ensures longevity.
Begin by using either string or wooden markers to delineate the designated excavation zone.
This is particularly important for areas earmarked for high foot traffic.
However, if the space in question is intended for more passive purposes, such as garden borders, edging accents, or planting zones, the need for a sub-base might be obviated.
In such cases, don’t rush to lay down the slate just yet. Prioritize weed prevention and enhance drainage by incorporating a layer of Weed Prevention Membrane beneath the slate.
This dual-purpose layering not only curbs pesky weed intrusions but also aids in optimizing the overall drainage system, an essential facet of a thriving garden ecosystem.
Step 4: Dig The Area
With your designated territory clearly outlined, it’s time to grab that trusty shovel and embark on the excavation phase.
If your vision involves crafting slate pathways that radiate charm and durability, the depth to aim for is around 4 inches.
This strategic depth facilitates the inclusion of crushed Type 1 MOT beneath the slate, providing a robust foundation that ensures enduring strength and steadfast stability.
Should your aspirations involve enhancing garden zones not destined for foot traffic, the excavation parameters shift.
In this scenario, a depth of 4-5cm will suffice for standard slate chippings, with a slight adjustment to 5-6cm if you’re working with the more substantial 40mm variety.
Now, let’s talk about an essential ally in your gardening arsenal: the weed prevention membrane. As you excavate, this invaluable sheet takes centre stage.
Lay it atop your freshly dug area, ensuring coverage extends across the full slate expanse.
Contouring it to the exact shape of your space can be a bit of a puzzle, especially if you’re dealing with unconventional contours.
No worries – simply employ strategic cuts and overlapping sections to eliminate gaps and embrace flawless coverage.
Whether it’s a pathway that beckons wanderers or a garden bed that thrives, each dig moves you closer to a landscape where functionality and aesthetics coalesce in harmonious brilliance.
Step 5: Add Your Slate Chippings
Now that your foundation is set, it’s time to bring in the star of the show – your beautiful slate chippings.
This step adds the final touch to your landscape, transforming it into a picturesque haven.
Using a shovel, carefully scoop the slate chippings and place them onto the area where you’ve laid the weed prevention membrane.
Take your time to evenly spread them out, ensuring a consistent coverage.
To achieve this, grab a garden rake and gently move the chippings around until they’re distributed smoothly.
Think of it as arranging the pieces of a puzzle; each chipping finds its rightful place, contributing to the overall aesthetic.
This process is both creative and satisfying – you’re moulding the visual identity of your garden.
As you work, envision the end result – a breathtaking mosaic of slate that adds character to your outdoor space.
Specific Applications for Slate Chippings
Driveway Enhancement
To begin, the key lies in selecting the right slate chippings, with 20mm Slate Chippings emerging as an optimal choice.
Their flatter profile offers a more comfortable surface for driving, making them the ideal candidate.
With your preferred chippings in mind, the groundwork awaits. Mark out the area earmarked for your driveway, demarcating the canvas upon which your vision will unfold.
Now, it’s time to dig. With diligence, excavate the designated zone to a depth of roughly 4 inches, ensuring a canvas that’s primed for transformation.
Next, comes the foundation. A layer of approximately 10cm of Type 1 MOT is the magic touch that ensures stability, resisting the pressures of vehicular weight and maintaining a steadfast demeanour over time.
Employ a sledgehammer to compact the layer of Type 1 MOT, ensuring its resilience against the rigors of daily traffic. For expansive driveways, consider enlisting a roller to achieve comprehensive compaction.
A layer of Driveway Fabric Weed Prevention Membrane acts as a barrier, thwarting weed growth while facilitating efficient drainage. Tailor the membrane to your canvas, cutting it to fit the contours of your base.
With the stage set, it’s time for the grand reveal. Gently shovel your chosen decorative slate chippings onto the membrane-covered base, ensuring a depth of at least 6cm.
Once they’re in place, employ the finesse of a garden rake to distribute the chippings evenly, creating a symphony of texture and visual appeal.
Pathways and Walkways
Building a slate chipping pathway is like painting a masterpiece in your garden – it blends practicality with beauty, inviting you to embark on a sensory journey.
Let’s dive into the step-by-step process that will transform your outdoor space into a work of art.
1. Choose Your Slate Chippings: Begin by selecting the right slate chippings. Opt for 20mm Slate Chippings, known for their smoother surface that’s both visually appealing and foot-friendly.
2. Mark Out Your Pathway: Outline the path you envision for your chippings. This simple step sets the stage for a well-defined and visually pleasing result.
3. Excavate with Purpose: With purposeful strokes, dig down to about 4 inches. This creates the canvas on which your pathway will come to life. Remember, you’re not just digging; you’re shaping a functional work of art.
4. Lay the Groundwork: Place a weed prevention membrane over the excavated area. This layer not only keeps unwanted growth at bay but also aids in drainage. Trim and adjust the membrane to fit seamlessly.
5. Chippings Take Center Stage: Gently pour your selected slate chippings onto the membrane-covered base. Aim for a depth of at least 6cm to ensure a substantial and visually pleasing result.
6. Spread the Beauty: Using a garden rake, distribute the chippings evenly across the pathway. This step ensures a smooth and inviting surface that’s both safe and stunning.
7. Revel in Your Creation: Step back and take in the beauty you’ve crafted. Your slate chipping pathway is now ready to be enjoyed, offering a visual delight as well as a functional route through your garden.
How To Lay Slate Chippings Conclusion
As we wrap up our exploration of How To Lay Slate Chippings, it’s time to bask in the achievements that have graced your garden.
Armed with practical know-how and an artistic eye, you’re now equipped to transform your outdoor spaces into stunning showcases of natural elegance.
By mastering the art of laying slate chippings, you’ve added a new layer of skill to your landscaping repertoire.
The pathways and driveways you create will not only serve as functional features but will also radiate an inviting charm that enhances your entire garden.
As you put your newfound expertise into practice, remember that every rake stroke and chipping placement is a testament to your commitment to crafting landscapes of distinction.
Explore the 15 Best Shade-Loving Plants for Your Garden
Shade-loving plants are nature’s answer to those areas where sunlight is a bit more elusive.
These resilient and captivating plants have adapted to thrive in the cool embrace of shadows, bringing life and beauty to even the dimmest corners of your outdoor oasis.
But why should you bother with shade-loving plants, you might wonder?
By incorporating these botanical wonders into your garden, you not only create a harmonious balance with nature, but you also unlock a wealth of benefits that will leave you awestruck.
In this comprehensive guide, we will embark on a delightful journey through the world of shade-loving plants. We will explore the various types of shade and learn how to choose the perfect plants for your specific shade conditions.
Let’s dive into the world of shade-loving plants.
Understanding Shade
When we talk about shade, it’s not just a simple absence of light. Shade is a fascinating realm with its own shades of complexity.
So, let’s shed some light on the subject and explore the different facets of shade that influence our gardens.
1. Different Types of Shade
Shade comes in various flavours, each with its own characteristics and effects on plants. The two primary types of shade are full shade and partial shade.
-
- Full Shade: Imagine a spot where the sun’s rays rarely, if ever, reach the ground. This is what we call full shade. It occurs in areas heavily shaded by tall trees, buildings, or structures. Plants in full shade typically receive less than two hours of direct sunlight per day.
- Partial Shade: Partial shade is a more nuanc ed affair. Picture a location where sunlight filters through the leaves of trees or where sunlight is limited to certain times of the day. In partial shade, plants receive a few hours of direct sunlight but are protected from the scorching midday sun.
2. Factors Influencing Shade Conditions
Shade conditions in your garden can be influenced by a range of factors. Here are a few key ones to consider:
-
- Tree Canopies: The canopy of trees plays a significant role in casting shade. The density, height, and spread of tree branches determine the intensity and extent of shade in your garden.
- Buildings and Structures: The presence of buildings, walls, or structures can create shade patterns in your outdoor space. Depending on their position and height, they can either provide relief from the sun or cast deep shadows.
- Time of Day and Season: The angle and position of the sun change throughout the day and vary with the seasons. Understanding how the sun moves across your garden throughout the year helps you identify the shifting patterns of shade.
3. Assessing Shade Levels in Your Garden
Determining the shade levels in different areas of your garden is crucial for selecting the right shade-loving plants. Here are a few methods to assess shade:
-
- Observation: Spend time observing your garden throughout the day, noting areas that receive direct sunlight, partial shade, or full shade at different times.
- Sunlight Duration: Monitor the amount of sunlight different areas receive. Use a sun calculator or simply track the hours of direct sunlight using a watch or smartphone.
- Shade Measurement Tools: Various tools, such as a light meter or a sun compass, can help measure shade intensity and duration more precisely.
Understanding shade is the key to creating a thriving shade garden.
By grasping the different types of shade, recognizing the factors that influence shade conditions, and assessing shade levels in your garden, you will be equipped to make informed decisions when selecting shade-loving plants.
Choosing the Right Shade-Loving Plants
1. Consideration of Soil Type and Moisture Levels
Before you embark on your quest for shade-loving plants, it’s important to understand your soil type and moisture levels.
Some shade-loving plants prefer moist soil, while others can tolerate drier conditions.
Conduct a soil analysis and assess the drainage capabilities of your soil to ensure you provide the optimal growing environment for your leafy companions.
2. Matching Plants to Specific Shade Conditions
Shade is not a one-size-fits-all affair, dear gardeners. Different plants have different shade preferences.
Some thrive in deep, full shade, while others prefer dappled or partial shade. Pay attention to the specific shade conditions in different areas of your garden and choose plants that match those conditions.
This way, you’ll set the stage for a flourishing botanical paradise.
3. Selection of Plants Based on Desired Features
As you navigate the vast array of shade-loving plants, keep in mind the specific features you desire in your garden.
Are you yearning for a burst of vibrant flowers to brighten up those shadowy corners? Or perhaps you’re enchanted by the allure of textured foliage that adds depth and interest to your garden design.
By identifying your desired features, you can narrow down the selection process and curate a garden that truly reflects your vision.
17 Top Shade-Loving Plants for Gardens
In this section, we’ll unveil 17 remarkable botanical gems that will infuse your garden with an enchanting tapestry of colours, textures, and fragrances.
From delicate blooms to lush foliage, these plants will thrive in the gentle embrace of shade and transform your outdoor space into a verdant paradise.
Let’s dive in and explore the captivating world of shade-loving plants!
1. Astilbe
Graceful and elegant, Astilbe boasts feathery plumes of flowers that sway gently in the shade.
Available in shades of pink, red, and white, these delightful blooms add a touch of romance to any shady corner.
Their fern-like foliage provides an exquisite backdrop, creating a mesmerizing interplay of texture and colour.
2. Hosta
Hostas are renowned for their captivating foliage. With a vast array of shapes, sizes, and colours, they offer endless possibilities for garden design.
From broad, heart-shaped leaves to slender, variegated patterns, Hostas bring depth and visual interest to shaded spaces.
Their hardy nature makes them a reliable choice for shady retreats.
3. Bleeding Heart
Prepare to be enchanted by the whimsical beauty of Bleeding Heart. Its heart-shaped flowers dangle delicately from arching stems, evoking a sense of romantic allure.
These captivating blooms, available in shades of pink and white, make a charming statement in shade gardens.
4. Ferns
No shade garden is complete without the lush presence of ferns. With their feathery fronds and vibrant green hues, ferns offer a sense of tranquillity and serenity.
From the delicate Maidenhair Fern to the robust Boston Fern, these verdant wonders thrive in the cool, shaded corners of your garden.
5. Coral Bells (Heuchera)
A true delight for foliage enthusiasts, Coral Bells present a stunning display of colourful leaves. Their vibrant foliage comes in a range of hues, from deep burgundy and purple to lime green and silver.
These versatile plants add a pop of colour and texture to shaded areas, elevating the overall visual appeal of your garden.
6. Japanese Painted Fern (Athyrium niponicum)
The Japanese Painted Fern is a true work of art in the world of shade-loving plants. Its fronds display an exquisite combination of silver, green, and burgundy, creating a mesmerizing tapestry of colours.
This fern’s unique foliage adds a touch of elegance and sophistication to shaded gardens.
7. Foamflower (Tiarella)
Delicate and enchanting, Foamflower showcases clusters of dainty, star-shaped flowers that bloom in shades of white and pink.
Its foliage features intricately patterned leaves, resembling the foam atop ocean waves. Foamflower thrives in the shadows, bringing a sense of whimsy and charm to your garden.
8. Lungwort (Pulmonaria)
Lungwort is a shade-loving perennial that offers an abundance of charm. Its clusters of tubular flowers emerge in shades of pink, purple, and blue, attracting pollinators to your garden.
The foliage of Lungwort is equally captivating, with leaves that transition from silver-spotted to deep green. This resilient plant adds interest and beauty to shaded areas.
9. Jacob’s Ladder (Polemonium)
Jacob’s Ladder is a perennial that flaunts delicate, ladder-like foliage in shades of green, blue, or variegated combinations.
Its clusters of bell-shaped flowers, available in hues of purple, pink, or white, add a touch of whimsy to shady spots. Jacob’s Ladder is a graceful addition to any shade garden.
10. Hellebore (Helleborus)
Known as the “Lenten Rose,” Hellebore is a winter-blooming beauty that thrives in shade. Its cup-shaped flowers emerge in an array of colours, including shades of white, pink, purple, and green.
Hellebore’s evergreen foliage ensures year-round interest, making it a beloved choice for shade gardens.
11. Japanese Forest Grass (Hakonechloa)
Japanese Forest Grass is a graceful and elegant ornamental grass that thrives in shade. Its cascading, arching blades create a gentle, flowing effect, adding movement and softness to shaded areas.
The grass’s foliage ranges from vibrant green to golden variegation, providing a striking contrast against other shade-loving plants.
12. Columbine (Aquilegia)
Columbine is a charming perennial with delicate, spurred flowers that nod gracefully in the breeze.
These blooms come in an array of colours, including shades of blue, purple, pink, yellow, and white. Columbine’s airy foliage adds an element of lightness to shaded gardens, making it a favorite among gardeners.
13. Virginia Bluebells (Mertensia virginica)
Virginia Bluebells bring a burst of vibrant blue to the shade garden. These bell-shaped flowers emerge in clusters, creating a visual spectacle that attracts pollinators.
Virginia Bluebells thrive in moist, shady environments, making them an ideal choice for woodland gardens or alongside streams and ponds.
14. Japanese Anemone (Anemone hupehensis)
Japanese Anemone offers elegance and grace with its nodding, daisy-like flowers that bloom in shades of pink and white.
These beauties add a touch of sophistication to shade gardens, blooming in late summer and early fall when other flowers may be fading.
Their tall stalks sway gently in the breeze, infusing your garden with movement and charm.
15. Toad Lily (Tricyrtis)
Toad Lily is a unique and fascinating shade-loving plant that captures attention with its exotic blooms. Its orchid-like flowers feature intricate patterns and come in various shades of white, pink, and purple.
Toad Lily’s ability to thrive in shade and provide late-season blooms makes it a prized addition to any garden.
Care and Maintenance of Shade-Loving Plants
Watering Guidelines for Shade Gardens
Watering is a crucial aspect of plant care, and shade-loving plants have specific needs when it comes to moisture.
Here are some general watering guidelines to keep in mind:
- Moisture Requirements: Shade-loving plants typically prefer consistently moist soil. Regularly check the moisture level in the soil by inserting your finger into the ground. If it feels dry to the touch, it’s time to water.
- Watering Frequency: The frequency of watering will depend on various factors such as plant type, soil type, and weather conditions. Aim to water deeply rather than shallowly, ensuring the water reaches the plant’s root zone.
- Mulching: Applying a layer of organic mulch around your shade-loving plants helps retain moisture, suppresses weeds, and regulates soil temperature. Spread a 2-3 inch layer of mulch around the base of the plants, keeping it away from direct contact with the stems.
Fertilization and Soil Amendment Tips
Providing proper nutrients and maintaining soil fertility is essential for the overall health and vigour of your shade-loving plants.
Consider the following tips for fertilization and soil amendment:
- Organic Matter: Amend the soil with organic matter such as compost, well-rotted manure, or leaf mold. This enriches the soil, improves its structure, and enhances moisture retention.
- Balanced Fertilizer: Apply a slow-release, balanced fertilizer formulated for shade-loving plants during the growing season. Follow the package instructions for proper dosage and application frequency.
- Avoid Overfertilization: While fertilization is important, it’s crucial not to overdo it. Excessive fertilizer can lead to weak growth, excessive foliage, or even burn the roots of your plants. Always follow recommended guidelines and avoid applying fertilizer during periods of dormancy.
Proper Pruning Techniques for Shade-Loving Plants
Pruning plays a vital role in maintaining the shape, size, and overall health of your shade-loving plants. Follow these tips for effective pruning:
- Remove Dead or Damaged Growth: Regularly inspect your plants for any dead, damaged, or diseased branches or foliage. Prune these off using clean, sharp pruning shears to prevent the spread of diseases and to encourage healthy growth.
- Shape and Size Control: Prune your shade-loving plants as needed to maintain the desired shape and size. Be mindful of each plant’s growth habit and prune accordingly, whether it’s to promote bushier growth or to control spreading tendencies.
- Timing: Timing is crucial when it comes to pruning shade-loving plants. Generally, it’s best to prune them in late winter or early spring before new growth emerges. However, be aware that some plants may have specific pruning requirements, so research each plant’s individual needs.
Remember, each shade-loving plant has its own specific care requirements, so it’s essential to research and understand the needs of the plants in your garden.
Best Shade-Loving Plants Conclusion
There you have it, a delightful journey through the realm of shade-loving plants!
We’ve explored the secrets of choosing the best shade-loving plants, understanding shade conditions, and caring for these botanical wonders.
Now, armed with knowledge and inspiration, it’s time for you to unleash your creativity and transform your garden into a shady oasis of natural beauty.
We hope this guide has provided you with the knowledge and inspiration you need to embark on your shade garden adventure.
How To Design a Small Garden
Welcome to our post, where we unravel the secrets of how to design a small garden.
If you find yourself blessed with a compact outdoor space, fear not, for it is these very limitations that ignite creativity and transform tiny landscapes into veritable works of art.
In this article, we will embark on a journey to discover the endless possibilities that lie within the realm of small garden design.
With a smaller canvas to work with, each element within the garden becomes significant, contributing to the overall aesthetic and functionality.
By thoughtfully considering your space, setting clear objectives, and employing smart design strategies, you can effortlessly transform your modest patch of land into a picturesque retreat that will leave your neighbours in awe.
But where do you start? From analysing the layout to selecting the perfect plants, incorporating key design elements, and even adding stylish furniture and accessories, we have you covered.
Let’s get started!
Assessing Your Space and Setting Goals
Analysing the Layout: Understanding the Dimensions and Features of Your Small Garden
Before diving headfirst into designing your small garden, take a moment to acquaint yourself with the lay of the land.
Familiarizing yourself with the dimensions, contours, and existing features of your outdoor space will set the foundation for a successful design journey.
Grab a measuring tape and carefully record the length, width, and any irregularities of your garden.
Pay attention to any existing structures, such as fences, walls, or trees, as they can serve as natural boundaries or focal points in your design.
These elements can often be integrated seamlessly into the overall aesthetic, adding depth and character to your garden oasis.
While assessing the layout, keep an open mind and embrace the possibilities that even the quirkiest of spaces can offer. Odd angles, tight corners, or irregular shapes should be seen as opportunities for creative solutions, rather than obstacles.
Defining Your Vision: Identifying Your Design Preferences and Objectives#
Now that you have familiarized yourself with the physical aspects of your garden, it’s time to delve into the realm of imagination and set your design goals.
- What do you envision for your small garden?
- What purpose should it serve?
By clarifying your objectives, you will be better equipped to make informed decisions throughout the design process.
Consider the various functions your garden could fulfil. Are you seeking a tranquil retreat for relaxation and meditation?
Or perhaps an outdoor entertainment space to host memorable gatherings? Identifying the primary purpose of your garden will guide your design choices and help create a cohesive and harmonious space.
Furthermore, reflect on your personal style preferences. Do you lean towards a formal, structured garden or an informal, naturalistic approach?
Are you drawn to vibrant, bold colours, or do you prefer a more serene, monochromatic palette? By determining your aesthetic inclinations, you can curate a garden that resonates with your unique personality and brings you joy with every step.
Remember, the key to successful garden design lies in aligning your goals with the inherent characteristics of your space.
Creating a Functional Layout
Optimizing Space: Strategic Placement of Garden Elements for Efficiency
Start by considering the primary activities you envision in your garden. Do you dream of a cosy seating area for relaxation, a small dining space for alfresco meals, or a dedicated gardening corner to nurture your green companions?
By identifying these key areas, you can allocate space accordingly and create distinct zones within your limited landscape.
Take advantage of verticality to add depth and visual interest to your small garden.
Utilize trellises, arbors, or vertical planters to introduce climbing plants and vines, effectively transforming walls or fences into living canvases.
This not only saves precious ground space but also adds a sense of enchantment and vertical drama to your garden.
Remember to leave ample pathways that connect different areas of your garden, ensuring smooth navigation and accessibility.
These paths can be adorned with stepping stones, gravel, or lush ground covers, adding texture and defining the overall aesthetic of your outdoor haven.
Establishing Zones: Designating Areas for Relaxation, Entertaining, and Planting
To create a harmonious and well-balanced small garden, it is essential to establish distinct zones that cater to different activities.
By designating areas for relaxation, entertaining, and planting, you can create a multifunctional space that accommodates all your desires.
Begin by envisioning a cosy seating area where you can unwind and bask in the beauty of your garden. Whether it’s a comfortable bench nestled beneath a tree, a set of stylish outdoor chairs, or a hammock that invites you to sway gently, this space should exude tranquillity and provide respite from the outside world.
If you enjoy hosting gatherings, allocate a small dining or entertaining area where you can share delightful meals and create lasting memories with friends and family.
Opt for compact furniture that fits seamlessly into your garden’s scale, ensuring a comfortable and intimate ambiance for your guests.
Lastly, reserve an area for planting and gardening activities. Whether you dream of a bountiful vegetable garden, a collection of aromatic herbs, or a riot of colourful flowers, this zone will be your horticultural sanctuary.
Selecting the Right Plants
Embracing Verticality: Utilizing Climbing Plants and Trellises
When it comes to designing a small garden, embracing verticality is a game-changer. By utilizing climbing plants and trellises, you can add a sense of vertical drama and maximize your available space.
Consider introducing enchanting climbers like jasmine, clematis, or passionflower to adorn walls, fences, or pergolas.
These plants not only create a visually captivating backdrop but also offer delightful scents and attract pollinators, infusing your garden with life and fragrance.
Additionally, trellises and arbors serve as architectural features that guide and support climbing plants.
They provide structure and define vertical boundaries within your small garden, adding depth and dimension to your outdoor oasis.
Maximizing Greenery: Choosing Compact and Multi-purpose Plants
In a small garden, every plant matters. Choosing compact and multi-purpose plants allows you to maximize the greenery and create a lush, yet manageable, landscape.
Consider ornamental grasses such as Japanese forest grass or blue fescue, which add texture and movement without overwhelming the space.
Compact shrubs like dwarf hydrangeas or boxwoods provide structure and year-round interest, while still maintaining a small footprint.
Opting for plants with multiple benefits can be a smart strategy. For example, herbs like rosemary or lavender not only offer culinary delights but also release heavenly scents and attract beneficial insects.
Look for plants that have attractive foliage, colourful blooms, and interesting textures to create a visually engaging tapestry in your garden.
Unveiling Colour Schemes: Selecting Plants for Seasonal Delights
To create a captivating small garden, consider the power of colour. Choose plants that offer a diverse range of hues and stagger their blooming periods to ensure year-round visual interest.
Start by determining your preferred colour palette. Do you long for a vibrant and energetic garden bursting with bold oranges and reds?
Or does a serene and calming oasis filled with soft blues and purples entice you? By establishing a colour scheme, you can curate a cohesive and visually pleasing garden experience.
Select a mix of plants that bloom during different seasons, ensuring that your garden stays vibrant throughout the year.
Early-blooming bulbs like crocuses and daffodils signal the arrival of spring, while summer favourites like roses and dahlias offer a riot of colour. Don’t forget to incorporate evergreen plants to provide structure and year-round foliage interest.
Incorporating Key Design Elements
Playing with Scale and Perspective: Using Illusion Techniques for Spatial Enhancement
In small gardens, the art of illusion becomes a powerful tool to create the illusion of space and depth.
By playing with scale and perspective, you can transform your petite outdoor oasis into a seemingly expansive and enchanting retreat.
Consider incorporating elements like mirrors strategically placed on walls or fences to reflect light and create the illusion of a larger garden.
These reflective surfaces not only add a touch of elegance but also amplify the sense of openness and depth.
Another technique is to use pathways and stepping stones that gradually narrow as they lead deeper into your garden.
This diminishing perspective creates an enticing visual journey, drawing the eye further and creating an illusion of extended space. It’s a clever trick that captivates the senses and makes your small garden feel more expansive.
Enhancing Visual Interest: Incorporating Texture, Shape, and Contrast
To create a visually captivating small garden, it’s essential to pay attention to texture, shape, and contrast.
These elements add layers of interest and ensure your garden remains visually stimulating throughout the seasons.
Introduce a variety of plant textures, combining fine, feathery foliage with bold, broad leaves. This interplay of textures creates a dynamic and visually intriguing landscape.
Consider incorporating plants like lamb’s ear, ornamental grasses, or hostas, which offer a diverse range of foliage textures.
Shape plays a vital role in small garden design as well. Incorporate plants with different growth habits, such as mounding, columnar, or cascading forms, to create a sense of balance and variation.
Utilize pruning techniques to maintain the desired shape and prevent plants from overpowering the space.
Contrast is the secret ingredient that adds drama and excitement to your garden.
Combine plants with contrasting colours, such as pairing vibrant yellow flowers with deep purple foliage or delicate white blooms against a backdrop of dark green leaves.
Harnessing Natural Elements: Water Features, Stones, and Lighting
Incorporating natural elements enhances the overall appeal and ambiance of your small garden.
Consider adding water features, such as a bubbling fountain or a small pond, to create a sense of serenity and provide a soothing backdrop of sound.
Stones and rocks can serve multiple purposes in a small garden. They can act as decorative elements, defining borders or pathways, and adding texture and visual interest.
Large rocks can also create focal points or serve as seating options, blurring the lines between functional and aesthetic elements.
Don’t forget the power of lighting to transform your garden into a magical oasis after the sun sets.
Install soft, ambient lighting along pathways, illuminate key features like plants or sculptures, and create a warm and inviting atmosphere that beckons you to spend evenings outdoors.
Furniture and Accessories
Choosing the Right Furniture: Compact and Multi-functional Pieces
Furniture plays a pivotal role in transforming your small garden into a functional and inviting outdoor living space.
However, in limited areas, it’s crucial to choose furniture that is not only visually appealing but also optimized for compactness and multi-functionality.
Opt for smaller-scale furniture pieces that fit harmoniously within the proportions of your garden.
Consider folding chairs or stackable seating options that can be easily stored when not in use, freeing up valuable space.
Benches with built-in storage compartments offer a clever solution for keeping gardening tools, cushions, or blankets close at hand while maintaining a tidy environment.
When selecting tables, opt for options that are space-saving yet versatile. Look for collapsible or extendable tables that can accommodate both intimate gatherings and larger parties.
Additionally, consider furniture with built-in features like hidden planters or table top fire pits, adding an extra layer of functionality and charm to your outdoor haven.
Accessorizing with Style: Adding Pots, Ornaments, and Decorative Features
Accessorizing your small garden is the key to adding personality and flair to the space.
By carefully choosing pots, ornaments, and decorative features, you can infuse your garden with style and create a unique and inviting atmosphere.
Select a variety of pots in different sizes, shapes, and materials to create visual interest.
Hanging baskets or wall-mounted planters can be utilized to make the most of vertical space, cascading with vibrant flowers or trailing vines.
Grouping pots together in clusters or arranging them in a visually appealing pattern adds a sense of unity and artistry to your garden.
Ornaments and decorative features serve as the finishing touches that elevate your garden’s charm. Incorporate sculptures, wind chimes, or bird feeders to create focal points and engage the senses.
Think strategically about their placement, ensuring they enhance the overall aesthetic without overwhelming the space.
Additionally, consider incorporating outdoor lighting fixtures like string lights, lanterns, or solar-powered path lights.
These not only provide illumination but also create a warm and inviting ambiance, extending the usability of your small garden into the evening hours.
Maintenance and Sustainability
Tending to a Small Garden: Pruning, Watering, and Weeding Tips
Maintaining a small garden requires consistent care and attention to ensure its health and vitality. By following a few key practices, you can keep your garden thriving and vibrant throughout the seasons.
Pruning
Regular pruning is essential to keep plants in check and promote healthy growth. Trim back overgrown branches and remove dead or damaged foliage to maintain the overall shape and appearance of your plants.
Pruning also encourages air circulation, reducing the risk of diseases and pests.
Watering
Watering is a critical aspect of garden maintenance, especially in small spaces where soil moisture can fluctuate quickly.
Monitor the moisture levels regularly and water your plants deeply when the top inch of soil feels dry.
Consider using a drip irrigation system or soaker hoses to deliver water directly to the roots, minimizing water loss through evaporation.
Weeding
Don’t forget the importance of weeding in a small garden. Weeds not only compete for nutrients and water but can also detract from the overall aesthetic.
Regularly inspect your garden and remove weeds as soon as they appear. Consider applying a layer of mulch to suppress weed growth and conserve soil moisture.
Embracing Eco-friendly Practices: Composting, Rainwater Harvesting, and Organic Pest Control
Sustainability is a crucial aspect of modern gardening, and small gardens can be especially conducive to eco-friendly practices.
By adopting a few simple strategies, you can minimize your environmental impact and create a more sustainable outdoor space.
Composting is a fantastic way to recycle kitchen scraps and garden waste, creating nutrient-rich organic matter for your plants.
Set up a compost bin or pile in a discrete corner of your garden, and regularly add a mix of green (such as vegetable scraps) and brown (like dry leaves) materials.
This natural fertilizer will enrich your soil and reduce the need for chemical-based alternatives.
Rainwater harvesting is another sustainable practice that small garden owners can embrace.
Collect rainwater using barrels or containers positioned beneath downspouts. This harvested water can then be used for watering plants, reducing your reliance on municipal water sources.
When it comes to pest control, opt for organic and eco-friendly methods. Encourage beneficial insects like ladybugs and lacewings, which naturally prey on pests.
Use companion planting techniques to deter pests, such as interplanting marigolds to repel aphids or basil to deter mosquitoes. If necessary, consider natural pest control solutions like neem oil or insecticidal soap.
How To Design a Small Garden Conclusion
Congratulations, fellow gardener, you have reached the conclusion of our comprehensive guide on how to design a small garden!
By assessing your space, setting clear goals, and creating a functional layout, you have laid a solid foundation for a successful small garden design.
Selecting the right plants, embracing verticality, and maximizing greenery have allowed you to infuse your garden with life, colour, and texture.
Incorporating key design elements like illusion techniques, texture, shape, and contrast has elevated the visual appeal and created a captivating landscape.
Don’t be afraid to think outside the box and break the traditional gardening norms.
Small gardens offer the perfect opportunity to push boundaries and create innovative and awe-inspiring spaces. Embrace your own style, trust your instincts, and let the magic unfold.
The Ultimate Guide To Laying a Gravel Garden Patio [Expert Tips]
In this comprehensive article, we will delve into a guide to laying a gravel garden patio.
Patios have become more than just a functional space in outdoor design; they have evolved into havens of relaxation and entertainment.
One popular option gaining momentum is the gravel garden patio. With its versatility and low-maintenance nature, a gravel patio can transform your outdoor space into a stunning retreat.
In this comprehensive guide, we will walk you through the step-by-step process of creating a beautiful and functional gravel garden patio that will enhance the aesthetics of your landscape.
With the right planning, preparation, and installation techniques, you can lay a gravel garden patio that not only enhances your outdoor living experience but also increases the value of your property.
Join us as we delve into the world of gravel garden patios, providing you with expert advice, valuable tips, and creative ideas to help you design and construct a patio that perfectly suits your style and needs.
Planning your Gravel Garden Patio
Assessing your space
Before diving into the process of laying a gravel garden patio, it’s crucial to assess your outdoor space and envision the patio of your dreams.
Consider the size and shape you desire, taking into account the available area and how it fits within your overall landscape design.
Think about how the patio will complement existing elements such as trees, shrubs, or flower beds. Additionally, evaluate any functional requirements you have in mind, such as seating areas or pathways, to ensure a well-utilized space.
Selecting the gravel type
The type of gravel you choose plays a significant role in the overall appearance and functionality of your patio. There are various options to consider, including pea gravel, crushed stone, or angular gravel.
Pea gravel is popular for its smooth texture and natural appearance, while crushed stone offers a more textured and rustic look. Angular gravel provides excellent stability and is ideal for high-traffic areas.
When selecting your gravel, weigh the pros and cons of each option, considering factors like aesthetics, durability, ease of maintenance, and your specific preferences.
Additionally, consider the size of the gravel, as it affects both the visual appeal and the patio’s comfort underfoot.
How To Lay a Gravel Garden Patio
Preparing the Site for your Gravel Patio
Clearing the area
Before you can start building your gravel garden patio, it’s important to prepare the site by clearing away any existing vegetation, weeds, and debris.
- Begin by removing any plants, shrubs, or grass within the designated patio area.
- Use a garden spade or shovel to dig them out, ensuring you remove their roots as well.
- To tackle persistent weeds, you may opt to use herbicides, but be sure to follow the instructions carefully and consider environmentally friendly alternatives if desired.
Taking the time to clear the area thoroughly ensures a clean and stable foundation for your gravel patio. By eliminating unwanted plants and debris, you create a blank canvas for your new outdoor space to flourish.
Marking the patio boundaries
To achieve a well-defined and aesthetically pleasing patio, it’s essential to mark the boundaries before proceeding with the installation.
One effective method is to use stakes and string or garden hoses to outline the desired shape and size of the patio. This step helps you visualize the space and make any necessary adjustments before digging.
Take care to ensure the lines are straight and accurately represent the shape you desire. This meticulous process guarantees that your gravel garden patio will have a professional and polished appearance once completed.
Creating a Solid Foundation
A. Excavating the area
Creating a solid foundation is crucial for the long-term stability and functionality of your gravel garden patio.
Begin by excavating the designated patio area to an appropriate depth, considering factors such as the thickness of the gravel layer and the existing soil conditions.
It’s generally recommended to excavate to a depth of around 4-6 inches to accommodate both the gravel and necessary base layers.
While digging, pay attention to the slope and drainage of the area. Ensure that the excavation allows for proper water runoff, preventing potential pooling or water damage on your patio.
Remember, a well-drained foundation promotes the longevity of your patio and helps maintain its pristine condition.
B. Installing landscape fabric
Once the area is excavated, it’s time to install landscape fabric. This step plays a vital role in preventing weed growth and maintaining the stability of your gravel patio.
- Roll out the landscape fabric over the excavated area, ensuring it covers the entire patio space.
- It’s crucial to overlap the fabric sheets to eliminate any potential gaps that weeds could exploit.
- Secure the landscape fabric in place using landscape fabric pins or staples, ensuring it remains taut and flat. This barrier acts as a protective shield, preventing weeds from infiltrating your patio and simplifying future maintenance efforts.
With the landscape fabric in position, you’re now ready to move on to the exciting part: installing the gravel!
Installing the Gravel

A. Adding a layer of gravel
With the foundation prepared, it’s time to add the first layer of gravel to your patio.
- Start by spreading a generous amount of gravel evenly across the landscape fabric.
- Use a rake or shovel to distribute the gravel, ensuring a consistent thickness throughout the patio area.
- As you work, pay attention to achieving an even surface, smoothing out any uneven patches or bumps.
Take the time to step back and assess the progress, making adjustments as needed to achieve the desired levelness and aesthetic appeal.
This initial layer sets the stage for the rest of the installation, so be meticulous in your efforts.
B. Compact the gravel
To ensure a firm and stable surface, it’s essential to compact the gravel.
This step helps to eliminate any voids or loose areas within the patio, creating a solid foundation for walking or placing furniture.
- Utilize a tamper or vibrating plate compactor to exert pressure on the gravel, compacting it firmly.
- Remember to work systematically across the entire patio area, paying extra attention to high-traffic sections.
By compacting the gravel, you enhance its durability and prevent shifting or displacement over time.
This not only contributes to the longevity of your gravel garden patio but also enhances the overall aesthetic and functionality.
Finishing Touches and Maintenance
A. Edging the patio
To give your gravel garden patio a clean and defined look, it’s important to edge the perimeter.
Edging not only adds a touch of elegance but also helps to contain the gravel within the designated area.
You can choose from various edging materials such as bricks, pavers, or even natural stones that complement the overall style of your patio.
- Carefully place the edging material along the outer boundaries of your patio, ensuring a secure and level installation.
- Use a rubber mallet or a hammer with a scrap piece of wood to gently tap the edging into the ground.
This will help anchor it firmly and create a clear separation between the patio and the surrounding landscape.
B. Adding decorative elements
To truly personalize your gravel garden patio and create an inviting atmosphere, consider adding decorative elements.
Introduce plants, such as colourful flowers or lush greenery, to bring life and vibrancy to the space. Choose plant varieties that thrive in your climate and require minimal maintenance.
Additionally, incorporate outdoor furniture and accessories that suit your desired functionality.
Whether you envision cosy seating areas, a dining space, or a hammock for relaxation, select furniture pieces that align with your patio’s style and accommodate your needs.
Don’t forget to consider lighting options as well, such as string lights or solar-powered lanterns, to enhance the ambiance and extend the usability of your patio into the evening hours.
C. Regular maintenance
To ensure the long-term beauty and functionality of your gravel garden patio, regular maintenance is key.
- Rake The Gravel: Periodically rake the gravel to even out any uneven areas and maintain a smooth surface. This will help prevent the accumulation of debris and keep your patio looking pristine.
- Weeds: Weeds may occasionally make an appearance, despite the landscape fabric. Take the time to hand-weed any unwanted growth, being careful not to disturb the fabric or the gravel.
- Herbicides: If needed, you can also use herbicides sparingly and selectively to target persistent weeds, but always follow the instructions and exercise caution to protect the surrounding plants and environment.
By dedicating some time to maintenance, you can enjoy your gravel garden patio in all its splendour and extend its lifespan for years to come.
Guide To Laying a Gravel Garden Patio Conclusion
Congratulations on completing your journey to create a stunning gravel garden patio!
By following this comprehensive guide, you have acquired the knowledge and skills necessary to transform your outdoor space into a captivating retreat.
From planning and preparation to installation and finishing touches, you have learned the essential steps to lay a gravel patio with expertise.
Remember, your gravel garden patio offers endless possibilities for relaxation, entertainment, and personal expression.
Embrace its low-maintenance nature and the versatility it brings to your outdoor design.
How to Create a Japanese Garden: Expert Tips & Tricks
Welcome to the serene world of Japanese garden design, where nature’s beauty intertwines with artistry and tranquillity.
Within the enchanting realm of Japanese gardens, every element is carefully chosen and thoughtfully arranged to evoke a sense of calm and balance.
From the flowing water to the carefully placed rocks and the vibrant hues of meticulously selected plants, Japanese gardens are a testament to the profound connection between humans and nature.
In this comprehensive guide, we will embark on a voyage of discovery, peeling back the layers of Japanese garden design to reveal its essence and beauty.
Together, we will explore the philosophy of Zen, the principles of minimalism, and the artful use of symbolism. We will learn how to create a space that not only delights the senses but also nurtures the soul.
Through this guide, we will delve into the key aspects of Japanese garden creation.
From selecting the perfect location to designing the layout, choosing authentic Japanese plants, and incorporating elements of Zen, we will walk hand in hand through each step of the process.
You will gain the knowledge and inspiration needed to transform your outdoor space into a haven of tranquillity and natural elegance.
Understanding the Essence of a Japanese Garden
Step into the captivating world of Japanese gardens, where every element is imbued with meaning and intention.
To embark on the journey of creating a Japanese garden, it is essential to grasp the essence and philosophy that underlie these enchanting landscapes.
- The Philosophy of Zen: Discovering Spiritual Roots At the heart of Japanese gardens lies the philosophy of Zen, a profound spiritual practice that emphasizes mindfulness, simplicity, and the harmonious union of humans with nature. Zen principles guide the design and aesthetics of Japanese gardens, infusing them with a sense of tranquillity and contemplation.
- Embracing Nature: Minimalism and Symbolism Japanese gardens celebrate the beauty of nature while embracing minimalism and symbolism. The design elements aim to reflect the essence of the natural world rather than replicate it. Delicate arrangements of rocks, carefully raked gravel, and meticulously placed plants symbolize mountains, rivers, and forests, allowing the viewer to connect with nature on a profound level.
- Balance and Harmony: Creating a Sense of Tranquillity Japanese gardens seek to achieve a delicate balance and harmony between various elements. This balance extends to the use of asymmetry, where irregularity and imperfection are celebrated, fostering a sense of natural beauty. By striking a harmonious chord between empty and filled spaces, light and shadow, and contrasting textures, Japanese gardens create a serene and visually captivating atmosphere.
- Seasons and Impermanence: Embracing Change One of the distinctive aspects of Japanese gardens is their ability to embrace the passage of time and the changing seasons. From the ephemeral blossoms of cherry trees in spring to the fiery hues of maples in autumn, Japanese gardens invite contemplation of the transient nature of existence. This appreciation of impermanence adds depth and poetry to the garden, making each visit a unique and reflective experience.
Understanding the essence of Japanese gardens lays the foundation for creating an authentic and captivating space.
By embracing Zen philosophy, minimalist design principles, and the interplay of balance, symbolism, and impermanence, you will embark on a journey to craft a Japanese garden that not only enchants the eyes but also nourishes the soul.
Choosing the Perfect Location
Selecting the ideal location is crucial when creating a Japanese garden, as it sets the stage for the harmonious integration of nature and design.
Let’s dive into the key considerations to help you choose the perfect spot for your enchanting oasis.
Assess Your Existing Space
Assessing Your Garden’s Potential Begin by assessing your existing outdoor space, taking note of its size, shape, and topography.
Look for areas that offer ample space and can accommodate the desired elements of a Japanese garden, such as pathways, water features, and planting beds.
Consider the views from different angles and envision how the garden will blend with the surroundings.
Sun, Shade, and Water
Sun, Shade, and Water Japanese gardens often incorporate a delicate balance of sunlight and shade, as well as water features that enhance the overall tranquillity.
Observe the patterns of sunlight and shade throughout the day to determine the areas that receive the desired amount of light.
Additionally, consider the availability of water sources for potential ponds, streams, or waterfalls, as they contribute to the soothing ambiance of the garden.
Privacy and Noise
Privacy and a sense of seclusion are vital aspects of Japanese garden design, allowing for introspection and tranquillity.
Assess the level of privacy your chosen location provides, considering neighbouring properties, fences, or natural barriers.
Moreover, take into account the ambient noise in the area and consider ways to minimize or mitigate it to maintain the garden’s serene atmosphere.
Accessibility and Integration
Consider how the Japanese garden will integrate with the existing landscape and the flow of your property.
Ensure that the garden is easily accessible and seamlessly connected to the surrounding areas, such as the house, patio, or other outdoor living spaces.
Design pathways that guide visitors through the garden, creating a sense of discovery and enhancing the overall experience.
Climate and Environment
Climate and Environmental Factors Take into account the specific climate and environmental conditions of your location.
Research the native plants that thrive in your region and choose those that are suitable for a Japanese garden aesthetic.
Consider factors such as temperature, rainfall, and soil type to ensure the long-term health and vitality of your garden.
By carefully considering these factors, you can choose a location that provides the optimal foundation for your Japanese garden.
Remember, the perfect location sets the stage for a captivating and harmonious space that will transport you to a world of serenity and beauty.
Designing The Layout
Designing the layout of your Japanese garden is an exhilarating process that brings together aesthetics, functionality, and the harmonious integration of various elements.
Let’s explore the key considerations to help you create a layout that captivates the senses and evokes a serene ambiance.
- Pathways and Stepping Stones: Creating a Sense of Exploration Pathways play a pivotal role in a Japanese garden, guiding visitors on a journey of discovery. Design pathways that meander gracefully through the garden, inviting exploration and contemplation. Consider using stepping stones to add a touch of whimsy and create a natural flow within the space.
- Rocks and Boulders: Craftsmanship in Nature Rocks and boulders hold immense significance in Japanese garden design, symbolizing mountains and rugged landscapes. Strategically place rocks of varying sizes and shapes to create a visually appealing composition. Achieve a sense of balance and harmony by adhering to the principle of odd numbers, as it is believed to be more pleasing to the eye.
- Water Features: A Source of Tranquillity Water features, such as ponds, streams, and waterfalls, are central to the allure of a Japanese garden. Incorporate them into your design to introduce a soothing and reflective element. Consider the placement and size of the water feature, ensuring it complements the overall layout and provides a focal point for contemplation.
- Planting Beds: Embracing Simplicity and Balance Japanese gardens often feature well-defined planting beds, showcasing a thoughtful selection of plants. Embrace the principles of simplicity and balance by using a limited variety of plant species. Focus on foliage texture, colors, and the changing seasons to create a dynamic and visually appealing landscape.
- Spatial Arrangement: Embracing Negative Space The concept of “Ma” or negative space is integral to Japanese garden design. It refers to the intentional use of empty or open spaces to highlight and enhance the presence of objects and elements. Incorporate open areas within your layout to create a sense of calm and allow the eye to rest, making the surrounding elements more impactful.
- Views and Perspectives: Framing Nature’s Beauty Japanese gardens are often designed with the intention of framing and showcasing scenic views. Take advantage of the surrounding natural beauty by carefully positioning elements to capture breathtaking vistas. Use trees, trellises, or arbors to create frames that draw the eye towards focal points, such as mountains, trees, or other captivating features.
By considering these aspects when designing the layout of your Japanese garden, you can create a harmonious space that captivates and inspires.
Remember, each element should work in unison to evoke a sense of tranquillity and reflect the beauty of nature.
Selecting Authentic Japanese Plants
Selecting the right plants is essential to capture the authentic essence of a Japanese garden.
The choice of plants contributes to the overall aesthetic, symbolism, and seasonal beauty of the landscape.
Let’s explore the key factors to consider when selecting authentic Japanese plants for your garden.
Native and Traditional Species
Embrace Native and Traditional Species To create an authentic Japanese garden, prioritize native plants that thrive in your specific climate and region.
Look for plant species that have been traditionally used in Japanese garden design, such as Japanese maple (Acer palmatum), cherry blossoms (Prunus serrulata), bamboo (Bambusa spp.), and Japanese iris (Iris ensata).
These plants not only contribute to the visual appeal but also have cultural significance.
Symbolism
Symbolism and Cultural Significance Japanese gardens often incorporate plants with symbolic meanings that reflect the values and traditions of Japanese culture.
For example, the cherry blossom represents the transient nature of life, while the pine tree symbolizes longevity and resilience.
Research the symbolism behind various plants and select those that align with your desired theme or message.
Texture and Form
Texture and form play a vital role in Japanese garden aesthetics.
Look for plants with interesting foliage textures, such as the delicate and feathery leaves of Japanese painted fern (Athyrium niponicum var. pictum) or the bold and dramatic foliage of Japanese forest grass (Hakonechloa macra).
Consider plants with graceful and sculptural forms, such as ornamental grasses, bonsai trees, or the elegant weeping form of Japanese maple.
Seasonal Beauty
Seasonal Beauty Japanese gardens embrace the ever-changing beauty of the seasons.
Incorporate plants that showcase stunning displays during different times of the year.
From the vibrant cherry blossoms in spring to the fiery colors of Japanese maples in autumn, ensure your selection offers a captivating tapestry of seasonal transitions, adding depth and visual interest to your garden.
Foliage Colours and Combinations
Pay attention to foliage colours and their combinations to create visually captivating compositions.
Japanese gardens often feature a harmonious blend of green, bronze, red, and variegated foliage.
Seek out plants that offer a range of hues and experiment with different combinations to achieve a visually pleasing palette throughout the year.
Maintenance and Growth Habits
Consider the growth habits and maintenance requirements of the plants you choose.
Japanese gardens often embrace the concept of “Wabi-Sabi,” which appreciates the beauty of imperfection and natural growth.
Select plants that can be pruned and shaped to maintain a sense of balance and harmony, while also considering their long-term maintenance needs.
By carefully selecting authentic Japanese plants, you can infuse your garden with a sense of tradition, cultural significance, and natural beauty.
Each plant will contribute to the overall ambiance and create a captivating space that evokes the spirit of a true Japanese garden.
Incorporating Elements of Zen
To truly embody the essence of a Japanese garden, incorporating elements of Zen is paramount.
Zen principles not only infuse a sense of tranquillity and mindfulness but also enhance the overall aesthetic and spiritual experience.
Let’s explore how you can incorporate these elements into your garden design.
- Meditation Spaces: Finding Inner Stillness Create dedicated meditation spaces within your garden where you can find solace and connect with the present moment. This can be a simple stone bench placed under the shade of a tree or a secluded area with a small Zen rock garden. Choose a spot that offers privacy and a sense of seclusion, allowing you to immerse yourself in the serene atmosphere.
- Zen Rock Gardens: Cultivating Serenity Zen rock gardens, known as karesansui, are iconic elements in Japanese garden design. These minimalist gardens consist of carefully raked gravel or sand, symbolizing water, and strategically placed rocks representing mountains or islands. The rhythmic patterns created by raking the gravel evoke a sense of tranquillity and invite contemplation.
- Bamboo: Graceful Strength and Flexibility Bamboo is a versatile and highly regarded plant in Japanese culture, symbolizing strength, resilience, and flexibility. Incorporate bamboo into your garden as a living screen to provide privacy or as elegant structural elements, such as fences, trellises, or water spouts. Its tall and graceful presence adds a touch of natural beauty and evokes a sense of Zen.
- Lanterns: Illuminating the Path Stone lanterns, known as tōrō, are traditional Japanese garden ornaments that add a touch of enchantment and practicality. Place lanterns strategically along pathways or near water features to guide visitors through the garden, especially during evenings. The soft glow emitted by these lanterns creates a serene ambiance and allows for contemplation in the gentle illumination.
- Tea Houses: Embracing the Tea Ceremony Tea houses, or chashitsu, are integral components of Japanese garden design, particularly in traditional tea gardens. These small, intimate spaces are designed for the art of tea ceremonies, promoting harmony, mindfulness, and hospitality. Incorporate a tea house or a dedicated tea garden area, complete with a tea house-style structure, to embrace this cultural tradition.
- Bonsai: Capturing the Essence of Nature Bonsai, the art of growing miniature trees in containers, is synonymous with Japanese garden aesthetics. These meticulously shaped and pruned trees represent the grandeur and beauty of nature in a compact form. Incorporate bonsai specimens throughout your garden to create focal points and evoke a sense of timelessness and reverence for the natural world.
By incorporating elements of Zen, you can transform your Japanese garden into a sanctuary of tranquillity and contemplation.
Whether through meditation spaces, Zen rock gardens, bamboo, lanterns, tea houses, or bonsai, each element will contribute to the overall harmony, spirituality, and aesthetic beauty of your garden.
Enhancing the Atmosphere with Ornamentation
Ornamentation plays a crucial role in elevating the atmosphere of a Japanese garden, adding visual interest, and imbuing the space with a touch of artistry.
Thoughtfully selected ornaments can evoke a sense of tradition, tell stories, and create focal points.
Let’s explore various ways to enhance your garden’s atmosphere with the right ornamentation.
- Stone Lanterns: Illuminating the Night Stone lanterns, known as tōrō, are iconic Japanese garden ornaments that add a touch of elegance and mystique. These meticulously crafted lanterns come in various styles and sizes, from the simple Yukimi lantern to the more intricate Kasuga lantern. Strategically place them along pathways, near water features, or in serene corners of the garden to create a captivating ambiance, especially during nighttime.
- Water Basins: Invoking Purification Water basins, called tsukubai, serve both functional and symbolic purposes in Japanese gardens. These stone or ceramic basins are traditionally used for ritual handwashing to purify oneself before entering a tea house or shrine. Incorporate a beautifully designed tsukubai into your garden, complete with a bamboo ladle and a small stone basin, to evoke a sense of reverence and tranquility.
- Tsukiyama: Miniature Landscapes Tsukiyama refers to the art of creating miniature landscapes within a garden. These meticulously crafted compositions mimic natural scenes, including hills, valleys, and water features. Incorporate miniature mountains, cascading streams, and serene ponds to create a sense of depth and perspective. Adorn these landscapes with carefully chosen rocks, shrubs, and moss to evoke a sense of serenity and wonder.
- Pagodas: Symbolism and Grace Pagodas, known as tō, are traditional Japanese garden ornaments that add a touch of cultural symbolism and architectural elegance. These multi-tiered structures, typically made of stone or wood, symbolize spiritual ascent and are often associated with Buddhism. Place pagodas strategically within the garden to create vertical focal points and enhance the overall aesthetic appeal.
- Bridges: Symbolic Connections Bridges, or hashi, hold symbolic significance in Japanese garden design, representing the connection between different realms or elements within the landscape. Incorporate a beautifully crafted bridge over a stream, pond, or dry riverbed to create a sense of transition and invite exploration. Choose a style that complements the overall theme of your garden, whether it be a simple arched bridge or a curved moon bridge.
- Sculptures and Statues: Expressions of Art Sculptures and statues add artistic expressions and cultural references to a Japanese garden. Choose sculptures that resonate with the garden’s theme and evoke a sense of harmony and balance. Consider traditional Japanese motifs like deer, cranes, or mythical creatures like dragons or foo dogs. These artistic additions will create focal points and engage visitors with their unique stories and symbolism.
By incorporating carefully selected ornamentation, you can enhance the atmosphere of your Japanese garden, infusing it with tradition, symbolism, and artistic flair.
Whether through stone lanterns, water basins, miniature landscapes, pagodas, bridges, or sculptures, each ornament will contribute to the overall aesthetic appeal and create a captivating experience for all who visit.
Maintaining the Japanese Garden
Maintaining a Japanese garden requires careful attention to detail and a commitment to preserving its beauty and harmony.
By implementing proper maintenance practices, you can ensure that your garden remains a captivating oasis for years to come.
Let’s explore essential maintenance tips for your Japanese garden.
Pruning and Trimming
Shaping Nature’s Beauty Regular pruning and trimming are essential for maintaining the desired shape and balance of plants in your garden.
Prune trees, shrubs, and bonsai specimens to maintain their intended form and prevent overgrowth.
Trim back overhanging branches that may obstruct pathways or block desired views. Additionally, remove dead or diseased foliage to promote plant health and aesthetics.
Weed Control
Taming the Unwanted Intruders Weeds can disrupt the visual appeal and harmony of your Japanese garden.
Regularly inspect your garden for weeds and remove them promptly. Hand-pulling is often the preferred method, as it minimizes soil disturbance.
Applying a layer of organic mulch around plants can help suppress weed growth and retain soil moisture.
Watering
Nurturing Life’s Vitality Proper watering is crucial to maintain the health and vitality of your garden’s plants.
Japanese gardens often feature water elements like ponds, streams, or water basins, which require regular monitoring to ensure appropriate water levels.
Water plants according to their specific needs, taking into consideration factors such as soil moisture, weather conditions, and the plant’s stage of growth.
Moss Maintenance
Preserving Serene Ground Covers Moss is a common ground cover in Japanese gardens, adding a lush and serene ambiance.
To maintain healthy moss, ensure it receives adequate moisture and shade. Remove any debris or fallen leaves that may accumulate on the moss, as they can hinder its growth.
Avoid stepping or placing heavy objects on the mossy areas to prevent damage.
Stone and Pathway Care
Ensuring Safety and Aesthetics Regularly inspect stones, pathways, and stepping stones within your garden.
Clean them of any dirt, debris, or moss build-up to preserve their natural beauty and prevent slips or trips.
Realign or replace any loose stones to ensure safe and stable pathways. Additionally, consider applying a sealant to protect porous stones from weathering or staining.
Seasonal Adjustments
Embracing Nature’s Rhythm Japanese gardens transition with the seasons, and adapting to these changes is crucial for maintenance.
Adjust your gardening practices based on seasonal requirements. For example, in autumn, remove fallen leaves from ponds or water features to prevent clogging.
In winter, protect delicate plants from frost or cold temperatures. Embrace these seasonal adjustments to maintain the garden’s harmony and natural rhythm.
Adding Your Personal Touch
While traditional Japanese gardens have their own distinct design principles, adding your personal touch allows you to infuse your unique style and preferences into the space.
By incorporating elements that resonate with you, you can create a Japanese garden that reflects your personality and creates a deeper connection.
Let’s explore some creative ways to add your personal touch to your Japanese garden.
- Selecting Meaningful Objects: Tell Your Story Consider incorporating objects or artefacts that hold personal significance or tell a story. These can be heirlooms, souvenirs from your travels, or even handmade items that reflect your creativity. Display them strategically within the garden, such as on a stone pedestal or within a carefully designed alcove, to create focal points and spark conversations with visitors.
- Artistic Accents: Infusing Color and Texture Introduce artistic accents that complement the natural beauty of your Japanese garden. This could include colourful ceramic pots, vibrant wind chimes, or hand-painted tiles. Choose accents that harmonize with the garden’s overall aesthetic and evoke a sense of joy or serenity. These artistic touches will add bursts of visual interest and further enhance the ambiance.
- Personalized Zen Elements: Meditation and Contemplation If you seek tranquillity and reflection in your garden, consider incorporating personalized Zen elements. Install a small meditation area with a comfortable cushion or bench where you can sit and unwind. Place a miniature Zen garden with carefully raked sand and stones, allowing you to engage in the meditative act of creating patterns. These personalized Zen elements will offer a peaceful retreat within your garden.
- Plant Selection: Expressing Your Botanical Preferences While traditional Japanese gardens have specific plant selections, you can still incorporate your favorite plants that thrive in the local climate. Choose flowers, shrubs, or trees that resonate with you and create visual harmony with the existing plants. Whether you prefer vibrant blooms, delicate foliage, or evergreen varieties, infusing your botanical preferences will make the garden feel uniquely yours.
- Sculptural Installations: Modern Interpretations For those with a contemporary taste, consider incorporating modern sculptural installations that contrast with the garden’s traditional elements. These can be abstract metal sculptures, geometric structures, or minimalist artworks. The juxtaposition of old and new will create a visually striking and thought-provoking experience for both you and your visitors.
- Personalized Seating: Relaxation and Enjoyment Create intimate spaces within your Japanese garden by adding personalized seating areas. Choose comfortable chairs, benches, or even hammocks where you can unwind and appreciate the beauty of your surroundings. Consider placing seating near water features, under shade-providing trees, or overlooking a picturesque view. These seating areas will invite you to relax, read a book, or simply enjoy the peaceful ambiance of your garden.
Remember, adding your personal touch to a Japanese garden is about creating a space that resonates with you and evokes a sense of harmony and connection.
By incorporating meaningful objects, artistic accents, personalized Zen elements, your favourite plants, sculptural installations, and comfortable seating, you can infuse your unique style and create a garden that truly reflects your personality and aspirations.
Frequently Asked Questions
What is another name for a Japanese garden?
Another name for a Japanese garden is “Nihon Teien” in Japanese, which translates to “Japanese-style garden” or simply “Zen garden.”
The term “Zen garden” is often used to describe the minimalist and serene nature of Japanese gardens, emphasizing their connection to Zen Buddhism and the meditative atmosphere they create.
What are the 4 elements of Japanese garden?
The four essential elements of a Japanese garden are rocks, water, plants, and ornaments.
These elements work together to create a harmonious and balanced landscape that embodies the principles of simplicity, natural beauty, and tranquillity.
The rocks symbolize mountains and islands, while water represents streams, ponds, or waterfalls.
The carefully chosen plants reflect the changing seasons and provide a sense of serenity.
Finally, the ornaments, such as lanterns, bridges, or arbors, add cultural and aesthetic appeal to the garden.
Together, these elements create a captivating and contemplative space for relaxation and reflection.
What colours look best in a Japanese garden?
In a Japanese garden, a harmonious colour palette that reflects the serenity and natural beauty of the surroundings is key.
While there isn’t a single set of prescribed colours, certain hues are commonly used to achieve a visually pleasing and tranquil atmosphere.
Earthy tones like moss green, various shades of brown, and warm greys help create a sense of grounding and blend the garden with its natural surroundings.
These colours can be found in the foliage of trees and shrubs, as well as in the use of natural materials like rocks and gravel.
Soft pastel colours such as light pink, pale purple, and delicate white are often employed to represent the ephemeral beauty of cherry blossoms and other flowering plants.
These gentle hues add a touch of elegance and grace to the garden.
Additionally, incorporating pops of vibrant colours sparingly can create focal points and add visual interest.
A burst of fiery red from Japanese maples or the striking hues of ornamental flowers like irises or azaleas can enliven the garden and provide a delightful contrast against the predominantly calming tones.
Ultimately, the colour choices in a Japanese garden should aim to harmonize with the natural surroundings, evoke a sense of tranquillity, and reflect the changing seasons.
It is essential to strike a balance between muted and vibrant colours, allowing the beauty of the plants and materials to shine through while maintaining a serene and captivating atmosphere.
What are the 7 principles of Japanese garden?
The seven principles of Japanese garden design, known as “Shichikujuhakkei,” guide the creation of these serene and harmonious landscapes. These principles include:
- Simplicity (Kanso): Emphasizing the beauty of simplicity and minimalism, Japanese gardens often feature clean lines, uncluttered spaces, and a sense of understated elegance.
- Tranquillity (Seijaku): Creating a peaceful atmosphere, Japanese gardens aim to evoke a sense of calmness and serenity, providing a sanctuary for relaxation and contemplation.
- Naturalness (Shizen): Embracing the natural world, Japanese gardens strive to mimic and enhance the beauty of nature, harmoniously blending the human-made elements with the surrounding environment.
- Asymmetry (Fukinsei): Departing from perfect symmetry, Japanese gardens embrace asymmetry to evoke a sense of naturalness and a more organic aesthetic, capturing the imperfections and balance found in nature.
- Balance (Koko): Achieving balance and harmony is a key principle in Japanese garden design. This balance extends to both the physical layout of the garden and the visual arrangement of elements, ensuring a sense of equilibrium.
- Symbolism (Yugen): Japanese gardens often incorporate symbolic elements that evoke deeper meanings or associations, such as the use of rocks to represent mountains or water to symbolize life’s flow and continuity.
- Borrowed Views (Shakkei): Incorporating the surrounding landscape into the garden design, Japanese gardens utilize “borrowed views” to seamlessly integrate with the outside environment, extending the sense of space and connecting with the larger natural world.
These principles serve as guiding principles in the creation of Japanese gardens, allowing for a harmonious blend of aesthetics, philosophy, and nature to create captivating and inspiring landscapes that rejuvenate the soul.-
Japanese Garden Conclusion
In conclusion, creating a Japanese garden is a labour of love that requires careful planning, attention to detail, and a deep appreciation for nature’s beauty.
It is an opportunity to reconnect with the elements, find solace in simplicity, and create a space that brings you joy and serenity.
Remember, the journey doesn’t end here. As you embark on your own Japanese garden project, continue to seek inspiration, experiment with different elements, and adapt the design to suit your evolving tastes and needs.
With time and dedication, your Japanese garden will flourish, becoming a sanctuary that nurtures your soul and captivates all who visit.
39 Inspiring Rockery Ideas – [Garden Idea & Designs]
Have you ever fancied a stunning focal point in your garden? Why not create your very own rockery!
In this post, we have a number of rockery ideas and inspiration, broken down into different categories.
Rock gardens are popular for a number of reasons. Not only are they very affordable, but they are also pretty easy to build.
A lot of the materials can but bought from us here at TW Aggregates such as turf, Top soil, compost, decorative aggregates plus much more.
So let’s jump right in and look at some inspiring rock garden ideas.
What Is a Rock Garden?
A rock garden is a garden designed specifically to feature rocks and other natural elements. It’s usually a small area that’s filled with various types of rocks, stones, and other geology-inspired elements.
There are several reasons why you might want to create a rock garden in your yard. Some people find them aesthetically pleasing, while others use them as focal points for their gardens.
It also adds texture, colour and beauty, making it the perfect place to relax on a nice summer s day.
Rockery Ideas
Here are some rock garden ideas broken down into various different sections to give you some ideas and inspiration for your own garden.
You can replicate these ideas as closely as you like or take your favourite elements from different designs to create your own design.
Rock Ideas With Water Feature
View the original design inspiration
View the original design inspiration
View the original design inspiration
View the original design inspiration
View the original design inspiration
View the original design inspiration
Rock Ideas For Small Gardens
View the original design inspiration
View the original design inspiration
View the original design inspiration
View the original design inspiration
View the original design inspiration
Rockery Ideas Around a Tree
View the original design inspiration
View the original design inspiration
View the original design inspiration
View the original design inspiration
View the original design inspiration
View the original design inspiration
Corner Rock Ideas
View the original design inspiration
View the original design inspiration
View the original design inspiration
View the original design inspiration
View the original design inspiration
View the original design inspiration
View the original design inspiration
View the original design inspiration
Rockery Border Ideas
View the original design inspiration
View the original design inspiration
View the original design inspiration
View the original design inspiration
View the original design inspiration
View the original design inspiration
View the original design inspiration
Rockery Plant Ideas
View the original design inspiration
View the original design inspiration
View the original design inspiration
View the original design inspiration
View the original design inspiration
View the original design inspiration
View the original design inspiration
Inspiring Rockery Ideas Conclusion
Rockeries make an excellent addition to any outdoor space, no matter how big or small your garden may be.
They not only add beauty, but also make the space more serene and calm. They are also surprisingly pretty easy to create on your own with no prior experience or the need to be a professional landscaper.
If you want to get a beautiful rockery of your own, just keep these designs in mind so that you can create one that is truly mesmerizing for everyone who visits it!
Have you successfully created a rockery for your garden? Let us know in the comments below, or send us your pics.
Small Garden Ideas & Inspiration On A Budget
Welcome to the enchanting world of small garden ideas and inspiration!
From cosy balconies to pocket-sized backyards, these petite wonders offer endless possibilities for green enthusiasts and aspiring landscape artists alike.
In this guide, we will unravel the secrets of maximizing small garden spaces, infusing them with life and character.
Discover the art of vertical gardening with living walls adorned in trailing plants, or create intimate seating areas with garden furniture where relaxation and reflection become a daily ritual.
We’ll explore the wonders of container gardening, where miniature masterpieces bloom at your fingertips, and reveal the allure of raised beds that elevate gardening to new heights.
Let your creativity bloom, and let’s craft the small garden of your dreams together!
Small Garden Ideas & Inspiration
1. Utilizing Vertical Space
Green Walls: Living Artistry on Vertical Canvases
Picture this: a living tapestry of lush foliage draped gracefully upon walls and structures, breathing life into the once barren surfaces.
Welcome to the captivating realm of green walls, also known as living walls or vertical gardens.
These botanical masterpieces are the poet’s dream, transforming mundane spaces into living poetry that captivates the senses.
Climbing Plants: Nature’s Ascent to Enchantment
But wait, there’s more! Enter the mesmerizing world of climbing plants, the botanical acrobats that scale fences, trellises, and arbours with graceful prowess.
Each vine, each tendril tells a story of nature’s tenacity and beauty.
From the flamboyant wisteria to the delicate clematis, and the steadfast ivy, climbing plants adorn your small garden with a touch of drama and elegance.
Vertical Garden Bliss: Where Creativity Soars
Embracing vertical space is more than just a horticultural feat; it’s an art form that ignites the imagination.
In the realm of petite gardens, where every inch counts, vertical gardens become the canvas for creativity.
Transform blank walls into living artworks, or create green room dividers that add depth and dimension to your outdoor haven.
Space-Efficient Gardening: When Every Inch Counts
In a world where space is at a premium, small garden enthusiasts celebrate the wonders of space-efficient gardening.
Utilizing vertical space not only enhances the visual appeal but also optimizes precious real estate.
Green walls and climbing plants elevate your garden’s allure, providing botanical treasures that bloom and flourish in harmonious coexistence.
Water Garden: Create a Mesmerizing Vertical Oasis of Tranquillity and Elegance
Embrace the serenity of water in your small garden by crafting a mesmerizing water garden along a vertical wall.
Picture a cascading waterfall, its gentle flow reflecting the dancing sunlight, transforming your outdoor space into a tranquil oasis.
Imagine the soothing sound of water trickling down, a melodic symphony that washes away the stresses of the day.
A water garden is not just an aesthetic delight but also a haven for relaxation and contemplation.
As water gently caresses the vertical surface, it creates an aura of elegance that elevates the ambiance of your green sanctuary.
The interplay of light and water casts enchanting patterns, enchanting both the eyes and the soul.
Window Boxes: A Whimsical Vertical Canvas Bursting with Color and Fragrance
Window boxes are a delightful addition to any vertical space, infusing your small garden with a touch of whimsy and charm.
These dainty containers suspended along windowsills or attached to walls transform otherwise plain surfaces into vibrant canvases teeming with life.
Imagine looking out of your window to behold a picturesque scene of cascading blooms and aromatic herbs.
Window boxes breathe new life into your surroundings, whether you live in a cosy apartment or a quaint cottage.
Their compact size allows you to create a captivating display of colours and scents even in the smallest of spaces.
2. Cozy Nooks and Garden Furniture
Creating Intimate Seating Areas: An Oasis of Comfort
Imagine stepping into your small garden oasis, where time seems to slow down, and worries drift away like autumn leaves on the breeze.
Intimate seating areas are the gateways to such rejuvenating experiences.
They offer respite from the hustle and bustle of daily life, inviting you to linger, to breathe, and to simply be.
Garden Furniture: Where Aesthetics Meets Comfort
Now, let’s immerse ourselves in the world of garden furniture, where aesthetics and comfort intertwine.
These outdoor essentials are more than mere elements of design; they are instruments of relaxation and joy.
From weather-resistant materials that withstand the elements to ergonomic designs that cradle your body, garden furniture elevates your outdoor experience to the epitome of comfort.
The Whimsy of Garden Seating: From Swing Sets to Hammocks
But wait, there’s more to discover in these cosy nooks! Embrace the whimsy of garden seating, where swing sets sway with laughter and hammocks cradle daydreams.
These playful elements add a touch of childhood nostalgia and carefree spirit to your small garden, inviting you to indulge in moments of pure bliss.
Captivating Garden Reading Nooks: A Book Lover’s Paradise
For the literary aficionados among us, envision a captivating garden reading nook – a book lover’s paradise!
Picture a secluded corner adorned with soft cushions and a rustic bookshelf, where the written word becomes your sanctuary and nature’s embrace, your muse.
Enhancing Cosiness with Textiles and Lighting
To further amplify the allure of cosy nooks, let us explore the art of textiles and lighting.
Soft cushions and throws infuse warmth and style, while outdoor rugs define spaces with a touch of elegance.
As the sun sets, garden lights and lanterns dance in the dusk, enveloping your intimate haven in a captivating glow.
Fruit Trees: A Bountiful Touch of Nature’s Harvest in Compact Containers
Imagine strolling through your small garden, and there it is – a miniature orchard of delightful fruit trees, each elegantly cradled in its own container.
Dwarf fruit trees offer a bountiful touch of nature’s bounty, bringing beauty, fragrance, and a delicious harvest to your outdoor space.
In the past, having a fruit tree in a limited garden seemed like a distant dream, but not anymore.
Dwarf fruit trees have revolutionized the way we embrace nature’s gifts, allowing you to cultivate these fruitful wonders even in the coziest of spaces.
3. Container Gardening Delights
Miniature Gardens in Pots: A Symphony of Design
Imagine holding a world of green enchantment in the palm of your hand. Container gardening allows you to do just that!
Each pot becomes a canvas for artistic expression, where colour, texture, and form harmonize in a symphony of design.
From vibrant blooms that paint the world in a kaleidoscope of hues to ornamental grasses that sway with graceful elegance, container gardens offer a glimpse of Mother Nature’s boundless creativity.
Fresh Herbs at Your Fingertips: A Culinary Haven
But there’s more to container gardening than ornamental delights. Step into the realm of practicality and convenience with kitchen gardens brimming with fresh herbs.
Picture yourself plucking fragrant basil for a homemade pesto or adding a sprig of mint to your refreshing summer drink – it’s a culinary haven just a few steps away from your kitchen!
Space-Efficiency and Flexibility: The Power of Portable Gardens
One of the greatest charms of container gardening lies in its space-efficient nature.
Whether you have a petite balcony, a cosy patio, or a sunny window sill, portable gardens offer the freedom to explore green possibilities wherever your heart desires.
They adapt to your changing needs, allowing you to move and rearrange your green gems as you see fit.
Vertical Trellises: A Garden Ascending
But wait, we can take container gardening to new heights – literally! Enter the world of vertical trellises that add a touch of elevation to your garden paradise.
Train climbing plants to scale these artistic structures, creating living tapestries that transform blank walls into green wonders.
With vertical trellises, you embrace the verticality of gardening and elevate your outdoor haven in the most captivating manner.
4. Pathways of Whimsy
Meandering Trails: The Joy of Exploration
Picture this: a labyrinth of meandering trails that beckon you to wander aimlessly, to lose yourself in the beauty of your garden oasis.
These pathways are invitations to slow down, to let your senses dance with the foliage that brushes against your fingertips, and to savour the moment as each step unfolds a new surprise.
The Charm of Narrow Pathways: Where Intimacy Blooms
But what makes pathways of whimsy so special? It’s the charm of narrow trails that cradle you in their embrace, creating an intimate connection between you and the garden.
In small gardens, where space is a precious commodity, narrow pathways become the threads that weave your green tapestry together, enhancing the sense of cosiness and wonder.
Stepping Stones: A Trail of Delight
Now, imagine stepping stones that lead you on a trail of delight. Each stone becomes a stepping stone of memories, guiding you through the lush wonders of your garden.
The possibilities are endless – from rustic stones that exude old-world charm to vibrant tiles that add a splash of colour to your green haven.
Intriguing Garden Focal Points: The Art of Surprise
But wait, there’s more to these whimsical pathways! Garden focal points become the hidden treasures that surprise and captivate.
Picture a charming birdbath nestled amidst foliage or a quaint garden statue that comes to life as you turn the corner.
These captivating elements infuse your pathways with moments of wonderment.
Glowing Pathways in Dusk: Embrace the Magic of Evening
As the sun sets, a new chapter unfolds – the magic of glowing pathways in dusk.
Garden lights and lanterns come to life, illuminating your meandering trails with a warm and inviting glow.
It’s a fairytale come true, where your garden transforms into a realm of enchantment under the starry night sky.
Budget Garden: Pathways of Charm and Sustainability on a Shoestring
Who says you need to break the bank to create a captivating garden pathway?
Embrace the art of budget gardening and unleash your creativity, crafting charming pathways that beckon with every step.
With a little ingenuity and resourcefulness, you can transform your outdoor space into a visual delight using eco-friendly and affordable materials.
Gravel pathways offer a simple yet alluring choice for budget-conscious gardeners.
This versatile material comes in various colours and sizes, allowing you to customize the look of your pathway to suit your garden’s style.
5. Thematic Inspiration for Small Gardens
Zen Serenity: Tranquil Japanese-Inspired Gardens
Embrace the serene beauty of Japanese-inspired gardens, where Zen serenity becomes a way of life.
These minimalist landscapes captivate with their harmonious design, inviting you to find tranquillity amidst carefully placed rocks, raked gravel, and contemplative water features.
With every step, you enter a realm of inner peace, where the essence of nature intertwines with the soul.
Cottage Garden Charm: Old-World Allure in a Cosy Space
Now, let’s step into the heart-warming charm of cottage gardens, where nostalgia and romance bloom in abundance.
These whimsical spaces captivate with their profusion of flowers, cascading over quaint picket fences and rustic trellises.
Imagine a tapestry of colours and scents, where rose bushes entwine with fragrant lavender and vibrant daisies dance in the breeze.
Modern Oasis: Fusion of Elegance and Greenery
But wait, we can venture into a modern oasis – a realm where sleek sophistication meets the embrace of greenery.
Contemporary garden design harmonizes clean lines and architectural elements with lush plants and artistic focal points.
Picture sleek geometric planters adorned with exotic foliage, or sculptural art pieces that add a touch of avant-garde to your outdoor haven.
Thematic Accents: From Lanterns to Ornamental Bridges
To elevate the thematic allure of your small garden, let us explore thematic accents that weave the narrative together.
Lanterns and stone sculptures transport you to a mystical realm, while ornamental bridges create a sense of whimsy that invites exploration.
These thematic elements are the brushstrokes that paint your garden masterpiece.
Personalizing Thematic Gardens: Express Your Style
The beauty of thematic inspiration lies in its versatility – it’s an invitation to express your unique style and taste.
Whether you prefer the meditative ambiance of Zen gardens, the rustic charm of cottage havens, or the sleek elegance of modern paradises, let your personality shine through and transform your small garden into a reflection of your soul.
Patio Ideas: Unleashing the Magic of Thematic Havens
Your patio is more than just an outdoor space; it’s a canvas waiting to be adorned with creativity and imagination.
Transform this charming alcove into a thematic haven, where each patio idea weaves a tale inspired by different cultures or design eras.
Embrace the allure of thematic patio design, and let your outdoor sanctuary become a reflection of your passions and inspirations.
6. Water Features and Evening Illumination
Water Wonders: Ponds, Fountains, and More
First, let’s immerse ourselves in the world of water wonders. Picture a shimmering pond, its still surface reflecting the clouds above, or a graceful fountain that cascades like a melodious waterfall.
From bubbling streams to trickling waterfalls, water features infuse your garden with a sense of serenity and natural elegance, inviting you to pause and meditate amidst the soothing sounds of water.
Ponds: Ecosystems of Delight
A pond is not just a water feature; it’s an ecosystem of delight. These aquatic havens become the homes of aquatic plants and creatures, fostering biodiversity in your small garden.
Embrace the sight of water lilies floating gracefully and dragonflies darting above the water’s surface – it’s a microcosm of nature’s wonders.
Fountains: A Symphony of Elegance
Now, let’s turn our attention to fountains – the symphony of elegance that enchants with every drop.
Whether it’s a classical tiered fountain or a contemporary sculptural piece, fountains add a touch of refinement to your outdoor space.
Their gentle flow of water becomes the soothing background music to your garden sanctuary.
Evening Illumination: The Enchantment Begins
As the sun bids farewell, the enchantment begins with evening illumination. Garden lights and lanterns come to life, weaving a spell of magic that transforms your small garden into a dreamlike wonderland.
Imagine twinkling fairy lights draping over lush foliage or solar-powered lanterns guiding your path with a warm and inviting glow.
Moonlit Gardens: A Symphony of Shadows
Under the moon’s gentle glow, your garden undergoes a transformation – it becomes a symphony of shadows. Strategic lighting creates intriguing silhouettes, casting an air of mystery and allure.
Moonlit gardens evoke a sense of romance and enchantment, where every leaf and petal takes on a new dimension under the lunar caress.
7. Garden Storage and Organization
Smart Solutions for Garden Tools and Supplies
Imagine a garden shed where every tool has its place and every seed packet finds its designated spot. Smart storage solutions are the backbone of a well-organized garden.
From sturdy tool racks that keep your shovels and rakes at the ready to neat shelves for organizing pots and potting soil, every element plays a crucial role in decluttering your outdoor space.
Emphasizing Tidiness in Small Garden Spaces
In the world of petite gardens, tidiness is paramount.
Clever storage solutions ensure that every inch of your limited space is optimized.
Vertical tool hangers and hanging baskets make use of wall space, while stackable containers and drawers keep your small garden essentials in order without taking up much room.
Garden Storage Structures: Sheds and Beyond
Garden storage structures are the guardians of your gardening arsenal.
Beyond the traditional garden shed, consider other options like garden benches with hidden storage, charming wooden chests, or even creative repurposed furniture that serves both functional and aesthetic purposes.
These structures become not just utilitarian but also charming accents that complement your garden design.
Organizing Potting Stations: A Gardener’s Haven
Ah, let us not forget the heart of every gardener’s haven – the potting station!
This sacred space is where creativity sprouts, and where seedlings grow to become thriving plants.
Organizing your potting station with well-labelled containers and proper storage shelves ensures a smooth and delightful gardening experience.
Enhancing Aesthetics: Storage as Garden Decor
Who says storage can’t be beautiful? Embrace the art of blending functionality with aesthetics by choosing storage solutions that double as garden decor.
Rustic wooden cabinets, stylish wicker baskets, or ornate metal containers can add a touch of charm to your outdoor sanctuary while keeping your garden tools neatly tucked away.
Frequently Asked Questions
How do you design a small garden?
There’s no need to spend a fortune on a large garden when you can create a small one that’s just as beautiful and useful.
It’s important to remember that a small garden doesn’t have to be sparse or boring – in fact, there are plenty of interesting ways to make it work well for your needs.
Here are some tips for designing and planting a small garden:
- Start with an eye for simplicity: Keep the design as simple as possible so that it’s easy to maintain and Weedless. This means using plants that require relatively little care (like berry bushes or annual plants), choosing low-maintenance flowers or herbs, and choosing pieces that you can easily move around if you need to expand or contract the garden.
- Plan your layout carefully: Make sure each section has specific functions (like flower beds for plants, vegetable patches for vegetables, etc.) and that the layout is easy to understand and navigate.
- Choose plants that will complement one another: For example, choose shade-tolerant flowers in front of light-tolerant plants, or choose tall herbs near shorter vegetables. This will help to create balance and harmony in the garden while keeping it visually appealing.
- Use pots and containers to advantage: Pots and containers allow you to grow many different types of plants in a small space without having to purchase large numbers of individual plants. You can also use them to combine different types of plants in one spot (for example, planting roses near lavender).
- Create natural borders: Create borders using rocks, logs, bricks, or other materials found around your home. This will add structure and height to the garden while hiding any unsightly roots from view.
What colours make a garden look big?
It is advisable to use light, cool-coloured paint shades in a garden colour scheme in order to make the space feel larger.
How Do You Brighten Up a Small Garden?
There are a number of ways to brighten up a small garden without spending a lot of money. Here are six suggestions:
- Add artificial plants: If you don’t have any real plants, you can add artificial ones to your garden to add some colour and height. There are many different types of artificial plants available on the market, so it’s easy to find something that looks good in your garden.
- Plant flowers in containers: One great way to add colour and depth to a small garden is by planting flowers in containers. You can buy pre-made flower pots or create your own using simple materials like plastic buckets or mugs. Once you’ve planted the flowers, it’s easy to care for them by watering them and changing the soil when necessary.
- Plant flowers that bloom all summer long: These include daffodils, lilies, iris, and snapdragons.
- Install a trellis for vines or baskets full of flowers.
What are the best flowers to plant in flower beds?
Popular choices for flower beds include petunias, marigolds, geraniums, pansies, and impatiens, as they offer vibrant colors, long-lasting blooms, and easy maintenance.
How do I create a stunning flower bed design?
Achieve a captivating design by choosing a focal point, selecting complementary colours and heights, and incorporating a mix of annuals and perennials for year-round beauty.
Which trailing plants are suitable for hanging baskets?
Consider trailing petunias, ivy geraniums, bacopa, sweet potato vine, and trailing lobelia to create cascading and elegant displays in hanging baskets.
What are the benefits of using hanging baskets in gardening?
Hanging baskets save space, add vertical interest, elevate the aesthetic appeal of any area, and are perfect for growing plants where ground space is limited.
How do I care for trailing plants in hanging baskets?
Water regularly to keep the soil moist, apply a balanced fertilizer to promote growth, and prune occasionally to maintain shape and prevent legginess.
What are the different types of hanging baskets available?
Choose from wire baskets, moss-lined baskets, plastic baskets, and decorative ceramic or resin containers, each offering unique features and aesthetics.
What trailing plants are suitable for shady areas?
Consider trailing fuchsias, ivy, begonias, and coleus, as they thrive in low-light conditions and bring life to shaded spots.
Can I mix different flowers in the same flower bed?
Yes, combining various flowers with different colors, textures, and heights creates dynamic and visually appealing flower beds with a harmonious and diverse display.
Small Garden Ideas Conclusion
In conclusion, your small garden holds boundless potential for creating a haven of natural beauty and enchantment.
Throughout this journey, we’ve explored a tapestry of small garden ideas to transform your limited space into a green paradise.
Embrace the charm of vertical space. Discover the allure of cozy nooks adorned with garden furniture.
Unlock the magic of container gardening, where pots and planters become miniature gardens bursting with life.
Thematic inspirations transport you to worlds of serenity and nostalgia, from the Zen tranquility of Japanese-inspired retreats to the old-world charm of cottage gardens.
Let your garden thrive, for it is a testament to the beauty of nature and the artistry of your heart.