Can You Paint Gravel Boards?: A Complete Guide + Tips & Tricks
Painting gravel boards is a simple and affordable way to enhance the appearance of your garden or outdoor space.
Gravel boards, also known as fence panels, are the boards that sit at the base of a fence and prevent the fence from coming into contact with the ground.
They are typically made of wood, concrete or plastic. Painting these boards allows you to change their colour and add a touch of personality to your outdoor space.
The purpose of this blog post is to provide a comprehensive guide on painting gravel boards. We will cover the basics of what gravel boards are, the benefits of painting them, and the steps involved in the painting process.
We will also provide tips and information on how to properly prepare the surface, choose the right paint and colour, and maintain the painted surface for a long-lasting finish.
Additionally, we will also address any potential challenges that may arise while painting gravel boards, and provide solutions to overcome them.
The goal is to equip readers with the knowledge and skills necessary to successfully paint their own gravel boards and enhance the overall look of their outdoor space.
What Are Gravel Boards?

Gravel boards are the boards that sit at the base of a fence and prevent the fence from coming into contact with the ground.
They are typically made of wood or concrete. The main function of gravel boards is to protect the fence from rot, decay, and moisture.
They also help to keep the fence stable by providing additional support and preventing the fence from sagging.
Furthermore, they are used to elevate the fence above the ground level and to allow for drainage and ventilation.
By keeping the fence off the ground, it reduces the risk of pests and damage caused by moisture and water.
They are an essential component of a fence and are crucial for the longevity and durability of the fence.
Here at TW Aggregates we offer the following concrete gravel boards:
Why Paint Gravel Boards?
Benefits Of Painting Gravel Boards
Painting gravel boards has several benefits that can enhance the overall appearance of your garden or outdoor space:
- Aesthetics: One of the main reasons to paint gravel boards is to change their colour and add a touch of personality to your outdoor space. Painting them can add a new level of visual appeal and make your garden look more cohesive and polished.
- Protection: Painting can also protect your gravel boards from the elements and prolong their lifespan. A coat of paint can shield the boards from moisture, UV rays, and other environmental factors that can cause the boards to rot, warp or degrade.
- Easy Maintenance: Painted gravel boards are also easier to clean and maintain, as dirt and grime won’t adhere as easily to the painted surface.
- Cost-Effective: Painting gravel boards is a cost-effective way to refresh and update the look of your garden, rather than replacing the entire fence.
In summary, painting gravel boards can not only improve the appearance of your garden, but also provide protection and longevity for the material.
How Painting Gravel Boards Can Enhance The Appearance Of A Garden Or Outdoor Space
Painting gravel boards can enhance the appearance of a garden or outdoor space in several ways:
- Colour Coordination: Painting gravel boards allows you to match the colour of the boards to existing elements in your outdoor space, such as the colour of your house, shutters, or trim. This can create a cohesive and polished look that ties everything together.
- Accentuation: Painting gravel boards in a bold or contrasting colour can also make them an accent in your garden design, and draw attention to certain areas of your outdoor space.
- Textural and Visual Interest: Painting gravel boards in a different colour or pattern can add textural and visual interest to your garden, and make it more visually appealing.
- Personalization: Painting gravel boards can give your garden or outdoor space a personal touch, and reflect your unique style and taste.
- Concealment: In case of any imperfections or damages on the gravel boards, painting them can conceal them and give your garden a polished and well-maintained look.
In summary, painting gravel boards can change the colour and look of the boards, and make them a more attractive and appealing element in your garden or outdoor space.
It can also be used as a design tool to create a cohesive and polished look, add an accent to certain areas, or even conceal imperfections.
Preparing To Paint Your Gravel Boards
Steps To Take Before Painting
Before painting gravel boards, it is important to take the proper steps to prepare the surface for painting. Here are some steps you should take:
- Clean the Surface: The first step is to clean the surface of the gravel boards thoroughly. Use a pressure washer or a stiff-bristled brush and a mild detergent to remove any dirt, grime, or mildew. Rinse the boards with clean water and allow them to dry completely.
- Repair any Damage: Inspect the boards for any cracks, holes, or rotting wood and repair them using wood filler or epoxy. Sand the repaired areas smooth to ensure the paint adheres properly.
- Sand the Surface: Sand the surface of the boards lightly with a fine-grit sandpaper to remove any rough spots or uneven surfaces. This will help the paint adhere better and give a smooth finish.
- Remove any Old Paint: If the boards are already painted and you wish to repaint them, you will need to remove any old paint. Use a paint scraper, wire brush or sandpaper to remove any loose or flaking paint.
- Mask off any areas that don’t need to be painted: Use masking tape and paper to cover any areas of the fence that don’t need to be painted, such as the fence posts or hardware.
- Prime the Surface: If the surface is new or unpainted, or if the existing paint is in poor condition, you should prime the surface first. This will help the paint adhere better and give a better finish.
By following these steps, you will have a clean, smooth and prepared surface that is ready for painting. Proper preparation is crucial to ensure that the paint adheres well, and that the final result is smooth and durable.
Materials And Tools Needed
When painting gravel boards, you will need a few basic materials and tools:
- Paint: Choose an exterior paint that is suitable for the type of surface you are painting. Acrylic paint is a good option for wood, while oil-based paint is suitable for concrete and plastic.
- Primer: If the surface is new or unpainted, or if the existing paint is in poor condition, you will need to use a primer. Choose a primer that is designed for the type of surface you are painting.
- Paint brushes: You will need paint brushes of different sizes, such as a 2-inch and 1-inch brush, to apply the paint to the different areas of the boards.
- Paint roller and tray: A paint roller and tray will help to apply the paint evenly and quickly to large areas.
- Sandpaper or wire brush: to remove any loose or flaking paint.
- Cleaner and detergent: to clean the surface of the gravel board
- Masking tape and paper: to cover any areas of the fence that don’t need to be painted, such as the fence posts or hardware
- Safety gear: such as gloves, goggles, and a mask to protect yourself from fumes and dust.
By having these materials and tools on hand, you will be able to paint your gravel boards effectively, and achieve a smooth and even finish.
Safety Precautions
When painting gravel boards, it is important to take certain safety precautions to protect yourself and others from potential hazards:
- Wear protective gear: Wear gloves, goggles, and a mask to protect yourself from fumes and dust.
- Keep the area clear: Keep the area around the boards clear of flammable materials and debris to prevent fires and accidents.
- Follow the manufacturer’s instructions: Read and follow the manufacturer’s instructions for the paint and primer you are using, and follow any safety precautions listed on the label.
- Be careful with ladders: If you need to use a ladder, be sure to use it safely and follow the proper ladder safety guidelines.
- Keep children and pets away: Keep children and pets away from the area while you are working to prevent accidents and injuries.
- Dispose of paint properly: Dispose of any left-over paint, paint cans, and rags in accordance with the local regulations, to avoid any environmental hazards.
By taking these safety precautions, you can reduce the risk of accidents and injuries while painting your gravel boards, and ensure that the job is done safely and effectively.
Gravel Board Painting Process
Choosing The Right Paint And Colour
Choosing the right paint and colour for your gravel boards is an important step in the painting process. Here are some things to consider when making your selection:
- Type of paint: Choose an exterior paint that is suitable for the type of surface you are painting. Acrylic paint is a good option for wood, while oil-based paint is suitable for concrete and plastic.
- Finish: Consider the type of finish you want for your gravel boards. A gloss finish will give a shiny and smooth finish, while a semi-gloss finish will have a slight shine and a satin finish will have a low sheen.
- Colour: Consider the colour of your existing fence, house, and other elements in your outdoor space. Choose a colour that will complement or contrast these elements and enhance the overall appearance of your garden.
- Durability: Choose a paint that is durable and long-lasting, and that can withstand the elements and UV rays.
- Brand: Research and choose a reputable paint brand that has a proven track record of quality and durability.
By considering these factors, you can make an informed decision and select the right paint and colour for your gravel boards.
This will ensure that the paint adheres well, and that the final result is smooth and durable, and enhances the overall appearance of your garden or outdoor space.
Applying Paint To Gravel Boards: Tips For A Smooth And Even Finish
Once you have chosen the right paint and colour, you can begin the process of applying the paint to your gravel boards. Here are some steps to follow:
- Stir the paint thoroughly: Make sure to stir the paint well before applying it, to ensure that the pigments are evenly distributed.
- Start with the edges: Use a small paint brush to paint the edges of the boards first. This will ensure that the edges are covered and that the paint doesn’t drip or run.
- Use a paint roller for larger areas: Use a paint roller and a paint tray to apply the paint to larger areas of the boards. Roll the paint in a W-shape pattern to ensure even coverage.
- Use a brush for the details: Use a small paint brush to paint the details of the boards, such as the corners and crevices.
- Apply a second coat: Allow the first coat of paint to dry completely before applying a second coat. This will ensure that the paint is evenly distributed and that the boards are fully covered.
- Clean up: Clean up any drips, spills or excess paint as you go along, to prevent them from drying and leaving a rough finish.
By following these steps, you can apply the paint to your gravel boards leaving a professional finish that is going to look great for your garden.
Drying And Curing Times
Once you have finished applying the paint to your gravel boards, it is important to allow sufficient drying and curing time before using or moving them.
- Drying Time: Drying time depends on the type of paint and the conditions under which the paint was applied. Generally, it takes about 2-4 hours for the paint to dry to the touch and 24 hours for it to dry completely.
- Curing time: Curing time is the time required for the paint to fully harden and reach its maximum durability. It can take anywhere from several days to a few weeks depending on the paint and the conditions, such as humidity and temperature.
- Avoiding damage: During the drying and curing process, it is important not to touch, move or press on the gravel boards, as it can cause the paint to smudge or scratch.
- Weather conditions: It is ideal to paint the gravel boards on a dry and warm day, with low humidity and no chance of rain. The paint will dry and cure faster in good weather conditions.
By allowing the paint to dry and cure properly, you can ensure that the finish is smooth and durable, and that the paint will last for a long time.
It is important to be patient and not to rush the process, as this can result in a poor finish and a shorter lifespan of the paint.
Maintenance And Care
Tips For Maintaining The Paint Job On Gravel Boards
Once you have painted your gravel boards, it is important to take proper care of them to ensure that the paint lasts for a long time. Here are some tips for maintaining the paint job on your gravel boards:
- Clean regularly: Regularly clean the boards with a mild detergent and water to remove dirt and grime. This will help to prevent the build up of dirt and grime, which can cause the paint to deteriorate over time.
- Touch-up: To touch-up any areas that need it, first identify the areas that need attention. Then use a paintbrush and paint to touch up those areas. Be sure to use the same paint and colour as was used on the boards originally, to ensure a good match.
- Apply a sealant: Applying a clear sealant to the painted surface will help to protect the paint from the elements and prolong its lifespan.
- Avoid pressure washing: Pressure washing can damage the paint, so it is better to use a mild detergent and a brush instead.
By cleaning and touching up your painted gravel boards regularly, you can ensure that they will maintain their good appearance for a long time.
It is important to be proactive and catch any imperfections early, to avoid the need for a major touch-up or repainting.
Can You Paint Gravel Boards Conclusion
In conclusion, painting gravel boards is a great way to enhance the appearance of your garden or outdoor space.
By using the right paint, colour and technique, you can change the colour and look of the boards. This make them a more attractive and appealing element in your garden or outdoor space.
However, it is important to properly prepare the surface, use the right materials, take safety precautions and allow sufficient drying and curing time before moving or using the boards.
Proper maintenance, including regular cleaning and touch-ups, will help to ensure that the paint lasts for a long time and maintain the good appearance of the gravel boards.
Overall, painting gravel boards can be a great way to add a personal touch to your outdoor space and make it more visually appealing.
39 Inspiring Rockery Ideas – [Garden Idea & Designs]
Have you ever fancied a stunning focal point in your garden? Why not create your very own rockery!
In this post, we have a number of rockery ideas and inspiration, broken down into different categories.
Rock gardens are popular for a number of reasons. Not only are they very affordable, but they are also pretty easy to build.
A lot of the materials can but bought from us here at TW Aggregates such as turf, Top soil, compost, decorative aggregates plus much more.
So let’s jump right in and look at some inspiring rock garden ideas.
What Is a Rock Garden?
A rock garden is a garden designed specifically to feature rocks and other natural elements. It’s usually a small area that’s filled with various types of rocks, stones, and other geology-inspired elements.
There are several reasons why you might want to create a rock garden in your yard. Some people find them aesthetically pleasing, while others use them as focal points for their gardens.
It also adds texture, colour and beauty, making it the perfect place to relax on a nice summer s day.
Rockery Ideas
Here are some rock garden ideas broken down into various different sections to give you some ideas and inspiration for your own garden.
You can replicate these ideas as closely as you like or take your favourite elements from different designs to create your own design.
Rock Ideas With Water Feature
View the original design inspiration
View the original design inspiration
View the original design inspiration
View the original design inspiration
View the original design inspiration
View the original design inspiration
Rock Ideas For Small Gardens
View the original design inspiration
View the original design inspiration
View the original design inspiration
View the original design inspiration
View the original design inspiration
Rockery Ideas Around a Tree
View the original design inspiration
View the original design inspiration
View the original design inspiration
View the original design inspiration
View the original design inspiration
View the original design inspiration
Corner Rock Ideas
View the original design inspiration
View the original design inspiration
View the original design inspiration
View the original design inspiration
View the original design inspiration
View the original design inspiration
View the original design inspiration
View the original design inspiration
Rockery Border Ideas
View the original design inspiration
View the original design inspiration
View the original design inspiration
View the original design inspiration
View the original design inspiration
View the original design inspiration
View the original design inspiration
Rockery Plant Ideas
View the original design inspiration
View the original design inspiration
View the original design inspiration
View the original design inspiration
View the original design inspiration
View the original design inspiration
View the original design inspiration
Inspiring Rockery Ideas Conclusion
Rockeries make an excellent addition to any outdoor space, no matter how big or small your garden may be.
They not only add beauty, but also make the space more serene and calm. They are also surprisingly pretty easy to create on your own with no prior experience or the need to be a professional landscaper.
If you want to get a beautiful rockery of your own, just keep these designs in mind so that you can create one that is truly mesmerizing for everyone who visits it!
Have you successfully created a rockery for your garden? Let us know in the comments below, or send us your pics.
How To Lay A Gravel Garden Patio: Step-By-Step Guide
Want to add a beautiful and stylish gravel garden patio to your home? Gravel is one of the most popular patio materials today, and for good reason.
Not only is a very affordable option, but it’s also extremely versatile, easy to maintain and looks great.
In this guide, we’ll show you how to lay a gravel patio step-by-step, so you can create a beautiful backyard oasis that everyone will love.
Interested? Let’s get started!
What is a gravel patio?
A gravel patio is a versatile and stylish way to add extra texture and character to your garden. It’s also a great option if you want to create an outdoor space that’s both comfortable and elegant.
Outdoor furniture such as table and chairs, as well as barbeques and fire pits can be placed on a gravel patio. Gravel patios can also be attached or detached from a home, which gives you flexible placement options.
Gravel Patio Pros And Cons
Pros
There are many benefits to having a gravel garden patio. Let’s take a look:
- Low-Maintenance: You don’t have to water them, fertilize them, or mow them.
- Affordable/Inexpensive: Gravel is relatively cheap in comparison to other kinds of building materials, which means you can build one on a budget. It’s also something that you can lay yourself which means you can also save money that you would of spent on a professional landscaper.
- Versatile: You can create many different unique looks in your garden due to the variety of shapes and colours available when it comes to gravel.
- Durable and Long-Lasting: Gravel gardens are resistant to weathering and pests, making them a long-lasting option.
- Attractive: They’re aesthetically pleasing and come in a variety of colors and styles.
- Drainage: Gravel provides natural drainage which means you will have a puddle free area.
Cons
- Not Furniture Friendly: Although people do have garden furniture on gravel patios, it is not the ideal kind of surface. Furniture is known for sinking and being unstable, even when laying a firm foundation.
- Sinking: Over time the surface can become absorbed by the soil underneath. This means that the gravel will need to be replenished each year.
What You’ll Need
Equipment/Tools
To lay a gravel garden patio, you’ll need the following equipment:
- Level
- Garden hose/string & wooden stakes for marking out the gravel patio area
- Marking paint
- Edging
- Rake
- Shovel
- Wheelbarrow or container
- Measuring tape
Materials
You will also need the following materials:
How To Lay a Gravel Garden Patio
Step 1: Patio Size and Location
Before you begin laying the gravel, first make sure to select a patio space that’s large enough for your desired layout. You’ll also want to take into account any obstructions or other elements that will need to be incorporated into your garden path – these could include plants, boulders, or stepping stones.
Another important factor to be aware of is how steep the area is. If the area is too steep, certain gravels can easily move due to foot traffic, as well as heavy water potentially washing the gravel away.
Step 2: Order Your Gravel
Ordering gravel is extremely easy. Here at TW Aggregates we provide a number of different gravels and decorative aggregates in a variety of colours that you can use for your patio.
How Much Gravel Do You Need?
There’s no one-size-fits-all answer to this question, as the amount of gravel you need will depend on the size and shape of the patio you’re creating.
You will need three different measurements:
You can take these measurements and enter them into our gravel calculator that will tell you exactly how many bags you will need to order.
Step 3: Mark Out The Area
Once you’ve ordered your gravel, it’s time to start marking out the area.
First, use a level to make sure that the surface of the patio is even. Choosing an area as flat and even as possible will make the overall job a lot easier.
Once the area has been chosen, it’s time to start marking out the area where the patio is going to be. There are a number of techniques you can use for this such as marking spray/paint, string, rope, or even a garden hose if that’s all you have available.
Step 4: Dig the area for your gravel patio
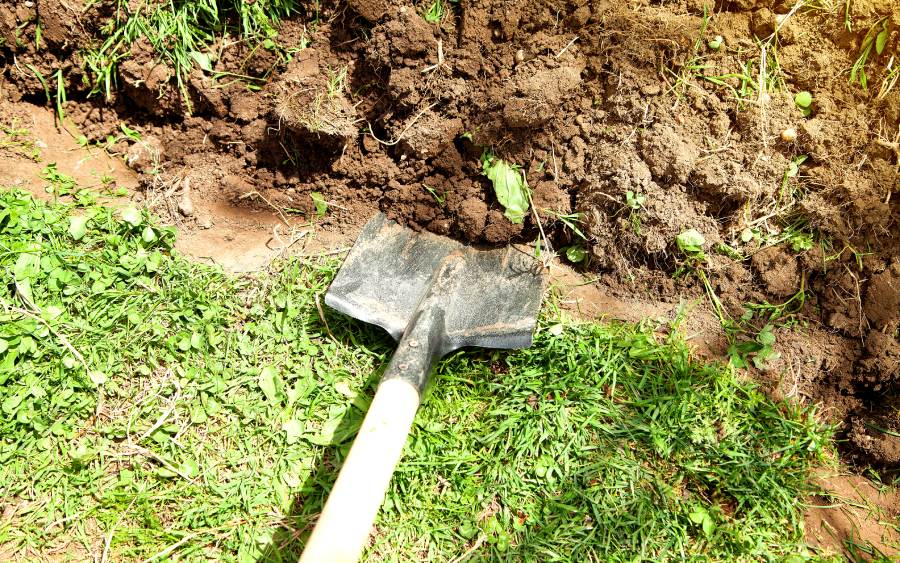
Once you have marked out the entire area, it is now time to start digging. You can start this off by removing any grass that is in the area. Simply use a straight edged shovel to cut away the turf along the marked area that you created in the previous step.
Dig to a depth of at least 5 inches, removing any topsoil to ensure you have enough depth to lay a sub-layer which will create extra stability for the patio.
Step 5: Install Edging
Edging is an important aspect because it helps to keep the loose gravel in place and prevent it from spilling out of the patio area.
When it comes to the type of edging or border, there are a number of options available:
- Stone
- Bricks
- Timber
- Plastic
- Metal
- Rubber
- Bamboo
The choice will depend on what kind of look or feel you want for your patio and how well it will fit in with the rest of the design in your garden.
Step 6: Patio Sub Base
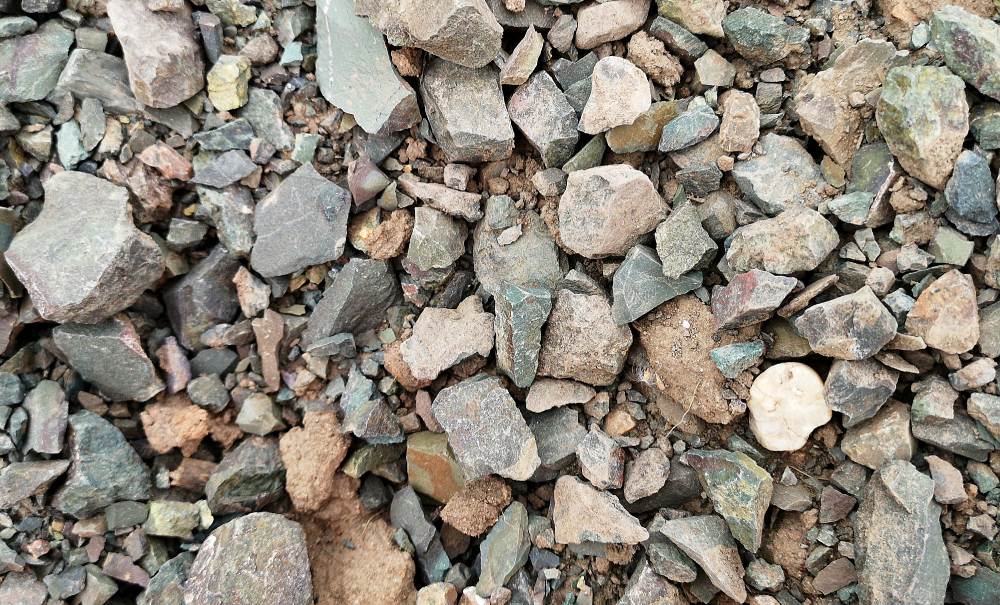
A patio sub base is not required, but it will add more stability to the patio if you know it is going to receive a lot of foot traffic, or if you plan on having a lot of garden furniture.
The best material to use for this is MOT Type 1, which is sized from 40mm, all the way down to dust and is ideal for drives, construction jobs, ponds, and patios. It compacts down extremely well which creates a solid foundation.
Spread the MOT Type 1 evenly across the base, and at a depth of around 4 inches. This ensures that you have enough space for your gravel to go on top.
Step 7: Add a Weed-Resistant Membrane
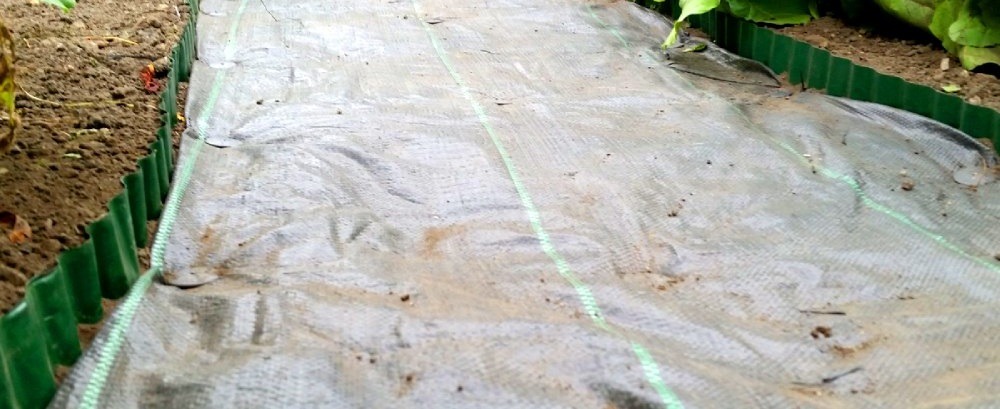
Before we add the gravel, it’s a good idea to add a weed-resistant membrane on top of the MOT Type 1 that you placed down in the previous step. This will prevent unwanted plants and weeds from growing in between the gravel.
It also stops the gravel from mixing with the material underneath, as well as improving drainage.
There are several types of membranes available on the market – so you can find one that best suits your needs. Just be sure to read the manufacturer’s instructions before installing them.
Step 8: Add Your Gravel
The final step is to add the gravel of your choice on top of the weed membrane. Ensure that it is evenly spread across the entire area using a rake.
The other tools that will come in handy for this step are the wheelbarrow that will be loaded with gravel, and a shovel for moving the gravel into the patio area.
Just be careful that you do not tear the weed membrane when doing this step.
How To Lay A Gravel Garden Patio Conclusion
Lay a gravel garden patio with the help of these steps and you are all set to have a beautiful outdoor space.
Read through the guide carefully, keep all the tips mentioned above in mind, and get started in making your dream patio come true!
Have you successfully created your own gravel garden patio? Let us know how you got on with the process in the comments section below.
How To Build A Rockery
Do you want to add a relaxing and stylish piece of landscaping to your home? If so, you’ll need to consider building a rockery!
This unique and beautiful garden can be created in just a few steps, and requires only a few basic materials.
In this guide, we’ll show you how to build a rockery step-by-step, and explain the different types of rocks that can be used in this project.
Let’s get started!
What Is a Garden Rockery?
A garden rockery is a landscaping project that involves creating a wall of rocks around an area of your yard or garden.
Rocks can be arranged in any shape, and can create a unique and beautiful landscape feature.
They are popular because they add texture, beauty and interest to any garden, while also providing a natural habitat for many plants and animals.
Rockeries are easy to install, as all you need is some concrete or brickwork, gravel, sand and rocks.
Benefits Of A Garden Rockery?
Why should you build a garden rockery. If you’re looking for a relaxing and enjoyable way to spend your free time, a garden rockery is a great option.
Here are some benefits of building one:
- It’s a great way to relax and get some exercise at the same time.
- It’s an excellent spot for enjoying the outdoors in prime weather conditions.
- You can decorate it however you like, making it personal and unique.
- It’s an amazing place to share special moments with your friends or family.
- It’s ideal for kids, who will love playing in it and exploring the different rocks and plants.
- There are many different types of gardens rockeries available on the market, so there’s sure to be one that fits your needs.
Getting Started With A Rockery
Before you begin the project, it’s important to gather all of the required tools and materials so you have everything you need before you begin. Here’s exactly what you will need.
Tools
To create a rockery, you’ll need the following tools:
- A shovel
- A pickaxe
- Rocks
- Sand or soil
- Water hose
- Garden hose or watering can
- Chipper or shredder (optional)
Materials
To create a rockery, you will need the following materials:
- Base layer (made from concrete, clay, or plastic)
- Coating of aggregate (salt, sand, etc.)
- Waterproofing agent
- Stones or other decorative objects
Types Of Rocks To Use
There are a few things you need to know when building a rockery:
- You’ll need different types of rocks to create different effects.
- The size and shape of the rocks will depend on the type of garden you have.
- You’ll also need some type of mortar or adhesive to hold them all together.
Now that you know what you need, it’s time to start picking out your rocks! Here are a few types of rocks that work well for creating a rockery:
- Gravel: These stones are great for adding texture and color to your garden, and they make a great base for other stones. They’re also easy to remove if you need to move them or fix something in the garden.
- Limestone: These stones are perfect for creating an antique look in your garden, as they have a natural aging effect that makes them look old and weathered. They’re also very easy to clean and maintain, so they’re perfect if you have kids or pets in the house who like to play in the garden!
- Sandstone: This type of stone is ideal for creating rugged appearances, as it has sharp edges that give it this “rocky” appearance. It’s also very easy to care for, making it a great option if you live in an area with harsh weather conditions.
- Slate: Slate is a softer, more textured type of granite that is often used indoors because it’s easier to work with. It has a blue or grayish hue and comes in different sizes and shapes.
How To Build A Rockery
A rockery is a great way to enjoy the outdoors and add some fun and excitement to your home. It’s also a great way to keep your plants healthy and happy.
Here are some tips on how to build a rockery:
Plan Your Rockery
To start building your rockery, you first need to plan out the layout. This will involve figuring out where you want the various rocks to go and what kind of shape they should be in.
Once you have a rough idea of what you’re after, you can start sketching out your ideas on paper. Take into account both the size and shape of each rock as well as how they will interact with one another.
Mark out your garden rockery area
Now that you have decided on your garden’s theme, it’s time to start planning out the rockery area.
To begin with, you’ll need to mark out an area that’s big enough to accommodate all of the rocks and stones you’ll be using.
It’s also a good idea to account for any shrubs or trees that might be in the vicinity – you don’t want them getting in the way of your rocks!
Once you’ve marked out your garden rockery area, it’s time to start gathering all of the rocks and stones you’ll need.
You can either collect them yourself or order them online. Whichever route you choose, make sure that they’re large enough so that they won’t move around easily and damage your plants.
Clear the area and lay a base
In order to build a successful rockery, you need to first clear the area and lay a base. This will ensure that the rocks are stable and won’t fall down in the future.
To clear the area, you’ll need to remove any debris or plants that may be blocking your way. You can do this by using a bulldozer, shovel or even your hands.
Make sure to wear gloves and protective gear if necessary so that you don’t injure yourself while working.
Once the area is cleared, you’ll need to lay a base layer of soil. This will provide support for the rocks and prevent them from slipping or moving around.
You can use either sand or stones as your base layer, but make sure that they’re firmly ground down so that they don’t move during storms or rain periods.
Set your large rocks
Now it’s time to start layering your rocks! Start by setting out a few large rocks in the center of your garden, and then fill in the space around them with smaller rocks.
Make sure that the larger stones are balanced so that they don’t fall over when passersby walk past.
if you’re using rocks that don’t move easily – like granite – then you’ll need to use a rock placement tool to get them into the right position.
You can either buy one or make one yourself using simple tools like a jigsaw or an angle grinder.
Plant and lay mulch
Now is the time to add plants and mulch to your rockery. Planting will help to enrich the soil, while mulching will help keep the soil moist and reduce weed growth.
To plant, first choose your plants wisely. You’ll want to choose plants that are resistant to cold weather, as your rockery will be in a cold environment. You’ll also want plants that are tolerant of dry conditions, as this is how your rockery will likely be maintained.
Once you’ve chosen your plants, dig a hole for each plant at the same depth as the root ball of the plant. Make sure the hole is big enough so that the root ball of the plant doesn’t touch any sides of the hole.
Then fill each hole with soil and water them well. Finally, top off each hole with mulch (either leaves or bark).
To mulch, first decide where you want to put it. This can be anywhere on or around your rockery, but make sure that it’s evenly distributed so that it’s not too wet or too dry.
Then spread mulch over top of the area you’ve chosen and rake it into an even layer.
Rockery Plants
What plants are suitable for a rockery?
There are a number of plants that can be used in a rockery, depending on your climate and what type of landscape you want. Here are some of the most popular choices:
- Roses
- Hardyshrubs and vines
- succulents
- Annual flowers
- Groundcovers such as thyme or lavender
- Ivy
- Geraniums
- Begonias
- Jasmin
Frequently Asked Questions
When is the best time to build a rockery?
There’s no one definitive answer to this question, as it depends on a variety of factors. However, some general advice that can be useful is to think about when the weather is most favourable for gardening – typically during the spring and autumn months.
##Does a rockery need soil?
A rockery does not need soil, but you may want to add some if you plan to grow plants in it. Rocks provide a natural drainage system and make a great base for your garden.
How To Build A Rockery Conclusion
It’s time to enjoy your beautiful garden now! All the work you did went into making this rockery look so amazing.
The flowers, plants, and other decorations will add color to your place while beautifying it at the same time.
To make sure that your garden stays beautiful for long, follow these steps carefully and don’t forget to have fun doing it!
Have you ever built your own rockery? Let us know in the comments section below.